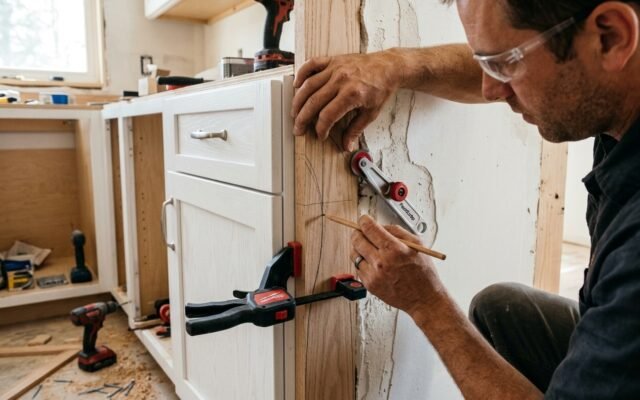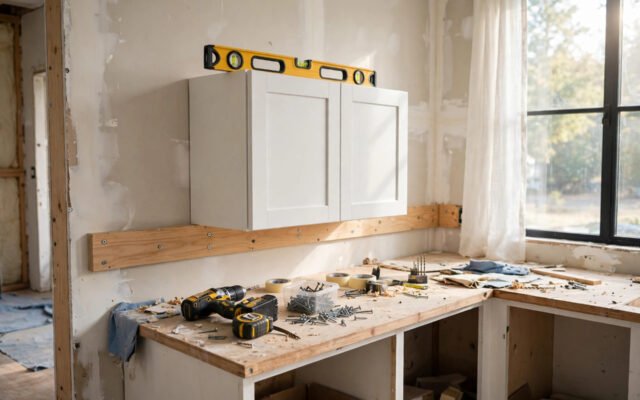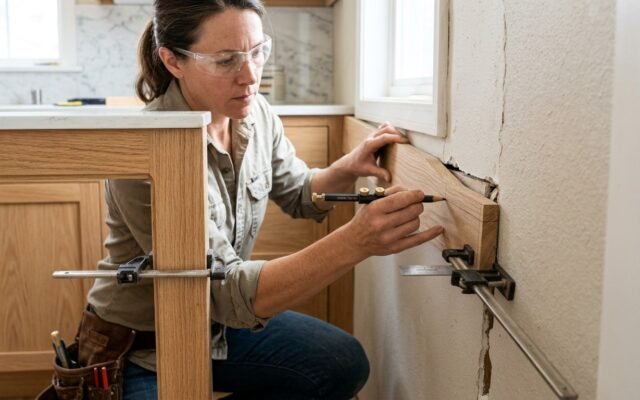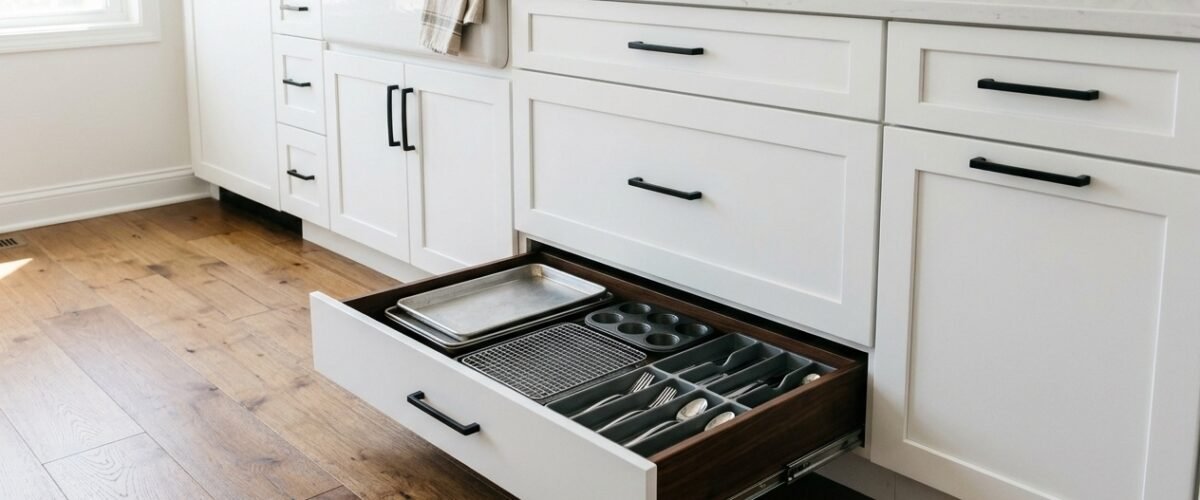
A toe kick cabinet is the unsung structural foundation of an ergonomic residential kitchen. Specifically, the toe kick space is that recessed four-inch cavity located directly beneath base cabinet face frames. In standard builder installations, contractors simply cap this void with a thin strip of painted plywood trim. However, modern kitchen designers treat this four-inch void as valuable real estate. By installing specialized low-profile drawers or custom plinth pull-outs, you can reclaim dozens of square feet of hidden kitchen storage space.
Furthermore, converting dead floor voids into functional storage transforms everyday kitchen efficiency. Homeowners frequently run out of space for flat items. For example, large cookie sheets, muffin tins, cutting boards, and fold-flat step stools clutter prime eye-level shelves. In contrast, toe kick drawers bring those flat accessories down to floor level. With a gentle tap of your toe, hidden runners glide forward smoothly. As a result, every inch of perimeter base cabinetry works actively for your household.
However, engineering a durable toe kick drawer system requires careful planning. First, you must evaluate floor levelness and clearance heights. Second, you must select low-profile undermount slides with touch-latch mechanisms. Next, you must navigate HVAC floor vents and plumbing kick lines. Finally, you must seal floor gaps against moisture and crumbs. In this comprehensive contractor guide, we explore dimensions, construction methods, hardware ratings, and installation techniques.

Standard Dimensions and Ergonomic Clearances
Standard Toe Kick Height and Depth Specs
Standard American kitchen base cabinets feature a four-and-one-half-inch plinth height. In addition, the standard toe kick recess measures three inches deep. These ergonomic proportions allow cooks to stand flush against the countertop edge without stubbing their toes. Consequently, your body weight stays balanced while chopping ingredients or washing dishes at the sink basin.
When planning storage retrofits, you must measure usable internal cavity dimensions accurately. Most cabinet toe-kick voids measure four inches high by twenty-one inches deep front-to-back. Therefore, an aftermarket drawer box typically measures two-and-one-half to three inches tall internally. To verify these measurements against overall carcass framing, review our reference guide on kitchen base cabinet dimensions and explore standard base cabinet height specifications.
Floor Clearances and Subfloor Levelness
Floor clearance is the single most critical factor in toe kick drawer operation. Unlike upper drawers that glide high above the room floor, a toe kick drawer operates mere millimeters above finished flooring. If your kitchen floor has high spots, the bottom edge of the drawer face will scrape and bind. Therefore, maintaining a minimum one-half-inch clearance above finished flooring is mandatory.
Furthermore, you must account for future flooring changes. If you install toe kick drawers over existing subflooring before laying hardwood or tile, you will permanently trap the drawers. Always install finished flooring beneath the cabinet run first. Alternatively, shim the cabinet carcass upward to maintain clearance. For expert leveling tips, check our contractor tutorial on how to level kitchen base cabinets on an uneven floor.
Clearance Rules Around Corner Cabinets
Installing toe kick drawers near ninety-degree kitchen corners presents unique layout challenges. When adjacent cabinets meet at a right angle, pulling out a corner toe drawer can collide with neighboring toe molding. Therefore, always maintain at least three inches of fixed corner filler spacing on both intersecting walls.
In addition, avoid installing toe kick drawers directly beneath diagonal corner units. The angled forty-five-degree framing complicates slide mounting rails significantly. Instead, dedicate straight runs for toe kick drawers and utilize corner cavities for rotating carousels. Discover smart corner layout options in our guide to corner kitchen base cabinet solutions and explore blind corner vs lazy Susan base cabinets.
Types of Toe Kick Storage Solutions
Push-to-Open Toe Kick Drawers
Push-to-open mechanical hardware is the most popular solution for toe kick cabinet installations. Because these drawers sit directly on the floor, bending down to grab a traditional pull handle is awkward. Instead, mechanical push-latch slides allow homeowners to tap the drawer face gently with the tip of a shoe. Instantly, an internal spring mechanism pops the drawer forward several inches.
Furthermore, push-to-open systems preserve clean, minimalist kitchen lines. Without visible knobs or handles at floor level, the drawer face appears as an ordinary seamless toe kick board. As a result, guests will never guess that valuable baking sheets and cutting boards are hidden right beneath the cabinets. For hardware insights, review our contractor breakdown of soft close drawer slides.
Fold-Flat Step Stool Drawers
Reaching high upper cabinet shelves is an everyday struggle in modern ten-foot ceiling kitchens. Traditionally, homeowners keep a clunky plastic step stool sitting out in a corner or pantry. However, a specialized toe kick step stool drawer solves this problem elegantly. A low-profile aluminum or solid birch folding stool folds down flat to fit inside a four-inch toe cavity.
When you need to reach top shelves, simply tap the kick board open. Pull the stool forward and unfold its locking steps in seconds. Because the step stool remains permanently docked in the toe space, it is always accessible yet completely invisible. Learn more about high-capacity cabinet setups in our review of kitchen base cabinet configurations.
Pet Feeding Stations and Shallow Tray Storage
Another popular application for toe kick storage is a built-in pet feeding station. Feeding bowls left out on the kitchen floor create tripping hazards and collect dust. By installing stainless steel food and water bowls into a shallow toe kick drawer, you can slide pet dishes completely out of sight during dinner parties.
Similarly, toe kick drawers provide ideal dimensions for shallow baking sheet trays, pizza stones, and silicone mats. These flat items normally get jammed vertically into crowded tray dividers. In contrast, laying them flat inside wide toe drawers keeps them organized and scratch-free. For complementary pantry ideas, review our guide to kitchen cabinet organizers.
Box Construction, Materials, and Hardware Specs
Solid Wood vs Plywood vs Melamine Drawer Boxes
The structural longevity of a toe kick drawer depends on core material selection. Because the drawer box sits close to the floor, moisture resistance is essential. Regular mop water, pet spills, and seasonal floor dampness can damage cheap materials. Therefore, you should avoid particleboard and standard melamine for toe drawers. Particleboard quickly swells and crumbles when exposed to floor cleaning liquids.
Instead, choose five-eighths-inch cabinet-grade Baltic birch plywood or solid maple. Multi-ply hardwood plywood maintains strict dimensional stability without warping over time. In addition, finish the exterior with water-resistant conversion varnish to seal all edge veneers completely. To compare cabinet box materials, explore our comprehensive reviews on kitchen cabinet plywood and kitchen cabinet boxes.
Undermount vs Side-Mount Low-Profile Slides
Selecting the right drawer slide geometry is vital because vertical clearance is severely limited. Standard side-mount ball-bearing slides require one-half inch of clearance on each outer side. While side-mount slides are affordable, they leave steel ball bearings exposed to floor sweepings, hair, and dust bunnies. Consequently, side-mount slides in toe kicks tend to grind and stick over time.
In contrast, concealed undermount slides mount beneath the drawer box floor. Heavy-duty undermount slides enclose internal gear racks in sealed channels. This protective design keeps kitchen dirt away from sensitive moving parts. Furthermore, undermount slides feature six-way adjustment dials that let you fine-tune face clearances easily. For deeper runner comparisons, consult our guide on kitchen cabinet drawer slides and undermount vs side mount drawer slides.
Weight Ratings and Dynamic Load Limits
Toe kick drawers typically carry wide, flat items that can accumulate significant dead weight. A thirty-six-inch wide drawer stacked with cast iron griddles and heavy stoneware easily weighs forty to fifty pounds. Therefore, standard fifty-pound light-duty slides are inadequate for kitchen use.
Always specify slides rated for at least seventy-five to one hundred pounds of dynamic load capacity. Commercial-grade seventy-five-pound slides guarantee that the drawer box will never sag or scrape finished flooring when fully extended. Learn more about high-capacity drawer engineering in our analysis of 4 drawer base cabinet installations.
HVAC Ducts, Plumbing, and Obstacle Management
Working Around Floor Supply Heating Vents
In many home floor plans, HVAC supply registers terminate directly beneath kitchen base cabinets. Builders routinely run flexible ductwork under cabinets and vent hot air through a metal grille cut into the toe kick board. Installing a solid toe kick drawer directly over an active heating duct will block room airflow and overheat drawer contents.
Fortunately, you can overcome this obstacle with specialized toe-kick duct diverter kits. These flat sheet metal or plastic ducts route airflow smoothly underneath or behind the drawer cavity, venting warm air out through an adjacent cabinet kick. Alternatively, avoid placing drawers under the specific cabinet containing the HVAC boot. For planning tips, explore our guide on kitchen cabinet layout.
Navigating Island Plumbing and Electrical Conduits
Island base cabinets frequently enclose plumbing drain pipes, water supply valves, and electrical junction boxes. In an island sink layout, the PVC drain stack and P-trap often drop directly into the subfloor through the toe space. Therefore, installing full-depth toe kick drawers beneath an island sink requires precise depth setbacks.
In these situations, build shortened twelve-inch or fourteen-inch shallow drawer boxes that stop in front of plumbing pipes. This modification preserves plumbing access while still providing convenient front storage for cleaning sponges and dish soap refills. For island construction details, review our contractor tutorials on kitchen island base cabinets and our detailed unfinished kitchen island guide.
Pest Sealing and Dust Mitigation Best Practices
Because toe kick cavities sit flush with the subfloor, poor installation can create dark tunnels where pests nest. When cutting into existing toe kick framing, always seal all subfloor penetrations with expanding foam or silicone caulk. In addition, install tight-fitting rear draft blocks behind the drawer runners.
Furthermore, attach a flexible silicone sweep gasket along the bottom edge of the toe drawer face. This thin rubber gasket brushes gently against the flooring when the drawer closes. As a result, it prevents dust bunnies, pet hair, and bread crumbs from sliding underneath the cabinet carcass.
Toe Kick Storage Options Comparison Table
Toe Kick Drawer Features and Specifications
To help you select the ideal toe kick drawer system for your kitchen remodel, review the detailed comparative specifications in the table below:
| Storage Type | Standard Widths | Usable Depth | Best Kitchen Storage Use | Recommended Slide Type | Average Hardware Cost |
|---|---|---|---|---|---|
| Push-to-Open Drawer | 15 in to 36 in | 2.5 in to 3.0 in | Baking sheets, muffin tins, cutting boards | Concealed touch-latch undermount | $75 to $140 per drawer |
| Folding Step Stool | 18 in to 24 in | 3.5 in clear | Reaching high upper cabinet shelves | Heavy-duty 100 lb full-extension | $180 to $320 integrated |
| Pet Feeding Station | 21 in to 30 in | 3.0 in bowl rim | Hidden food and water pet bowls | Water-resistant soft-close slides | $90 to $160 per unit |
| Standard Fixed Plinth | Continuous run | Zero (sealed void) | Decorative trim cover only | No hardware required | $15 to $30 per 8-foot strip |
Step-by-Step Retrofitting and Installation Guide
Inspecting Existing Cabinet Base Framing
Before ordering hardware, inspect how your existing base cabinets are built. Some cabinets feature independent ladder-frame bases with continuous side walls. In contrast, other modular cabinets have integrated sides that drop all the way to the subfloor. If your cabinets feature separate ladder platforms, cutting out the front kick is straightforward.
However, if the cabinet sidewalls rest directly on the floor to support the box weight, you must not cut structural side panels. Doing so could cause the cabinet bottom to sag under heavy quartz countertops. In that scenario, build drawer boxes that fit within the open four-inch space between structural side gables. For structural joinery tips, review our guide to what is a cabinet face frame.
Furthermore, check our detailed guide on kitchen cabinet face frame joinery. This will help you identify whether your face frames are pocket-screwed or mortise-and-tenon joined before making cuts. In addition, review our breakdown of frameless vs framed kitchen cabinets to assess plinth support differences.
Building the Low-Profile Drawer Box
Constructing a toe kick drawer requires precise table saw cuts. Rip five-eighths-inch Baltic birch into three-inch wide strips for drawer sides. Cut a one-quarter-inch dado groove one-quarter inch up from the bottom edge to capture a three-eighths-inch plywood bottom panel. Interlock the box corners using pocket screws or delicate dovetail joinery.
Next, sand all surfaces smooth with two-hundred-twenty grit sandpaper. Apply two coats of water-resistant polyurethane or conversion varnish to seal the wood. Finally, verify that the box is completely square by checking diagonal corner measurements with a tape measure. Discover cabinet finishing secrets in our review of kitchen cabinet stain options.
Moreover, consider edge banding any exposed plywood core veneers. Thin birch iron-on edge tape prevents moisture absorption from mop water. In addition, explore our recommendations on ready to assemble kitchen cabinets to see which manufacturers offer factory pre-cut drawer kits.
Mounting Slides and Aligning Push Latches
Mounting drawer runners inside a narrow four-inch cavity requires patience. First, fasten wooden mounting cleats to the subfloor or cabinet frame sides to provide solid screw purchase. Use a digital angle gauge to ensure that both left and right slides sit completely level and parallel to each other.
Next, clip the drawer box onto the slides and push it closed. Test the push-latch spring action multiple times to ensure positive engagement. If the drawer rubs against the floor, adjust the slide front elevation dials until you achieve an even one-half-inch reveal gap across the entire bottom edge. For mounting fasteners, explore our guide on cabinet brackets.
Additionally, check out our guide on kitchen cabinet shelf pins and hardware spacing. Maintaining exact parallel alignment between runners prevents binding. Furthermore, you can install quiet rubber pads to soften the closing sound. Read our tutorial on kitchen cabinet door bumpers for damping advice.
Attaching and Scribing the Toe Kick Face
The final step is attaching the finished toe kick face board to the drawer front. Select a matching piece of hardwood or painted trim molding that coordinates with your kitchen cabinet finish. Clamp the face board to the drawer box with double-sided mounting tape first to check floor clearances and reveal gaps.
Once you confirm proper alignment, drive wood screws through the inside of the drawer box into the rear of the face trim. If your kitchen floor has minor waves, scribe the bottom edge of the trim board to match floor contours. Review our contractor techniques on cabinet filler strips and explore trim details in our tutorial on kitchen cabinet trim molding.
Finally, consider how this hidden upgrade impacts overall home appraisal. Read our research on kitchen cabinet resale value to see why smart storage solutions yield high contractor returns.
DIY vs Custom Factory Toe Kick Options
Aftermarket Toe Kick Drawer Kits
Homeowners who prefer a quick weekend project can purchase aftermarket toe kick retrofit kits. Companies like Rev-A-Shelf and Hafele manufacture universal drawer units designed specifically for four-inch toe voids. These kits include pre-assembled drawer boxes, heavy-duty slides, and magnetic push latches.
Furthermore, aftermarket kits come with clear cutting templates and mounting brackets. Consequently, DIYers can complete installation in two to three hours per cabinet with basic hand tools. However, verify that your existing plinth cavity meets minimum width requirements before ordering hardware online.
Custom Cabinet Shop Built-In Plinths
If you are planning a full kitchen remodel, order custom factory built-in toe drawers from your cabinetmaker. Custom cabinet shops construct toe drawers as integral structural components of the base carcass. The drawer face matches the exact cabinet wood species, grain pattern, and factory conversion varnish finish.
In addition, custom builders can integrate continuous magnetic face seals and concealed electrical kick-strip outlets. While custom factory toe drawers cost twenty to thirty percent more than aftermarket kits, their fit and finish are flawless. To explore custom pricing expectations, review our guide on custom kitchen cabinets cost.
Frequently Asked Questions
How much space do you need for a toe kick cabinet drawer?
A standard toe kick drawer requires a cavity measuring at least four inches high by twenty-one inches deep. This allows room for low-profile slides and provides two-and-one-half to three inches of usable interior drawer height.
Can you retrofit toe kick drawers into existing cabinets?
Yes, you can retrofit toe kick drawers into most existing kitchen base cabinets. However, you must first inspect the base framing to ensure that removing the front kick board will not compromise cabinet box structural support.
Do toe kick drawers scrape hardwood or tile floors?
Quality toe kick drawers will not scrape finished floors when properly installed. By maintaining a one-half-inch clearance gap and using heavy-duty undermount slides, the drawer glides smoothly above the flooring without rubbing.
How do you open a toe kick drawer without handles?
Most toe kick drawers utilize mechanical push-to-open slides. Homeowners simply tap the center of the drawer face with the tip of their toe, and an internal spring pops the drawer open automatically.
Are toe kick drawers worth the extra remodeling cost?
Yes, toe kick drawers are definitely worth the investment for small and medium kitchens where storage is tight. They reclaim otherwise wasted floor space, providing perfect storage for flat baking pans and folding step stools.
Can you install toe kick drawers under a kitchen island?
Yes, kitchen islands are ideal candidates for toe kick drawers. Because islands feature open perimeter sides, you can install toe drawers on all working faces. However, make sure to navigate internal island plumbing lines and electrical conduits carefully.
What tools are required to retrofit a toe kick drawer?
Retrofitting a toe kick drawer requires basic carpentry tools. Specifically, you need an oscillating multi-tool to cut the kick board, a cordless drill, a digital torpedo level, and a tape measure. Furthermore, a table saw helps you rip drawer side components cleanly.
How do you clean beneath a toe kick drawer?
Cleaning beneath a toe kick drawer is simple. Most quality undermount slides feature quick-release locking clips on the drawer underside. Squeeze these release levers to disengage the box and slide it completely out. Then, vacuum the floor cavity thoroughly and clip the drawer back into position.
Editorial Note: This guide was researched and written by David Miller, founder of Kitchen Base Cabinets, and reviewed by Editorial Lead Marcus Vance. Prices are typical national ranges, not quotes — confirm locally before you buy.
For a focused look at this topic, see Toe Kick Drawers – The Hidden Storage Most Homeowners Skip.