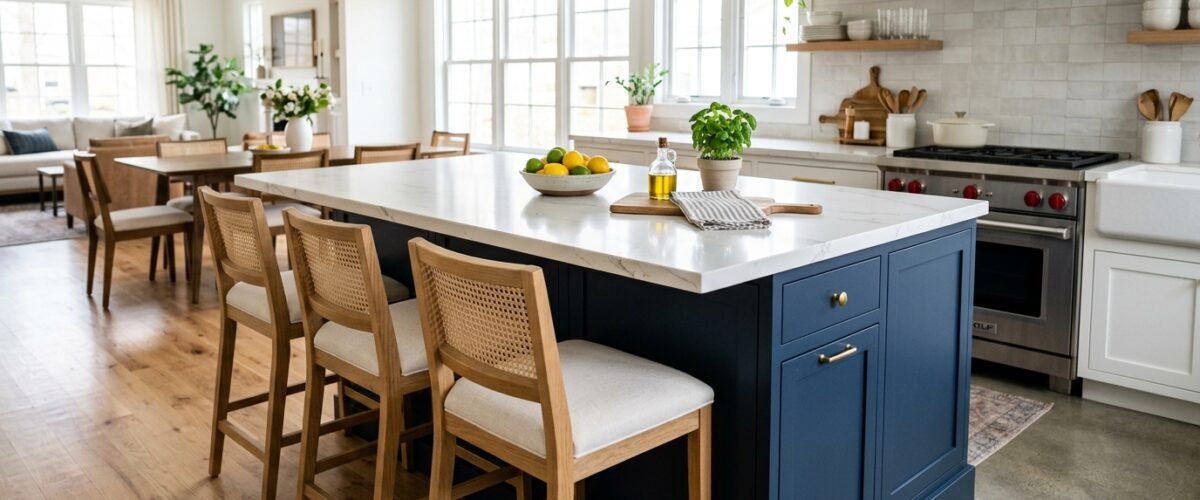
Building a kitchen island using base cabinets requires at least 36 to 42 inches of perimeter aisle clearance and an anchored 2×4 interior floor cleat system. While perimeter cabinetry anchors firmly into wall studs, island cabinets stand freestanding in the center of the room, meaning they depend entirely on subfloor fasteners and structural side panels for lateral stability. In fact, properly configuring your island base run allows you to integrate heavy storage drawers, trash pull-outs, and breakfast bar seating seamlessly.
Planning an island requires balancing cabinet box dimensions against room traffic flows. Before committing to a specific layout, review our guide on the kitchen cabinet budget planner to calculate realistic square-footage costs for island countertops and custom end panels.
What You Will Need
- Measuring tape and chalk line to snap floor layout boundaries
- 2×4 framing lumber for internal floor cleats
- Heavy-duty 3-inch structural wood screws or concrete masonry anchors
- 3/4-inch decorative plywood skin panels or beadboard wainscoting for exposed sides
- Low-profile 1/4-inch steel cantilever brackets for unsupported countertop seating
- Level (48-inch spirit level or laser level) and cordless drill with driver bits
Island Sizing and Clearance Reference Guide
| Overall Kitchen Dimensions | Maximum Island Footprint | Recommended Cabinet Configuration | Seating Overhang Depth | Minimum Walkway Clearance |
|---|---|---|---|---|
| Compact (11 × 13 ft) | 27 × 48 inches | Two 24-inch standard base cabinets | None (prep only) | 36 inches around all perimeter sides |
| Medium (13 × 16 ft) | 36 × 72 inches | 24-inch base run + 12-inch shallow rear run | 12 inches (countertop overhang) | 38 inches (sink run), 42 inches (range run) |
| Large (16 × 20+ ft) | 48 × 96 inches | Back-to-back 24-inch full-depth base cabinets | 15 inches with steel brackets | 42 to 48 inches throughout all work aisles |
Step 1: Establish Code-Compliant Aisle Clearances
Measure your kitchen floor carefully to guarantee 36 to 42 inches of unobstructed walking space between your island base cabinets and surrounding perimeter counters. The National Kitchen and Bath Association (NKBA) recommends a minimum work aisle width of 42 inches for single-cook kitchens and 48 inches for multi-cook households. If an island sits directly opposite an oven or dishwasher, you must account for open appliance doors, which extend 20 to 24 inches into the walkway.
Consequently, placing an oversized island in a narrow room creates a daily bottleneck that restricts traffic. Mark your proposed island boundaries on the floor with painter’s tape and walk the perimeter for several days. If opening your refrigerator door hits the tape line, reduce the island cabinet width immediately.
Step 2: Select Your Box Depths and Configurations
Combine standard 24-inch deep base cabinets with 12-inch shallow wall cabinets mounted on the floor to create the perfect island depth. A standard base cabinet measures 24 inches deep. If you want bar seating on the opposite side, you can either extend the countertop over empty space or build a solid backing run using 12-inch deep vanity or wall units set back-to-back.
For example, pairing a 24-inch drawer base with a 12-inch rear cabinet run produces a 36-inch deep island core that offers incredible two-sided storage. Position heavy-use units like pull-out trash bin cabinets on the prep side facing the sink, while utilizing the shallow back cabinets for serving platters and holiday dinnerware.
Step 3: Anchor the Island with 2×4 Floor Cleats
Build and anchor a rectangular 2×4 lumber cleat frame to your subfloor to hold the freestanding cabinets rigid against lateral movement. Because island cabinets have no rear wall to screw into, you cannot simply place them on the floor and caulk the edges. Instead, place the cabinets in position, trace their interior perimeter footprints, and set them aside.
Next, screw 2×4 lumber flat onto the subfloor just inside your marked lines using 3-inch deck screws for wood subfloors or Tapcon masonry anchors for concrete slabs. Slide the cabinet carcasses back over the cleats, level the boxes with composite shims, and drive #8 cabinet screws horizontally through the bottom of the cabinet frames directly into the 2×4 wood cleats. This anchored internal skeleton prevents the island from shifting when people lean against it.
Step 4: Finish Exposed Sides with Plywood Skins
Wrap the back and exposed exterior ends of your island with matching 3/4-inch finished skin panels to conceal raw cabinet sides and seams. Factory cabinet boxes ship with unfinished exterior backs designed to sit hidden against sheetrock. When you cluster cabinets in the middle of a room, these raw fiberboard panels remain completely visible.
Therefore, order finished wainscoting panels or 3/4-inch furniture-grade plywood skins finished to match your cabinet door style. Attach these panels to the rear and end frames with construction adhesive and 18-gauge brad nails. In addition, install continuous hardwood base molding around the bottom perimeter to hide shims and create a unified architectural appearance.
Step 5: Support Countertop Overhangs with Hidden Steel Brackets
Install concealed 1/4-inch solid steel support brackets every 24 inches along your cabinet run to support heavy quartz or granite seating overhangs. While laminate countertops can cantilever up to 8 inches without support, natural stone and engineered quartz crack under downward elbow pressure if left unsupported beyond 10 inches.
Specifically, route 1/4-inch deep channels across the top rails of your island base cabinets so the steel support plates sit completely flush beneath the stone slab. Fasten each bracket into the cabinet frame with structural screws. For overhangs deeper than 15 inches, incorporate decorative turned wooden posts or metal table legs anchored directly to the floor.
Common Island Base Mistakes
Skipping electrical outlet rough-ins represents the most frequent code violation on DIY kitchen island builds. The National Electrical Code (NEC) mandates at least one electrical receptacle on islands with countertops larger than 9 square feet. Because inspectors will not approve a kitchen without proper island power, coordinate with an electrician to pull conduit through the subfloor before fastening your cabinets.
Another common mistake involves forgetting plumbing chase access when installing an island sink or dishwasher. Because plumbing drain lines and vent pipes require dedicated physical space behind cabinet drawers, you must specify reduced-depth drawer boxes or a wide open sink base. Learn more about choosing between specialized drawer and door units in our guide on drawer base cabinets vs door cabinets.
Frequently Asked Questions
Can you make a kitchen island out of regular base cabinets? Yes, standard 24-inch residential base cabinets are the building blocks for kitchen islands. You simply fasten multiple boxes together at their face frames, anchor them to interior 2×4 floor cleats, and conceal the unfinished backs and sides with matching decorative skin panels.
How deep should a kitchen island with seating be? A kitchen island with counter seating should measure at least 36 to 42 inches deep. This includes 24 inches of standard base cabinet depth paired with a minimum 12-inch to 15-inch countertop overhang to provide comfortable leg and knee room.
How do you anchor base cabinets to a concrete slab floor? To anchor cabinets to concrete, screw 2×4 wood cleats into the slab using a hammer drill and 3/16-inch Tapcon masonry screws. Once the lumber cleats are locked down, place the cabinets over them and drive screws horizontally through the cabinet toe kicks into the wood cleats.
Do kitchen islands have to be bolted to the floor? Yes, building codes and safety standards require all permanent kitchen islands to be anchored to the floor. Freestanding islands carrying heavy stone countertops can tip or shift when subjected to lateral force or heavy leaning.
How far should an island be from the refrigerator? Maintain a minimum clearance of 42 inches between an island and a refrigerator. This spacing ensures you can open French doors or pull-out bottom freezer drawers fully while leaving comfortable walking space for other family members behind you.