Leveling kitchen base cabinets on an uneven floor is the critical foundation that prevents cracked stone countertops, sagging doors, and misaligned appliances. Here is the step-by-step laser level method to establish a benchmark line, calculate shim heights, and secure solid wall attachments.
Why Floors Are Never Flat (And What “Close Enough” Actually Means)
Most residential floors have variation. The question is how much. Here’s what to expect:
- New construction with engineered subfloor: Typically 1/4 inch of variation over 10 feet — very manageable
- Older homes (pre-1980): 1/2 to 1 inch over 10 feet is common; 1.5 to 2 inches over a full kitchen run is not unusual
- Homes with settled foundations or pier-and-beam construction: 2 to 4+ inches of variation is possible and requires a different approach
The NKBA standard for a level cabinet run: the top of the finished cabinet run should not vary more than 1/8 inch over its entire length when measured with a 4-foot or 8-foot level. That’s the standard you’re working toward. The floor can be wildly out of level — what matters is that your cabinet tops are level, because that’s what your countertop and your plumb door reveals depend on.
Variation of up to 3/4 inch over a cabinet run is handled with shims. Variation of 3/4 to 2 inches requires a combination of shims and toe kick riser modifications. Variation over 2 inches means you should strongly consider having a flooring contractor address the subfloor before you install cabinets.
Essential Tools and Materials for Laser Leveling
The right tools make this job go from frustrating to methodical. Here’s the full list:
- Self-leveling laser level: A cross-line or rotary laser that shoots a level horizontal line around the room. Brands: Bosch GLL 55, DeWalt DW088LG, Hammerhead HLSL10. Budget: $60–$150. This is the major improvement over a traditional bubble level.
- 4-foot spirit level: As a secondary check and for individual cabinet boxes
- Cedar shims: Buy two bundles ($4–$6 each). Cedar shims compress less than pine and resist moisture better.
- Composite shims (Rockite or plastic shims): For outdoor-adjacent areas or locations where moisture is a concern — they won’t compress or rot
- Drill and 1/4″ drill bit: For scribing shim positions
- Oscillating tool or flush-cut saw: For trimming shims flush after leveling
- Chalk line: To mark your level line on the wall
- Tape measure and pencil
- Clamps (at least 4 bar clamps): To pull adjacent cabinet boxes tight before screwing them together
You do not need to rent a fancy leveling leg system (those screw-adjustable metal legs some European cabinet lines use) unless you’re installing IKEA SEKTION or a frameless line that comes with them. For standard face-frame cabinets, shims are faster and just as accurate.
Step-by-Step: The Laser Method for Leveling Base Cabinets
Here’s the process I use on every kitchen install. Follow it in order — skipping steps is how you end up correcting mistakes later.
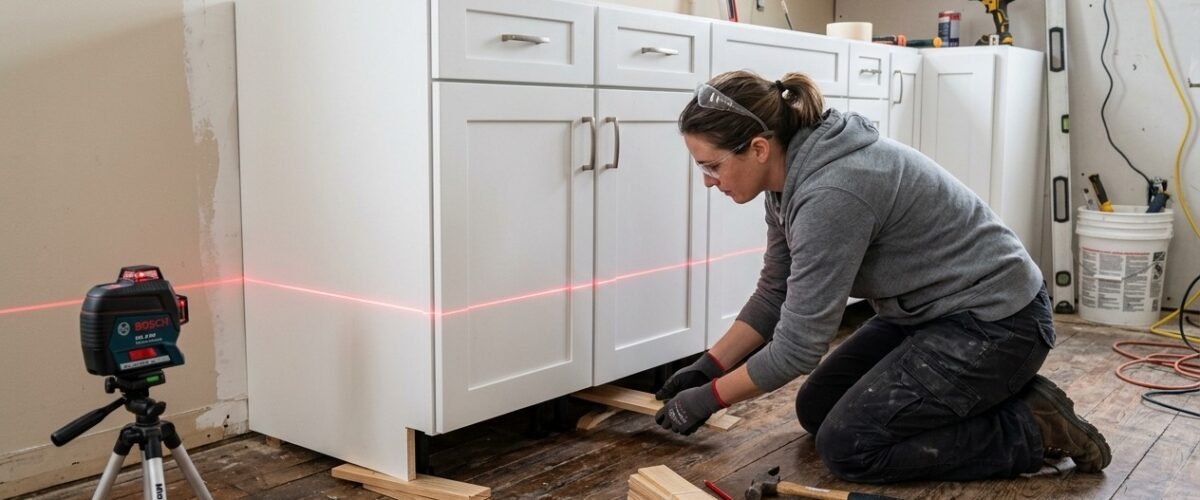
- Set up your laser level. Place it in the center of the room on a tripod or stack of boxes. Turn it on and let it self-level. Set the beam height to approximately 36 inches off the floor (finished counter height). Mark where the beam hits every wall with a pencil line — this is your reference line.
- Find the high point of your floor. Measure from your laser line down to the floor at 12-inch intervals along every cabinet run wall. The shortest measurement is your high point. Mark it clearly — this is where your first cabinet will sit with zero or minimal shimming.
- Calculate your shim heights. Subtract each floor measurement from the high-point measurement. The result is how much you need to raise the cabinet at each position. Example: high point measures 34.25″ from laser line to floor; a position 6 feet away measures 33.75″ to the floor — that position needs to be raised 0.5 inch to be level with the high point.
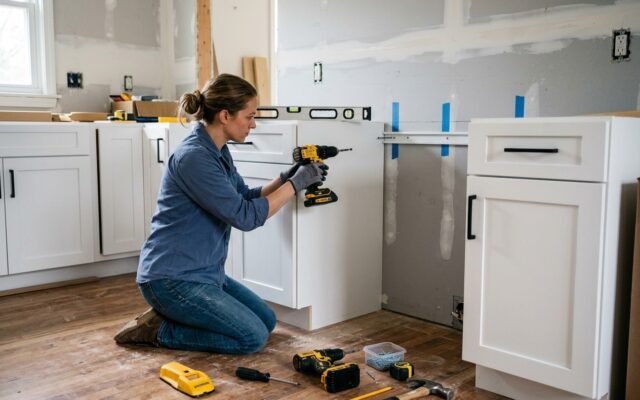
- Start at the highest floor point. Place your first cabinet here. Check it front-to-back and side-to-side with your 4-foot level. If it needs shimming at all, it should be minimal — just enough to get it plumb. Shim under the front corners of the base (under the toe kick platform) not under the cabinet box itself.
- Work outward from the high point in both directions. Set each subsequent cabinet, shimming to match your reference laser line. Before screwing cabinets together, clamp them face-to-face so the front faces are flush, then verify with the laser that the tops are level.
- Screw cabinets together before fastening to the wall. Use 1-1/4″ cabinet screws through the interior side walls (pre-drill to avoid splitting). Clamp first, screw second, check level again.
- Fasten to wall studs. Use 2-1/2″ to 3″ screws through the cabinet back rail into wall studs. Find studs with a stud finder before you start and mark them at the level of the cabinet hanging rail (about 3 to 4 inches below the top of the cabinet).
- Trim shims flush. Use an oscillating tool to cut exposed shims flush with the cabinet toe kick. Don’t use a handsaw — the vibration can shift shims that aren’t yet fully locked in place.
Handling Large Floor Drops: When Shims Aren’t Enough
Shims work well up to about 3/4 inch of elevation change. For larger drops — say 1.5 inches or more — stacking shims gets unstable and looks messy. Here’s how professionals handle bigger variations:
Toe kick riser method: Instead of shimming under the cabinet, build up the toe kick platform itself. Standard toe kick is 4.5 inches tall. If you need to raise a section of cabinet run by 1.5 inches, cut the toe kick platform boards to 6 inches tall in that section. The cabinet sits at the right height with minimal shimming.
Scribe molding method: If the floor drops only along one wall and the variation is consistent (like a sloped floor that’s lower at one end), some installers cut the toe kick board at an angle to follow the floor profile. The cabinet boxes are level; only the cosmetic toe kick trim follows the floor.
Subfloor build-up: For drops over 2 inches, it’s often better to sister up the low joists or add a layer of plywood underlayment to bring the floor up rather than trying to build the cabinets up. This is a one-time fix that also helps with any appliance leveling issues.
Cost to have a flooring contractor level a subfloor with self-leveling compound: $3–$8 per square foot depending on depth. For a typical 15–20 square foot problem area under a cabinet run, that’s $60–$160 — often less than the time spent shimming and adjusting.
Checking for Plumb: The Part Most Installers Rush
Level means horizontal. Plumb means vertical. A cabinet can be level but not plumb (tilted front-to-back or side-to-side), and that causes doors to swing open or swing shut on their own — the gravity issue I mentioned at the start.
Checking plumb on a base cabinet:
- Place a 4-foot level on the side panel of the cabinet box, running vertically. The bubble should center — if not, the cabinet is leaning front or back.
- Open a cabinet door and let go. It should stay exactly where you release it. If it swings open or closed, the box is out of plumb front-to-back.
- Check side-to-side plumb by placing the level against the face frame vertically. The bubble should center exactly.
Adjusting for out-of-plumb: add or remove shims at the front or back of the toe kick base. This is why you shim at both the front and rear corners of each cabinet, not just the front.
For frameless (European-style) cabinets with adjustable legs: most come with plastic leveling feet that adjust 0 to 3/4 inch with a screwdriver, which handles both level and plumb in one adjustment. The legs snap into clips on the cabinet base. This system is faster than shimming but doesn’t handle large floor variations — you’ll still need to supplement with shims for drops over 3/4 inch.
Wall Fastening: How to Hit Studs Every Time
Base cabinets need to be fastened to wall studs, not just drywall. A cabinet that’s only attached to drywall will pull free under load — especially sink base cabinets with heavy stone countertops and undermount sinks.
Stud-finding and fastening process:
- Use a quality stud finder (Zircon e50, $30–$45) and mark every stud along your cabinet run before you bring a single cabinet in.
- Mark stud centers on the wall at the height of the cabinet hanging rail — typically 2 to 3 inches below the top of the cabinet, about 32 to 33 inches from the floor.
- Pre-drill clearance holes through the cabinet back rail before installing the cabinet. Doing it after the cabinet is in place in a tight kitchen is awkward and error-prone.
- Use 2-1/2″ #8 or #10 coarse-thread wood screws or cabinet installation screws. Drive them through the cabinet back rail, through drywall, and into the stud. You want at least 1-1/4″ of thread in the stud.
- For areas between studs where a cabinet edge falls, use a 3/8″ toggle bolt as a supplement — not as the primary fastener.
If studs are 24 inches on center (common in some construction eras), you may only hit one stud per cabinet box. That’s acceptable for standard base cabinets but not for sink bases with heavy sinks — add blocking between studs before installing in the sink zone.
Common Leveling Mistakes and How to Fix Them
Even experienced installers make these — here’s what to do if you catch them mid-install:
- Cabinet run is level but tilted away from wall: You shimmed only at the front. Add shims at the back edge of the toe kick and re-check plumb.
- Two adjacent cabinets are individually level but their faces aren’t flush: The floor dips between them. Shim the low cabinet until the laser line confirms it matches the high cabinet, then re-clamp and re-fasten.
- Shims compress under cabinet weight over time: Switch to composite shims or double-stack and cross-grain your cedar shims (one running front-to-back, one running side-to-side) — this prevents compression in either direction.
- Cabinet won’t fasten flush to wall because wall is bowed: Scribe a filler strip to bridge the gap between the cabinet side and the wall, or use a planer to back-bevel the cabinet side so it sits flat at the contact points.
Leveling is the foundation. Once every box in your run is level, plumb, square, and fastened, the rest of the install — countertops, doors, drawer fronts, hardware — snaps into place. If you’re working with corner cabinets, the leveling sequence there has its own wrinkles — our corner kitchen base cabinet guide covers how to sequence the corner box into your leveling run without throwing the adjacent cabinet runs out of alignment.
Related Guides
- DIY Base Cabinet Installation: 7 Rules for Level & Solid Setup
- How to Measure Kitchen Cabinets Like a Professional
- Kitchen Base Cabinet Sizes: The Complete Measurement Chart Every Homeowner Needs
Frequently Asked Questions
Where do you start when leveling base cabinets?
Always find the highest point of the floor along the cabinet run walls and place your first cabinet there. Shim all adjacent cabinets upward to match the benchmark height of that first box.
What shims are best for leveling kitchen cabinets?
Cedar shims and heavy-duty composite plastic shims are best. Avoid soft pine shims, which compress under heavy stone countertop weight over time and throw cabinet runs out of level.
How out of level can a floor be before cabinets cannot be shimmed?
Shims handle floor variations up to 3/4 inch effectively. For drops between 3/4 inch and 2 inches, build a custom toe kick riser platform. For drops exceeding 2 inches, level the subfloor first.