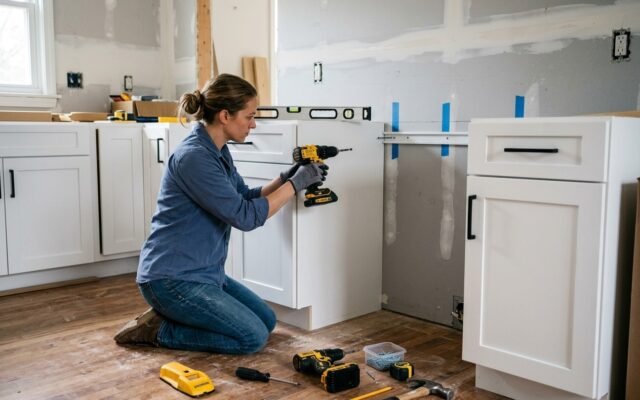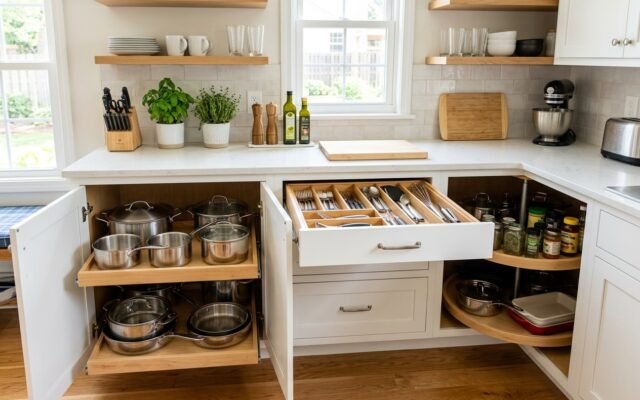
Kitchen cabinet refacing DIY costs $300 to $1,500 in materials for an average kitchen. In contrast, professional refacing costs $3,500 to $9,000. Full cabinet replacement demands $15,000 to $35,000. Therefore, a kitchen cabinet refacing DIY project provides incredible value. The process involves three main tasks. First, you apply peel and stick or iron on veneer to exposed cabinet box surfaces. Second, you replace old doors and drawer fronts with new ones. Finally, you swap the hardware for a complete transformation. You can achieve amazing results with patience.
You must evaluate your current layout carefully before starting. Naturally, a kitchen cabinet refacing DIY works best when your existing footprint functions well. If you hate your kitchen layout, refacing will not solve the underlying functional problems. Therefore, you should only proceed if you love where your appliances sit. In addition, you need to ensure you have enough workspace. A standard kitchen makeover requires several days of focused effort. Ultimately, careful planning guarantees a smooth installation process from start to finish.
Is Your Kitchen a Good Candidate for DIY Refacing?
When DIY Refacing Makes Sense
DIY refacing makes sense when cabinet boxes are structurally solid. First, check for water damage, rot, or warped frames. If your boxes are sound, you simply want a new look without tearing out boxes. In addition, your current layout must work well for your cooking habits. This project requires an intermediate DIY skill level. Therefore, you should feel comfortable using a utility knife, straight edge, and basic hand tools. You will save thousands of dollars if you possess these fundamental carpentry skills.
You can completely transform your space without the chaos of a full demolition. For instance, you avoid plumbing and electrical work entirely. In fact, you can continue using your kitchen during the majority of the process. Consequently, this approach minimizes household disruption significantly. You also prevent perfectly good wood from ending up in a local landfill. Therefore, a kitchen cabinet makeover via refacing is an environmentally friendly choice. Furthermore, you will enjoy a tremendous sense of accomplishment upon completion.
When to Skip DIY Refacing
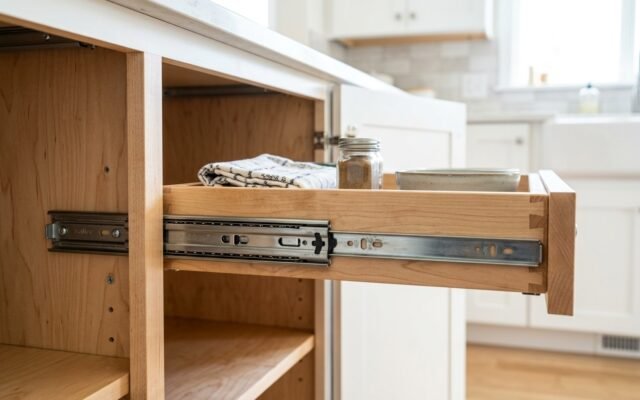
You should skip DIY refacing if you discover water damaged boxes. Similarly, warped face frames or broken drawer boxes require replacement. If your dovetail joints have failed, new drawer boxes add significant cost. In addition, you might desire significant layout changes. In these cases, full replacement gives better long term value. You do not want to apply expensive veneer over a failing foundation. Therefore, a complete tear out makes more sense when structural integrity is compromised.
You must also honestly assess your available time and patience. While you save money, you will spend considerable time measuring and cutting. For example, a large kitchen might take two full weekends to complete. If you demand absolute perfection but lack steady hands, you might struggle. In short, knowing your limitations prevents costly mistakes. You should consider the kitchen cabinet replacement cost as a baseline for your decision. Ultimately, a realistic self assessment leads to the best possible outcome.
Refacing vs Painting vs Full Replacement
You have three primary options for updating your cabinets. First, DIY refacing costs $300 to $1,500. This method changes the door style and covers the old finish entirely. Second, painting costs $200 to $600 for a DIY approach. However, painting keeps the exact same door style and does not hide existing wood grain completely. Finally, full replacement costs $15,000 to $35,000. Replacement changes everything including the layout and storage configuration. Therefore, refacing sits firmly in the middle regarding cost and impact.
You should consider the return on investment for each option. Generally, a kitchen update yields one of the highest returns in home improvement. However, spending thirty thousand dollars on full replacement might not make sense in a starter home. Conversely, spending one thousand dollars on refacing could dramatically increase your selling price. For this reason, many real estate agents recommend refacing. Specifically, it strikes the perfect balance between visual impact and budget preservation.
Materials and Tools You Need
Veneer Materials
You need high quality peel and stick wood veneer rolls. These cost $40 to $120 for an average kitchen. Next, you need iron on edge banding for the face frames. This edge banding costs $15 to $40. You should also keep wood glue and contact cement as backup adhesive. In addition, you require a heat gun or household iron for the iron on veneer. Therefore, gather these supplies before you remove a single door. You can find excellent veneer options on Amazon easily.
You must choose the right wood species for your veneer. For example, maple provides a smooth grain perfect for painting. On the other hand, oak offers a deep grain that accepts stain beautifully. You must match your veneer species to your new doors. Consequently, ordering samples first prevents mismatched components later. Furthermore, you should buy slightly more veneer than your initial measurements dictate. Ultimately, having extra material on hand saves you from frustrating delays if you make a cutting mistake.
New Doors and Drawer Fronts
You must order from reputable online suppliers like Walzcraft, Barker Door, or Conestoga Wood Specialties. Unfinished shaker doors cost $40 to $120 each. You must allow 2 to 6 weeks for delivery. Therefore, you should order early in your planning process. In addition, always order one extra door as a spare. You will appreciate having a backup if you make a drilling mistake. For quick delivery, you can also browse unfinished shaker cabinet doors on Amazon.
You have endless options when selecting new doors. However, Shaker style remains the most popular choice for modern kitchens. This clean design works perfectly with almost any decor style. You can learn more about different kitchen cabinet door styles to make an informed decision. Furthermore, you must decide between MDF and solid wood center panels. Specifically, MDF center panels prevent cracking if you plan to paint. Therefore, choose your materials based on your final finish strategy.
Hardware
You will need new cabinet pulls and knobs. These cost $50 to $300 for a full kitchen. In addition, you need new hinges if switching door styles. Standard hinges cost $3 to $15 per hinge. However, soft close hinge upgrades cost $6 to $20 per hinge. Therefore, you should budget carefully for these necessary components. You can read our complete guide on kitchen cabinet hardware for detailed recommendations. The right hardware elevates the entire project.
You can find incredible hardware deals by shopping strategically. For instance, you might want to browse options at Home Depot for contractor packs. These bulk packages reduce the per unit cost significantly. In addition, you should consider the finish carefully. Matte black, brushed brass, and polished nickel remain incredibly popular. Ultimately, your hardware acts as the jewelry of your kitchen. Therefore, you should select pieces that complement your new door style perfectly.
Tools Required
You must assemble a specific set of tools. First, gather a tape measure, utility knife, and a straight edge. Second, you need a rubber roller or J-roller for the veneer. In addition, keep a heat gun or iron nearby. You also need a drill, drill bits, and a screwdriver. Furthermore, stock up on 120 and 220 grit sandpaper, painter tape, and tack cloth. Finally, you need primer and cabinet paint or stain. Consequently, proper tools ensure professional results.
You should invest in a few specialized jigs to save time. For example, a concealed hinge jig makes drilling cup holes effortless. Similarly, a cabinet hardware jig guarantees perfect pull placement on every single door. While these jigs cost a little extra, they prevent disastrous measuring errors. Therefore, you easily recover their cost in saved time and avoided mistakes. Ultimately, good tools separate a professional looking refacing job from a sloppy amateur attempt.
Step 1: Remove All Doors, Drawers, and Hardware
Label Everything First
You must use painter tape and a marker to number every door. You need to label the door and the exact opening it came from. In addition, label drawer fronts the same way. This step saves significant time when rehanging after painting or finishing. Therefore, you should never skip this organizational task. If you plan to reuse your hinges, keep them with their corresponding doors. Consequently, your reassembly process will proceed much faster and with zero frustration.
You can create a simple map of your kitchen to track your numbers. For instance, start at the top left and work your way around the room clockwise. This logical progression prevents any confusion later. In fact, many professionals use this exact numbering system on high end jobs. You will have dozens of loose doors stacked in your garage. Ultimately, a solid labeling system represents your only defense against total chaos during the reinstallation phase.
Remove Hinges and Hardware
You must unscrew all hinges and set them aside if reusing them. Next, remove all pulls, knobs, and drawer slides if you are replacing them. You should fill old hinge holes with wood filler if the new hinge pattern differs. In addition, remove any bumper pads stuck to the cabinet frames. Therefore, you ensure a completely bare surface for the next steps. You must scrape away any dried glue or residue carefully with a putty knife.
You might encounter stripped screws during this removal process. If this happens, try placing a rubber band over the screw head before inserting your screwdriver. This trick often provides enough grip to extract stubborn screws. Alternatively, you can use a dedicated screw extractor bit. In short, patience remains critical during this demolition phase. You do not want to damage the underlying face frames by prying forcefully. Thus, you must work methodically to preserve the cabinet structure.
Clean All Surfaces
You must clean all cabinet box exteriors with a TSP substitute or a strong degreaser. Kitchens naturally accumulate grease and cooking residue over time. This invisible layer prevents veneer adhesion completely. Therefore, you must scrub every visible inch vigorously. After scrubbing, rinse the surfaces with clean water and allow them to dry fully. In addition, you should scuff sand the frames with 120 grit paper. Consequently, this creates microscopic scratches that help the new adhesive bite firmly.
You cannot overstate the importance of this cleaning step. Even a small speck of grease will cause your new veneer to bubble and peel away over time. For example, areas above the stove require extra attention due to heavy grease buildup. You should wipe these specific zones twice just to be safe. Finally, use a tack cloth to remove every single speck of dust before proceeding. Ultimately, your prep work dictates the longevity of your entire refacing project.
Step 2: Apply Veneer to Cabinet Box Exteriors
Measure and Cut the Veneer
You must measure each cabinet side, top, and bottom that will remain visible. Next, cut the veneer one inch oversized on all edges. You must always cut with a sharp utility knife and a metal straight edge. Therefore, you ensure clean cuts without splintering the delicate wood. You should change your knife blade frequently. A dull blade ruins expensive veneer instantly. In addition, measure twice before making any cuts to avoid costly material waste.
You should organize your cut pieces logically before application. For instance, label the back of each cut piece with its intended location. This prevents you from accidentally using a side panel piece on a bottom frame. You must also pay close attention to the wood grain direction. Specifically, the grain should always run vertically on sides and face frame stiles. Conversely, it should run horizontally on face frame rails. Thus, you ensure a natural, authentic wood appearance.
Apply Peel and Stick Veneer
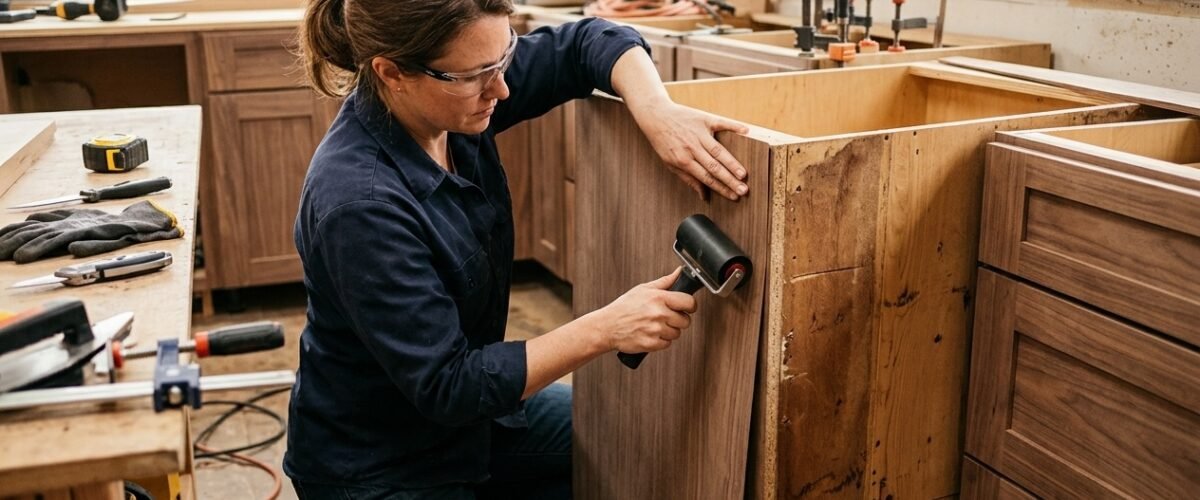
You peel the backing six inches at a time. Then, press firmly from the center outward to avoid trapping air bubbles. You must roll the entire surface with a J-roller using extremely firm pressure. The pressure activates the adhesive permanently. Next, trim the overhang flush with a utility knife guided by your straight edge. Therefore, you achieve a perfect, factory looking edge. In addition, you can use a fine file to smooth the final trimmed corner gently.
You might make a slight alignment mistake during application. If this happens, you must address it immediately before applying heavy pressure. You can sometimes lift the edge very carefully and reposition it. However, once you roll it, the bond becomes permanent. For this reason, you should take your time positioning the first few inches perfectly. Ultimately, steady hands and patience lead to flawless veneer application across your entire kitchen.
Apply Iron On Veneer to Face Frame Edges
You cut the edge banding slightly long. Next, press it with a household iron set to medium heat, moving slowly. The heat melts the pre applied glue perfectly. You must trim both ends flush after it cools slightly. In addition, roll firmly with a rubber roller while still warm to ensure full adhesion. Therefore, you secure the edges against peeling. You can use a specialized edge banding trimmer to remove the long overhangs safely and quickly.
You must monitor your iron temperature closely. If the iron is too hot, you will scorch the wood face. Conversely, if it is too cold, the glue will not melt properly. You should test a scrap piece first to find the optimal setting. Furthermore, pay special attention to the intersections where vertical and horizontal pieces meet. You want tight, seamless joints that mimic solid wood construction. Ultimately, careful iron work produces a highly professional frame appearance.
Dealing with Inside Corners and Irregular Surfaces
You must use contact cement for inside corner applications where peel and stick cannot reach. First, apply cement to both surfaces. Second, allow it to tack dry for five minutes. Finally, press the pieces together firmly. You get no repositioning after contact. Therefore, you must align the pieces perfectly before they touch. In addition, you might need wood filler to patch deep gouges before applying any veneer. Consequently, you guarantee a perfectly flat surface.
You might encounter decorative molding or tricky angles in older kitchens. In these specific situations, you must take your time creating paper templates first. You can trace the template onto your veneer for a perfect custom fit. While this takes extra effort, it ensures a seamless look. Furthermore, you can use matching wood putty later to hide any tiny imperfections in tight corners. Thus, you achieve a cohesive finish even on complex cabinet profiles.
Step 3: Finish the New Doors and Drawer Fronts
Sand and Prime Unfinished Doors
You must sand with 120 grit to remove mill marks. Next, use 220 grit for a smooth final surface. You apply one coat of shellac based primer or a high quality bonding primer. This seals the wood grain completely. After drying, sand lightly with 220 grit. Therefore, you knock down any raised grain fibers. In addition, you must wipe away all dust with a tack cloth before painting. Consequently, your final paint coat will look incredibly smooth.
You should set up a dedicated finishing station in a dust free area. For example, a clean garage or a basement works perfectly. You can use painter tripods to hold the doors off the table while you work. This allows you to paint the edges without sticking to the surface. Furthermore, you must ensure proper ventilation when using shellac based primers. Ultimately, a clean environment prevents airborne dust from ruining your perfect primer coat.
Paint Cabinet Doors
You should use Benjamin Moore Advance or Sherwin Williams Emerald Urethane Trim Enamel. These self leveling paints cure to a hard, durable finish. First, apply two to three thin coats with a fine nap roller for drawer fronts. Second, use a high quality brush for door profiles. You must lightly sand between coats with 320 grit paper. Therefore, you ensure maximum adhesion and a flawless finish. You can read our detailed guide on how to paint kitchen cabinets for more tips.
You must respect the required drying times between coats. Urethane enamels require up to sixteen hours to recoat safely. If you rush this process, the paint will drag and create a messy texture. In addition, the paint needs up to thirty days to fully cure and harden. Therefore, you must handle the doors gently during installation. Ultimately, patience during the painting phase guarantees a factory smooth finish that resists daily wear and tear.
Staining Unfinished Doors
You must apply Minwax Pre Stain Wood Conditioner first on maple or pine doors. This prevents blotchy, uneven coloring. Next, apply oil based or gel stain with a natural bristle brush. You must wipe the excess away within five minutes. Therefore, you control the color depth perfectly. Allow full dry time before applying the topcoat. In addition, apply two coats of oil based polyurethane for maximum protection. Check our kitchen cabinet stain guide for color inspiration.
You should always test your stain color on the back of a drawer front first. Wood accepts stain differently depending on the grain density. For instance, end grain absorbs stain rapidly and turns very dark. You can prevent this by sanding end grain to a higher grit before staining. Furthermore, you must sand lightly between polyurethane coats for a glass smooth final texture. Ultimately, proper staining techniques highlight the natural beauty of your new wood doors.
Step 4: Hang New Doors and Install New Hardware
Install New Hinges
You should use Blum Clip Top hinges for face frame cabinets. Alternatively, use Blum Compact hinges for budget builds. The standard cup size is 35mm for full overlay doors. However, you might need 26mm for partial overlay styles. You must pre drill cup holes with a 35mm Forstner bit if your doors arrive undrilled. Therefore, you ensure the hinges sit perfectly flush. In addition, use a square to align the hinge arm parallel to the door edge.
You will appreciate the adjustability of premium European hinges. These hinges offer six way adjustment capabilities. Consequently, you can move the door up, down, left, right, in, and out. This makes perfectly aligning your new doors incredibly simple. Furthermore, you should always pre drill the screw holes to prevent splitting the door frame. Ultimately, investing in high quality hinges ensures your doors operate smoothly for decades to come.
Hang the Doors and Adjust
You hang each door loosely at first. Next, adjust the hinge screws for perfect alignment. All door gaps should be completely even and consistent across the entire kitchen. In addition, soft close hinges snap shut automatically from 20 degrees open. Therefore, you get a premium feel instantly. You must take your time stepping back and checking the visual alignment from a distance. Consequently, your refaced cabinets will look identical to a brand new custom installation.
You might need to tweak the hinges several times over the first few weeks. As the doors settle and gain weight from stored items, slight shifts occur naturally. For example, a heavy pantry door might sag slightly over time. You simply turn the adjustment screw a quarter turn to fix this. In short, do not panic if the alignment shifts slightly. Ultimately, this easy adjustability represents the greatest benefit of modern concealed cabinet hinges.
Install New Drawer Fronts
You hold the new drawer front in exact position and clamp it securely. Next, drill pilot holes from inside the existing drawer box. You attach the front with machine screws driven from inside. In addition, adjust the position slightly before fully tightening the screws. Therefore, you perfectly match the gaps of the adjacent doors. You can use double sided tape to temporarily hold the front if you lack appropriate clamps. Consequently, this step requires careful measurement.
You must ensure your screws are the exact correct length. If they are too short, they will not grip the new front securely. Conversely, if they are too long, they will puncture the finished face of your new drawer. You should measure the combined thickness of the box and the front carefully. Furthermore, using pan head screws provides a cleaner look inside the drawer. Ultimately, precise installation guarantees your drawer fronts sit flush and operate perfectly.
Install New Pulls and Knobs
You must use a pull placement jig for consistent hardware position across all doors. The standard pull position places them centered on the top rail of base cabinet doors. Conversely, place them on the bottom rail of upper doors. In addition, drill from the front of the door through to the back. Therefore, you prevent the painted face from splintering out. You can review our cabinet knobs vs pulls comparison to make your final choice.
You should place painter tape over the spot where you intend to drill. This simple trick provides extra protection against wood splintering. Furthermore, hold a scrap block of wood tightly against the back of the door while drilling through. This backing block ensures a perfectly clean exit hole. In short, you must execute this final step flawlessly. Ultimately, poorly placed or crooked hardware will instantly ruin the professional appearance of your newly refaced cabinets.
DIY Refacing Cost Breakdown
Material Cost Estimate
You can expect peel and stick veneer to cost $80 to $200. New doors for an average 20 door kitchen run about $1,200 at a $60 average. Next, hardware costs range from $100 to $300. In addition, paint and primer will cost $60 to $120. Therefore, the total DIY material cost falls between $1,440 and $1,820 for an average kitchen. You can save even more if you reuse your existing hardware or hinges.
You must also factor in the cost of consumable supplies. For instance, sandpaper, tack cloths, and quality paint brushes add up quickly. You might spend an additional hundred dollars on these miscellaneous items. However, this total still represents a massive bargain compared to alternatives. You can completely transform your home value for under two thousand dollars. Ultimately, this exceptional return on investment makes refacing one of the smartest home improvement projects available.
Time Estimate
You will spend 2 to 3 hours removing doors and hardware. Veneer application requires 4 to 8 hours of focused work. Next, finishing doors takes 4 to 6 hours across two days to allow for drying. Finally, hanging and hardware installation takes 3 to 4 hours. Therefore, the total time equals 13 to 21 hours. You can easily complete this project over a single long weekend if you work efficiently. In addition, enlist a helper to speed up the process.
You should build in buffer time for unexpected delays. For example, paint might dry slower than expected due to high humidity. Similarly, you might need to make an extra trip to the hardware store for missing screws. You should never rush the veneer or painting steps to save time. In short, quality work requires patience and dedication. Ultimately, spending a few extra hours guarantees a beautiful result that will last for many years.
DIY vs Professional Refacing Cost
DIY material costs run $1,440 to $1,820. In contrast, professional refacing services charge $3,500 to $9,000 for the exact same kitchen. Therefore, your DIY savings equal $2,000 to $7,000. The trade off is 13 to 21 hours of your labor and an intermediate DIY skill level. In addition, you manage the entire project yourself. You can explore ready to assemble kitchen cabinets if you prefer building entirely new boxes.
You must decide if your time is worth the substantial financial savings. For many homeowners, keeping five thousand dollars in the bank easily justifies a weekend of hard work. However, if you lack basic tools or confidence, hiring a professional remains a valid choice. You could also compromise by installing new doors yourself but hiring a painter. Ultimately, the DIY route offers incredible financial flexibility for homeowners willing to learn new skills.
| Item | DIY Cost | Professional Cost | Notes |
| Veneer & Prep | $100 – $250 | Included | DIY requires buying own tools |
| New Doors | $1,000 – $1,500 | Included | Based on 20 average sized shaker doors |
| Hardware | $100 – $300 | $200 – $500 | Contractor markup applies to pro jobs |
| Labor | $0 | $2,000 – $6,500 | DIY takes 15-20 hours of personal time |
| Total | $1,440 – $1,820 | $3,500 – $9,000 | Massive savings via DIY approach |
You should also explore shaker kitchen cabinets styles when making your door selections. In addition, browse Wayfair kitchen cabinets for complete ready-made solutions if refacing seems too daunting. Therefore, you have multiple backup plans available. Ultimately, exploring all avenues ensures you make the best choice for your budget.
FAQ
Can you reface kitchen cabinets yourself?
Yes. DIY cabinet refacing is an intermediate skill project requiring basic carpentry tools. The main tasks are veneer application, door finishing, and hardware installation. Therefore, anyone with patience can succeed.
How much does it cost to DIY reface kitchen cabinets?
$300 to $1,800 in materials depending on kitchen size, door material, and hardware budget. Professional refacing costs $3,500 to $9,000. In addition, reusing hardware lowers your cost further.
How long does DIY cabinet refacing take?
13 to 21 hours spread over 2 to 3 days, allowing for paint drying time between coats. First, you prep. Second, you veneer. Finally, you install. Therefore, plan for a long weekend.
Is cabinet refacing worth it?
Yes when cabinet boxes are structurally sound. Refacing recovers 60 to 80 percent of a new cabinet look at 15 to 20 percent of the full replacement cost. Consequently, it offers incredible ROI.
What is the best veneer for cabinet refacing?
Peel and stick wood veneer from companies like FastCap or Oakey is the easiest to apply. Real wood veneer gives the most authentic look. Thermofoil is the most durable for high humidity kitchens.