Installing kitchen base cabinets is a two-day DIY job for one person working carefully, or a one-day job with a helper. You need a level floor line, located wall studs, and the correct sequence — because once a cabinet is screwed to the wall out of level, every cabinet that follows compounds the error. Here is the exact sequence to get it right the first time.
What You Will Need
Tools:
- 4-foot level (minimum — 6-foot is better for long runs)
- Stud finder
- Cordless drill/driver with #2 Phillips and square-drive bits
- 3-inch #10 cabinet screws (not drywall screws — they snap under load)
- 1-5/8-inch pocket screws for joining adjacent cabinet boxes
- Clamps (4 minimum — Bessey or Irwin bar clamps)
- Jigsaw or oscillating tool for cutouts (plumbing, outlets)
- Shims (cedar is standard; plastic shims do not compress over time)
- Tape measure and pencil
- Chalk line
Materials:
- Cabinet boxes (verify all boxes before starting — damaged face frames cannot be field-repaired)
- Filler strips cut to width
- Toe kick boards (or pre-finished toe kick panels)
- Plywood spacers for any refrigerator or range openings
Skill level: Intermediate DIY. Time: 6–10 hours for a standard kitchen (10–15 linear feet). You should be comfortable with a drill, reading a level, and making straight cuts. If your floor varies more than 1 inch across the run, add 1–2 hours for leveling work.
Step 1: Find the High Point and Snap the Reference Line
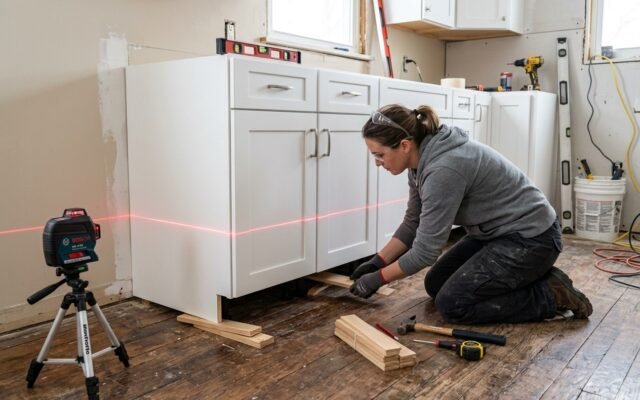
The high point of your floor is the number that controls everything. Set your 4-foot level on the floor and drag it slowly along the entire base cabinet run. The spot where the level reads flat but the floor is highest is your reference point. Every cabinet shims up to this height — none go down.
From the high point, measure up 34.5 inches on the wall and make a mark. Use a chalk line to snap a level line at 34.5 inches across the entire run. This line is the top of your cabinet boxes. Every cabinet gets leveled to it. Check the line with your 4-foot level before proceeding — a chalk line that looks straight but dips 1/4 inch in the middle will throw off your entire installation.
Check: Your reference line should read level in all directions. If it does not, your chalk line is not accurate. Reset it.
Step 2: Mark Stud Locations
Base cabinets must anchor into wall studs. Drywall anchors are not acceptable for cabinet installation — a cabinet loaded with dishes, pots, and appliances exerts 200 to 400 pounds of sustained load. Standard stud spacing is 16 inches on center, but older homes (pre-1970) may have 24-inch spacing.
Run your stud finder along the wall at 34 inches high — just below your reference line. Mark every stud with a vertical pencil line that extends from the floor to above the reference line. Transfer these marks to the face of the wall at 36 inches so they remain visible above the cabinet top after installation.
Pro tip from the job site: After marking studs, drive a 3-inch finish nail at each mark to confirm. A hollow thud means you missed — the stud is 3/4 inch to either side. Find it before you drill a 1/4-inch pilot hole through a cabinet back and miss.
Step 3: Start at the Corner
Always start at the inside corner of the kitchen — the corner cabinet goes in first, and every cabinet in the run aligns off it. If you have an L-shaped kitchen, the corner is where the two runs meet. Starting anywhere else means your corner cabinet lands wherever the math takes it, which is rarely where you want it.
For a blind corner cabinet (the most common type), position it so the blind side faces the wall with 1 inch of clearance. The adjacent run will butt up to the exposed side. For a lazy Susan corner, center it precisely on the corner intersection — measure from each wall equally. For exact minimum clearance requirements for each corner type, the blind corner vs lazy Susan guide has the dimension tables.
Step 4: Level and Shim the First Cabinet
Set the corner cabinet in position and place your 4-foot level on top. Check front-to-back and side-to-side. Slide cedar shims under the base (not the face frame) to bring it level. Never shim the face frame — it will crack or bow under the countertop load.
Once level, drill a 1/4-inch pilot hole through the back rail of the cabinet at a stud location, 3/4 inch from the top of the rail. Drive a 3-inch #10 cabinet screw — not flush, just snug. Check level again. Pilot hole through the bottom rail at another stud. Drive that screw snug. Now check level one final time in all directions before tightening completely. Overtightening before the final check will pull the cabinet out of level and you cannot get it back without removing the screw.
Check: Level reads flat in all directions. Cabinet top aligns with your 34.5-inch chalk line. No wobble when pushed side to side.
Step 5: Join and Secure Adjacent Cabinets
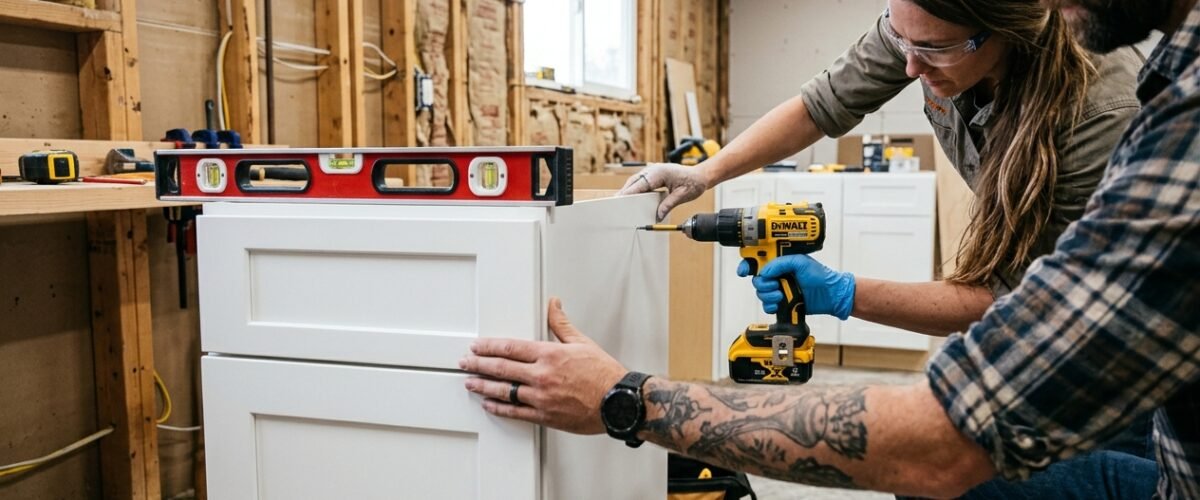
Set the next cabinet in position, butted flush against the first. Clamp the two face frames together at the top and bottom before drilling anything. The clamp keeps them perfectly flush — even a 1/16-inch mismatch between face frames is visible once the doors are on.
Drill 3/32-inch pilot holes through the face frame of cabinet 1 into the face frame of cabinet 2, at two points: 3 inches from the top and 3 inches from the bottom. Drive 1-5/8-inch pocket screws (or face frame screws with a coarse thread). Remove the clamps. The frames are now joined.
Level the second cabinet the same way as the first: shim until level, pilot hole into stud, snug the screw, verify level, then tighten. Work down the run one cabinet at a time. Never skip ahead and anchor a cabinet without confirming it is level — out-of-level boxes compound.
Check: Face frames are flush at every joint. Level reads flat on each box and across two boxes simultaneously.
Step 6: Install Sink and Specialty Bases
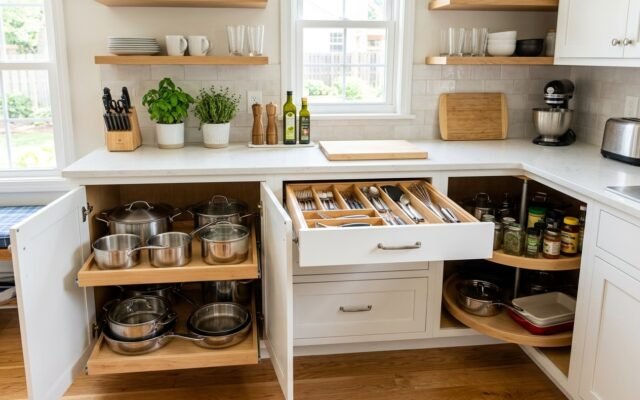
Sink base cabinets ship without a shelf and with a false bottom panel. Before positioning, cut the back panel opening for the supply lines and drain. A jigsaw with a fine-tooth blade works best — make your cutout 1 inch larger than the pipe diameter on all sides to allow for plumbing adjustments later.
Range bases are open-top boxes — they have no face frame across the top opening. Position them in the run like any other cabinet, level and shim the same way, but use only the bottom rail and one side stile for wall anchoring. The range will bear on the floor independently of the cabinet, but the cabinet surrounds it and must be secured so it does not shift over time.
For dishwasher openings, do not leave a gap in the cabinet run. Frame the opening with a filler strip on each side to bring the total opening to exactly 24 inches wide. The dishwasher sits on the floor and its mounting brackets attach to the underside of the countertop — not the cabinet sides.
For material and durability guidance, the drawer base vs door cabinet comparison covers when each type works best in a sink run versus a cooking run.
Step 7: Install Toe Kick
Toe kick installs last, after all cabinets are anchored and the countertop template is made. Cut pre-finished toe kick boards to length (if using solid stock) or snap pre-finished panels into the toe kick clips if your cabinets came with the clip system (most RTA and semi-custom boxes do).
For runs with shims, the toe kick must cover the shims without touching them. Gap at the floor is acceptable — caulk it after the toe kick is on. Do not nail or glue the toe kick to the shims. If a shim shifts over 5 years, a glued toe kick will pull the cabinet out of level with it.
Outside corners get a mitered joint. Inside corners get a coped or butted joint. Use finish nails (15-gauge, 1.5 inches) to attach toe kick to the face of the base platform. Set the nails and fill with matching wood filler before painting or staining.
Common Installation Mistakes
- Skipping the chalk line. Eyeballing level across a 15-foot run does not work. The chalk line is not optional — snap it first, every time.
- Starting in the middle of the run. Always start at the corner. Every other cabinet aligns off it. Starting in the middle leaves the corner as a leftover problem.
- Using drywall screws. Drywall screws are brittle and have no shear strength. A cabinet loaded with dishes will eventually pull them out. Use 3-inch #10 cabinet screws rated for wood-to-stud installation.
- Not shimming before drilling. Drill first, shim second is backward. The screw pulls the cabinet to the wall before shims are in place, forcing it out of level. Shim first, then drill.
- Joining face frames with drywall screws. The head diameter is too small and the screw will split the stile. Use pocket screws or purpose-made face frame screws with a wide washer head.
- Clamping too tight before checking level. Clamps are for alignment, not compression. If you overtighten a clamp, the face frame bows. Clamp snug, check alignment, then lock down.
FAQ
How long does it take to install kitchen base cabinets?
A standard kitchen with 15 linear feet of base cabinets takes 6 to 10 hours for one person, or 4 to 6 hours with a helper. Add 1 to 2 hours if your floor varies more than 1 inch across the run. Specialty cabinets (sink base with plumbing cutouts, corner units) add 30 to 45 minutes each.
Do I need to remove the doors before installing base cabinets?
Yes. Remove all doors and drawers before carrying cabinets into the kitchen. A 36-inch base cabinet weighs 40 to 60 pounds with hardware. Without doors, it is lighter and easier to maneuver through doorways. Removing doors also protects the finish from scrapes during installation.
How far from the wall should base cabinets be?
Base cabinets sit flush against the wall. If the wall is not plumb, scribe the cabinet side panel to follow the wall contour, or use a 1/4-inch scribe filler strip between the cabinet and the wall. Never pull the cabinet away from the wall to compensate for an out-of-plumb wall — it creates a visible gap behind the countertop.
What screws should I use for kitchen base cabinet installation?
Use 3-inch #10 coarse-thread cabinet screws for wall anchoring — these are rated for wood-to-stud connections. Use 1-5/8-inch #8 pocket screws or face frame screws for joining adjacent cabinet boxes. Never use drywall screws: they are too brittle for the sustained lateral load of a loaded cabinet run.
Can I install kitchen base cabinets on an uneven floor?
Yes. Measure the floor variation across the full run. If it is under 1 inch, cedar shims bring every cabinet to level with no visible result. If the floor varies more than 1 inch, build a shimmed plywood base platform first, then set the cabinets on it. The toe kick hides the platform completely.