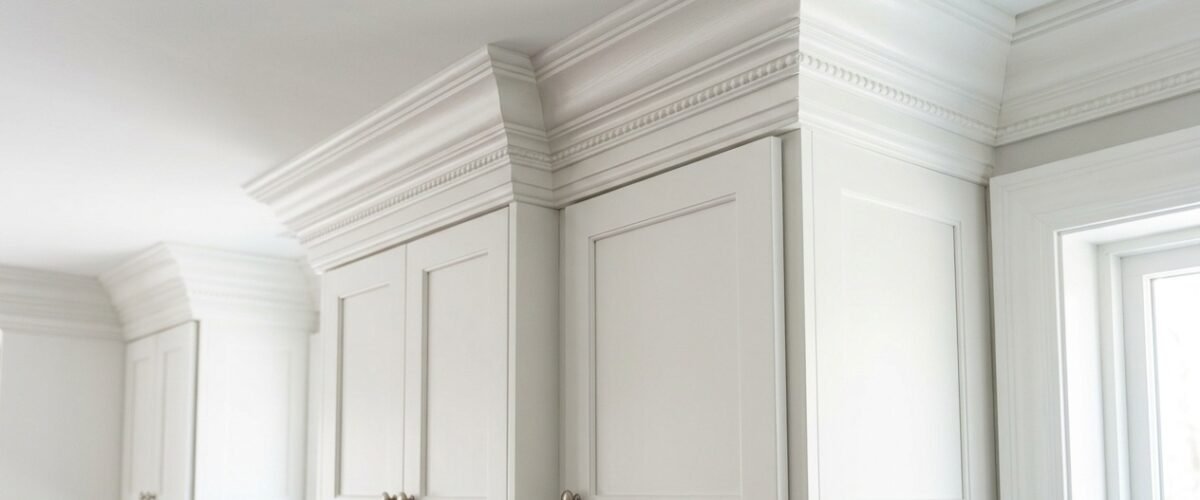
Kitchen cabinet crown molding bridges the gap between your upper cabinet tops and the ceiling to create a finished custom look. However, uneven drywall ceilings and out of square corners make molding installation tricky for DIYers. Installing a solid hardwood nailer cleat and coping inside joints ensures tight seams that never open up when seasons change. Follow the detailed steps below to select your profile and nail your installation.
Quick Comparison of Cabinet Crown Molding Profiles
Selecting the right molding profile depends on your ceiling height and door frame design. The table below compares the primary molding profiles used in residential kitchen remodels.
| Molding Profile | Projection (Depth) | Vertical Rise (Height) | Required Ceiling Clearance | Best Cabinet Style |
|---|---|---|---|---|
| Traditional Cove | 1.5 to 2.5 inches | 2.5 to 3.5 inches | 3 to 5 inches | Classic Shaker and Colonial |
| Classic Stepped Crown | 2.0 to 3.5 inches | 3.5 to 5.0 inches | 4 to 7 inches | Raised Panel and Formal Traditional |
| Modern Flat Shaker Trim | 0.75 to 1.5 inches | 2.0 to 4.0 inches | 2 to 4 inches | Modern Farmhouse and Craftsman |
| Simple Bullnose Cap | 1.0 to 1.5 inches | 1.0 to 2.0 inches | 1 to 3 inches (Low ceilings) | Contemporary Slab and Minimalist |
| Two-Piece Crown with Riser | 2.5 to 4.0 inches | 5.0 to 9.0 inches | 6 to 12 inches (Tall ceilings) | High Ceilings reaching full height |
Why You Need a Nailer Cleat (The Step Beginners Skip)
Most modern kitchen upper cabinets feature frameless tops or a recessed top panel sitting one half inch below the front face frame. Because there is no solid wood directly behind the molding, you cannot simply drive brad nails into thin cabinet top veneers.
Instead, professional carpenters always install a continuous hardwood nailer cleat along the top perimeter of every cabinet box. Specifically, rip strips of three-quarter inch solid pine or birch plywood down to size. Then screw the cleat flush against the top backside of the face frame.
Consequently, this solid backing gives your 18-gauge finish nails a full three quarters of an inch of solid meat to bite into. Without a nailer cleat, your molding shifts every time upper cabinet doors close with force.
How to Handle Uneven Drywall Ceilings
In residential construction, ceilings are almost never perfectly flat or level. In fact, ceiling joists frequently dip by one quarter to one half inch across a ten-foot run. If you push rigid crown molding hard against an undulating ceiling, your molding line will wave visibly.
To overcome this challenge, carpenters rely on a two-piece molding assembly consisting of a vertical riser board and a top crown molding piece. First, install the flat riser board flush to the cabinet top. Second, attach the angled crown molding over the face of the riser.
As a result, you can adjust the crown molding up or down against the riser face to absorb ceiling dips without changing the lower reveal line above your cabinet doors. For deeper box leveling tips, review our guide on how to level kitchen cabinets on an uneven floor.
Tools and Materials for Crown Molding Installation
Having the proper carpentry equipment prevents damaged trim and wasted materials. Gather these items before making your first cut.
- Compound miter saw: A 10-inch or 12-inch dual-bevel compound miter saw equipped with an 80-tooth fine finish blade.
- Pneumatic brad nailer: An 18-gauge finish nailer loaded with 1-1/4 inch and 1-1/2 inch galvanized brad nails.
- Coping saw: A handheld coping saw fitted with high-carbon steel blades for back-beveling inside corner joints.
- Polyurethane wood glue: Fast-curing carpenter PVA wood glue or cyanoacrylate molding adhesive for miters.
- Hardwood nailer stock: Strips of 3/4-inch plywood or poplar ripped to match your cabinet box top depth.
- Color-matched wax putty: Factory touch-up putty sticks to conceal nail holes and microscopic corner seams.
Step-by-Step Installation Process
Follow this exact chronological installation sequence to achieve razor-sharp trim corners.
Step 1: Map the High and Low Points of the Ceiling
First, place a laser level or four-foot bubble level along the ceiling line directly above your cabinet run. Measure the gap between the top of the cabinet face frame and the ceiling drywall at every stud location. Specifically, locate the lowest ceiling point in the room.
Therefore, all vertical measurements must reference this lowest point. If you set your molding height based on a high ceiling spot, the molding will bind and crush into the ceiling at the low spot.
Step 2: Install Solid Nailer Cleats
Next, secure your hardwood nailer cleats to the cabinet tops. Cut the cleats to fit the full length of each cabinet box. Then drive 1-1/4 inch coarse thread wood screws upward through the cabinet top panel directly into the cleat.
Next, check the cleat with a small framing square. Specifically, the front edge of the cleat must sit perfectly flush with the front face of the cabinet frame so your molding rests flat.
Step 3: Cut and Cope Inside Corners
Never join inside crown molding corners with simple 45-degree miter cuts. Because wall corners are rarely square, 45-degree inside miters open up as seasonal humidity expands drywall. Instead, professional trim carpenters always cope inside joints.
To begin, run the first piece of molding straight into the side wall with a square 90-degree butt cut. Second, cut the intersecting molding piece at a 45-degree inside miter. Next, use your coping saw to cut away the back-beveled contour along the exposed profile line.
Finally, test fit the coped joint against the butt piece. The coped profile laps seamlessly over the first molding, creating an airtight joint that accommodates slight drywall movement.
Step 4: Fasten Outside Miters with Glue and Brads
Similarly, outside corners require precision 45-degree miter cuts. First, measure from the inside corner to the exact outside corner edge of the cabinet face frame. Mark this point on the backside of your molding.
Second, apply a generous bead of wood glue to both mating miter faces. Press the corner together firmly and shoot two 1-1/4 inch brad nails through the corner joint to lock the points together. Then fasten the molding into the top nailer cleat every twelve inches.
The Showroom Shadow Line Test
Before packing away your tools, execute this critical visual inspection check. Stand six feet back from your newly installed crown molding and look directly above your cabinet doors.
Specifically, examine the horizontal gap between the top edge of your cabinet doors and the bottom edge of the crown molding. This visible strip of face frame is known as the reveal. The reveal must remain completely uniform across the entire kitchen run.
If the reveal pinches down over one cabinet and widens over another, your molding is sagging. Immediately tap the molding up or shim the nailer cleat until the reveal line measures laser straight. Review our related installation specs on how to install base cabinets to maintain alignment throughout your cabinetry.
4 Mistakes That Ruin Crown Molding Projects
Crown molding is unforgiving carpentry work. Avoid these four common traps that ruin otherwise beautiful cabinetry.
- Cutting molding upside down without stops: When cutting crown nested on a miter saw, the molding sits upside down and backwards. Always install wooden fence stops on your saw base so every piece nests at the exact same spring angle.
- Using brittle nails: Avoid large 16-gauge nails that split delicate hardwood crown molding profiles. Always use slender 18-gauge brads that penetrate cleanly without bulging grain.
- Neglecting wood acclimation: Solid wood trim expands and contracts with home humidity. Store your molding inside the heated kitchen for at least 48 hours before cutting to stabilize moisture content.
- Skipping miter glue: Brad nails hold trim to the wall, but glue holds miter joints together. Without high-strength wood glue, corner seams crack open during winter heating seasons.
Furthermore, pair proper trim with quality doors. Our guide comparing frameless vs framed kitchen cabinets highlights how face frames provide critical mounting surfaces for heavy architectural crown profiles.
Frequently Asked Questions
Should kitchen cabinet crown molding touch the ceiling?
Kitchen cabinet crown molding can touch the ceiling if your ceiling clearance is under six inches. However, with eight-foot ceilings and 42-inch uppers, closing the gap creates a clean built-in appearance that eliminates dust collection on cabinet tops.
What angle do you cut kitchen cabinet crown molding?
For standard 38-degree spring angle crown molding cut flat on a compound miter saw, set your miter angle to 31.62 degrees and your saw bevel angle to 33.86 degrees. Alternatively, cut the molding nested upside down against the saw fence at a 45-degree miter.
Can you install crown molding on frameless cabinets?
Yes, but frameless cabinets require a horizontal mounting sub-cleat screwed to the top box panel. Because frameless boxes lack an exterior face frame lip, the sub-cleat provides the necessary mounting surface for the crown profile.
Why do my crown molding corners keep opening up?
Crown molding corners open up because of house settling, seasonal humidity swings, or miter cuts instead of coped joints. Always cope inside corners and apply wood glue with cross-nailed brads on outside miters to maintain tight seams.
How much does it cost to install cabinet crown molding?
Professional trim carpenters typically charge $15 to $30 per linear foot for crown molding labor. Materials add $5 to $15 per foot depending on whether you choose primed MDF, solid poplar, or factory pre-finished hardwood.