The best kitchen cabinet stain depends on the wood species and the look you want. Gel stain is forgiving on blotch prone woods like pine and cherry. Oil based stain soaks deep into open grain woods like oak. Water based stain dries fast but requires more coats. Finding the right kitchen cabinet stain involves understanding your wood type and selecting the correct formula for your project.
Types of Kitchen Cabinet Stain Compared
You must understand the differences between stain formulas before starting your project. Specifically, each type behaves differently depending on the wood species. Therefore, choosing the correct product ensures a professional result.
Gel Stain
Gel stain sits on the surface of the wood. Consequently, it controls color depth well. It is great for blotch prone woods like cherry, pine, and birch. Minwax Gel Stain and General Finishes Gel Stain are the top choices. Drying time is 8 to 24 hours. Furthermore, it requires an oil based topcoat.
Applying gel stain is straightforward. First, you wipe it on with a lint free cloth. Next, you wipe off the excess. Because it is thick, it does not penetrate deeply. Ultimately, this prevents dark splotches on unpredictable wood grains.
Oil Based Stain
Oil based stain penetrates the wood grain deeply. Therefore, it is best for open grain species like oak and ash. It provides the longest lasting color. Minwax Wood Finish and Varathane Classic Wood Stain are excellent options. Drying time is 2 to 8 hours.
However, this product has strong fumes. Consequently, it requires proper ventilation during application. Because it soaks in, you cannot easily correct mistakes once applied. Therefore, always test a hidden area first.
Water Based Stain
Water based stain offers the fastest dry time at 1 to 2 hours. Also, it has a very low odor. However, it raises the wood grain. As a result, it requires light sanding between coats. It is best for maple and achieving modern looks. General Finishes Water Based Wood Stain and Varathane Fast Dry Wood Stain are great products.
You must work quickly with water based stain. Because it dries fast, lap marks can form easily. Therefore, applying it with a synthetic brush is recommended.
Java Gel and Dark Cabinet Stains
Dark stains are excellent for updating oak or pine cabinets to a richer look without replacing them. For example, General Finishes Java Gel is considered the gold standard for this task. It covers old finishes well.
Many homeowners prefer this method over painting. Specifically, it allows some wood texture to remain visible. Furthermore, it costs much less than a full replacement.
| Stain Type | Best Wood | Dry Time | Topcoat Compatibility | Odor Level | Cost per Quart |
| Gel Stain | Cherry, Pine | 8 to 24 hrs | Oil based | Medium | $25 |
| Oil Based | Oak, Ash | 2 to 8 hrs | Oil or Water | High | $15 |
| Water Based | Maple | 1 to 2 hrs | Water based | Low | $20 |
Best Wood Species for Kitchen Cabinet Staining
Selecting the best wood for kitchen cabinets affects the final finish. Every species absorbs stain uniquely. Therefore, you must match the product to the wood.
Oak Cabinets
Oak has an open grain structure. Consequently, it takes stain beautifully and shows strong grain lines. Oil based stain is highly recommended for oak. However, there is a risk. Specifically, the strong grain will telegraph through paint if you later decide to paint the cabinets.
Many classic kitchens feature stained oak. Because of its durability, it remains a popular choice for families. Furthermore, dark stains look exceptionally rich on oak.
Maple Cabinets
Maple features a very tight grain. As a result, it blotches easily. It requires a gel stain or a pre conditioner first. Water based stain works well after proper pre conditioning.
Professional cabinet makers often spray finishes on maple. However, DIYers can achieve great results with patience. Specifically, following the preparation steps is critical.
Cherry Cabinets
Cherry wood is naturally reddish and highly blotch prone. Therefore, gel stain is the professional choice. Also, you must know that cherry darkens naturally with UV exposure over time.
You should consider clear coats instead of dark stains on cherry. Because the wood is so beautiful, natural finishes are often preferred.
Pine and Birch Cabinets
Pine and birch are extremely blotch prone woods. Consequently, you must always use a gel stain or a pre conditioner. Oil based stain without prep creates uneven splotchy results.
Many rustic kitchens use knotty pine. Therefore, controlling the stain absorption around knots is essential.
MDF and Plywood Cabinets
MDF does not stain well at all. Specifically, it absorbs unevenly. Plywood end grain is also very absorbent. Therefore, staining is not recommended for MDF cabinet boxes. Understanding MDF vs plywood cabinets is important before starting.
If you have MDF, painting is the only viable option. However, high quality plywood veneers can be stained successfully.
How to Stain Kitchen Cabinets Step by Step
Preparation is the most critical part of any finishing project. Therefore, do not rush these steps. If you want to know how to paint kitchen cabinets instead, the prep is similar.
Step 1 Remove Doors and Hardware
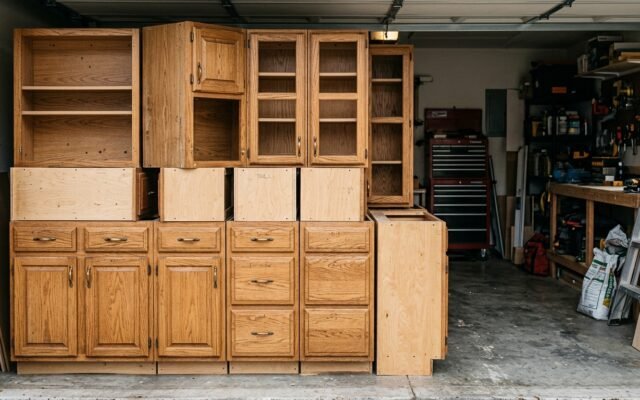
First, remove all doors, drawers, and hardware. Then, label each door with painter tape and a number matching the opening. Because this keeps things organized, it saves time later.
You must work in a clean and well lit space. Therefore, setting up a dedicated workstation in a garage is ideal.
Step 2 Sand the Surface
Next, sand the wood with 120 grit sandpaper to remove the old finish. Then, use 180 grit to smooth the surface. Always sand with the grain. Finally, wipe the wood clean with a tack cloth.
Never skip the sanding step. Because the new finish needs bare wood to adhere properly, this is mandatory.
Step 3 Apply Wood Conditioner if Needed
For maple, cherry, pine, and birch, apply Minwax Pre Stain Wood Conditioner or an equivalent product. Wait 15 to 30 minutes before applying the stain. Consequently, this prevents blotching.
If you are using gel stain, this step might be optional. However, it is always a good safety measure for unpredictable woods.
Step 4 Apply the Stain
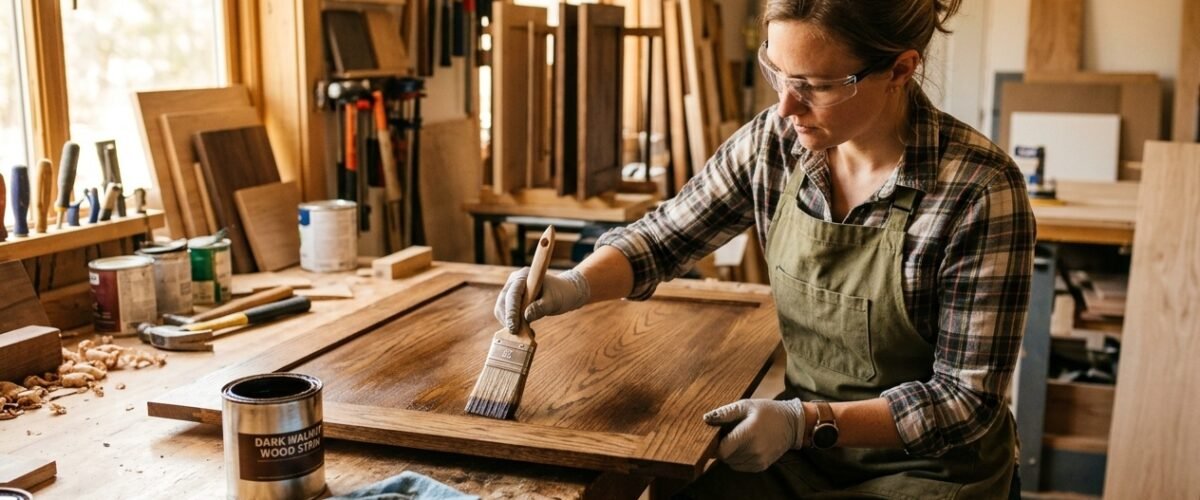
Brush on the stain evenly. Next, wipe it off with a lint free cloth within 1 to 5 minutes depending on the desired depth. You must work one panel at a time.
Always wipe in the direction of the grain. Therefore, you avoid leaving cross grain scratches visible.
Step 5 Let Dry and Apply Second Coat if Needed
Allow full dry time according to the product specifications. Lightly sand with 220 grit between coats if using a water based stain. Then, apply a second coat if darker color is desired.
Patience is key here. Because rushing the dry time ruins the finish, wait the full recommended duration.
Step 6 Apply Topcoat
Finally, apply a polyurethane, lacquer, or water based poly over the stain. You need a minimum of 2 coats. Lightly sand with 320 grit between topcoats.
The topcoat protects your hard work. Therefore, use a high quality brush for application.
Best Topcoats Over Kitchen Cabinet Stain
A protective clear coat is essential for kitchen environments. Specifically, it guards against moisture and grease.
Oil Based Polyurethane
Oil based polyurethane is the most durable option. However, it yellows slightly over time. It is best for dark and warm toned stains. Minwax Fast Drying Polyurethane is a solid choice.
Because it offers intense protection, it is great for busy kitchens. Furthermore, it builds a thick protective film.
Water Based Polyurethane
Water based polyurethane provides a crystal clear finish. Also, it features absolutely no yellowing. It is best over gel stain and light stains. Varathane Water Based Ultimate Polyurethane Diamond Finish is excellent.
It dries very fast. Therefore, you can apply multiple coats in a single day.
Lacquer Topcoat
Lacquer is a professional spray finish. Specifically, it has the fastest cure time. It is highly durable for cabinet production. However, it requires spraying equipment.
Due to the strong fumes, proper ventilation is mandatory. Consequently, it is usually reserved for professionals.
Conversion Varnish
Conversion varnish is a professional shop finish. Because it is extremely hard, it is most used in custom cabinet shops. It is not available at big box stores.
This product requires a catalyst to cure. Therefore, it has a very short pot life once mixed.
| Topcoat | Stain Compatibility | Yellowing Risk | Durability | Application Method |
| Oil Based Poly | Oil stains | High | Excellent | Brush |
| Water Based Poly | Water and Gel | None | Good | Brush or Spray |
| Lacquer | Most stains | Low | Excellent | Spray only |
Kitchen Cabinet Stain Color Guide
Choosing the right color transforms your kitchen. Therefore, testing samples on your exact wood species is crucial.
Light Stain Colors
Light colors like natural, honey, and golden pecan are beautiful. Specifically, they work wonderfully on oak and show the grain beautifully. They make a kitchen bright and warm. You can find specific Minwax and Varathane color codes at any hardware store.
These tones are perfect for small spaces. Because they reflect light, the room feels larger.
Medium Stain Colors
Medium colors like provincial, walnut, and espresso are the most popular cabinet stain colors. Furthermore, they work on most wood species. Minwax Provincial 211 and Minwax Dark Walnut 2716 are top sellers.
They offer a great balance. Specifically, they hide dirt well while remaining elegant.
Dark Stain Colors
Dark colors like ebony, java, and kona are very striking. However, they require multiple thin coats. General Finishes Java Gel is perfect for updating old cabinets. There is a risk of raising the grain on water based stains at dark depths.
Dark stains create a formal and luxurious look. Therefore, they pair beautifully with brass hardware. Check current prices on Amazon for these products.
| Color Name | Product Code | LRV | Best Wood | Best For |
| Provincial | Minwax 211 | Medium | Oak, Maple | Classic look |
| Dark Walnut | Minwax 2716 | Dark | Oak, Ash | Modern spaces |
| Java | GF Gel | Very Dark | Pine, Oak | Updating old wood |
Staining vs Painting Kitchen Cabinets
Deciding between these two finishes is a major step. Both offer unique benefits depending on your goals. You can find beautiful options for grey kitchen cabinets or white kitchen cabinets if you choose to paint.
When Staining Is Better
Staining is better when you want to see the natural wood grain. Furthermore, it is ideal if you have high quality solid wood kitchen cabinets. It is also perfect if you are renovating in a traditional or rustic style.
Wood tones add warmth to a room. Because of this, natural finishes remain timeless.
When Painting Is Better
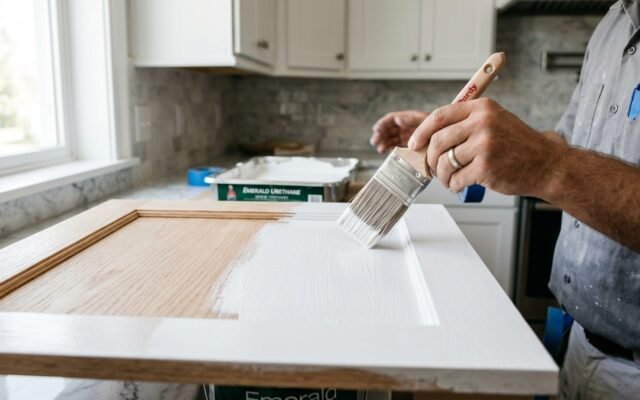
Painting is better when you have MDF cabinets. Also, it is preferred if you want a smooth uniform finish. If you want a trendy color like navy or sage green, paint is the answer.
Paint hides imperfections completely. Therefore, it is great for older, worn cabinet doors. Browse options at Home Depot to see popular paint colors.
Cost Comparison
Staining materials typically cost between $100 and $300 for a full kitchen DIY project. On the other hand, professional staining costs between $1,500 and $4,000 for a full kitchen. Painting costs are very similar.
DIY saves significant money. However, it requires immense time and effort. Find tools and supplies on Wayfair.
FAQ
Here are answers to the most common questions regarding finishing wood cabinets.
What is the best stain for kitchen cabinets?
General Finishes Gel Stain and Minwax Wood Finish are the most popular for DIY projects. Specifically, Java Gel is excellent for dark updates on existing wood. Therefore, choose based on your desired color.
Can you stain kitchen cabinets without sanding?
This is not recommended. Light sanding is required for proper adhesion. A liquid deglosser can reduce the amount of sanding needed but it cannot eliminate it completely.
How long does cabinet stain last?
It typically lasts 5 to 15 years depending on the finish coat quality and how the kitchen is used. A high quality polyurethane topcoat extends the life significantly. Therefore, never skip the clear coat.
Can you stain over painted cabinets?
No, you cannot. You must strip the paint completely. Then, you must sand down to bare wood before applying any stain. Because stain must penetrate the wood fibers, paint blocks this entirely.
Is gel stain better than regular stain for cabinets?
Yes, it is often better for blotch prone woods. Gel stain gives you much more control over the color depth. This is especially true on cherry, maple, and pine cabinets.
Understanding Cabinet Door Styles Before Staining
Different kitchen cabinet door styles require different application techniques. Therefore, identifying your door type is an important preliminary step.
Shaker Style Doors
Shaker doors have recessed center panels. Consequently, stain can easily pool in the inside corners. You must wipe these areas carefully. Otherwise, dark spots will form and ruin the clean lines.
Always use a dry brush to pull excess liquid from the corners. Because this style is so popular, mastering this technique is very valuable.
Raised Panel Doors
Raised panel doors feature intricate profiles. Therefore, applying stain requires a detailed approach. You must ensure the product reaches into every crevice evenly. Also, avoid aggressive sanding on the profiles to maintain their shape.
Using a foam brush often helps with detailed areas. Specifically, it conforms to the curves much better than a standard bristle brush.
Flat Panel Slab Doors
Slab doors are completely flat. As a result, they show lap marks and uneven application very clearly. You must work quickly and maintain a wet edge. Therefore, wiping off the excess evenly is absolutely critical for success.
Water based formulas are especially challenging on slab doors. Because they dry rapidly, you must apply them systematically.
Advanced Staining Techniques for Professionals
Professionals use several advanced methods to achieve flawless results. Furthermore, you can adopt these techniques for your own project.
Toning with Tinted Topcoats
Toning involves adding a small amount of stain into the clear topcoat. Consequently, this creates a perfectly uniform color over the entire surface. It is especially useful for evening out blotchy woods like maple.
This technique requires spraying equipment. Therefore, it is rarely attempted by beginners. However, it yields spectacular professional results.
Glazing Over Stain
Glazing adds depth and character to finished cabinets. First, you apply a base stain and a clear coat. Next, you apply a dark glaze and wipe it off. The glaze remains in the recesses of the door profile.
This creates a beautiful antiqued look. Because it highlights the architectural details, it is very popular on traditional raised panel doors.
Fuming and Chemical Stains
Fuming uses ammonia vapor to darken wood naturally. Specifically, it reacts with the tannins in woods like white oak. This creates a rich, authentic color that cannot be perfectly replicated with liquid pigments.
Chemical stains are highly specialized. Therefore, they demand extreme safety precautions and excellent ventilation during the process.
Troubleshooting Common Staining Problems
Even with careful preparation, issues can arise during the process. Therefore, knowing how to fix them is essential.
Blotchy or Uneven Color
Blotching happens when wood absorbs liquid unevenly. If this occurs, you might need to sand the piece down again. Alternatively, applying a darker gel product can sometimes mask the unevenness.
Always use a pre conditioner next time. Because prevention is much easier than fixing a blotchy finish.
Lap Marks and Streaks
Lap marks occur when a wet edge dries before you overlap it. To fix this, you must usually sand the area and reapply. Working faster prevents this issue.
Having a helper wipe off the excess while you apply the liquid is a great strategy. Consequently, this eliminates lap marks completely.
Sticky or Tacky Finish
If the finish remains sticky after 24 hours, it was applied too thickly. Also, high humidity can cause this problem. You can try wiping the surface with mineral spirits to remove the excess.
Always apply thin coats. Because thick coats trap solvents, they prevent proper curing and leave a tacky residue.
Maintaining Stained Kitchen Cabinets
Proper maintenance ensures your new finish lasts for many years. Furthermore, a good cleaning routine protects the clear coat.
Daily Cleaning Routine
Wipe up spills immediately with a damp cloth. Never use harsh chemical cleaners or abrasive sponges. Specifically, these will degrade the protective clear coat over time.
A simple mixture of mild dish soap and warm water is best. Therefore, you avoid leaving any dulling residue on the surface.
Handling Scratches and Dents
Minor scratches can be hidden with a touch up marker. You simply color over the scratch and wipe away the excess. For deeper dents, you might need a wax fill stick.
Always keep a small amount of your original stain and topcoat. Consequently, you can easily handle future touch ups.
When to Recoat
Over time, the clear coat will wear down around the handles. When this happens, you should lightly sand the area and apply a fresh coat of polyurethane. Because this restores protection, it prevents the bare wood from being damaged.
Regular inspection of high traffic doors is recommended. Therefore, you catch wear before it becomes a major problem.
Environmental Considerations When Staining
Choosing eco friendly products is becoming increasingly important. Therefore, you should consider the environmental impact of your materials.
Low VOC Options
Volatile Organic Compounds release harmful gasses into your home. Fortunately, many water based stains feature extremely low VOC levels. General Finishes offers several excellent low emission products.
Choosing low VOC materials protects your family health. Furthermore, it improves the indoor air quality during the curing process.
Disposal of Materials
You must dispose of oily rags safely. Because they can spontaneously combust, never leave them crumpled in a pile. Always lay them flat outside to dry completely before throwing them away.
Take leftover liquid products to a hazardous waste facility. Therefore, you prevent toxic chemicals from entering the local water supply.
Budgeting for Your Staining Project
Understanding the costs involved helps you plan effectively. Specifically, you need to budget for both materials and tools.
Basic Material Costs
A quart of high quality stain costs around twenty five dollars. Similarly, a quart of polyurethane costs twenty dollars. You will also need sandpaper, tack cloths, and brushes.
Do not buy cheap brushes. Because they shed bristles into your finish, they will ruin the final look.
Hidden Costs to Consider
You might need degreasers, wood fillers, and painter tape. Also, protective gear like masks and gloves adds to the total. Therefore, plan for an extra fifty dollars in miscellaneous supplies.
Investing in quality preparation materials always pays off. Consequently, your finished cabinets will look professionally done.