Installing kitchen base cabinets yourself saves between $3,500 and $7,000 in installation labor fees, but layout errors multiply fast across a wall run. When base cabinets sit out of level by even 1/8 inch across a ten-foot span, stone countertops crack under uneven stress points, cabinet doors swing open on their own, and slide-in appliances bind against face frames. Professional cabinet installers do not rely on level floors or plumb walls. Instead, installers establish a rigid, level datum line and bring every cabinet box up to meet that benchmark. This installation guide gives you the seven foundational rules for installing base cabinets with laser precision on any subfloor. Skill level: Intermediate. Project time: 6 to 10 hours for a 12-cabinet kitchen run.
What You Will Need for Base Cabinet Installation
Gather your installation tools and fastening hardware before unboxing your cabinets. Running to the store midway through leveling disrupts your reference setup. Here are the core tools and materials required for a solid installation:
- Self-Leveling 360-Degree Laser Level: Projects continuous horizontal benchmark lines across all four walls simultaneously.
- 48-Inch Box Beam Level & 24-Inch Level: Verifies face frame straightness and checks side-to-side level across multiple boxes.
- Composite Cabinet Shims: Resists rot, moisture, and compression under 200-pound stone countertops.
- #10 Washer-Head Cabinet Screws (2-1/2 Inch & 3-Inch): Large washer heads clamp hanging rails firmly without sinking through cabinet backs.
- Cabinet Face Frame Clamps: Aligns face frames flush while drilling pilot holes and driving connecting screws.
- Cordless Drill & Impact Driver: With 1/8-inch and 3/16-inch countersink drill bits.
- Electronic Stud Finder: Locates framing stud centers behind drywall.
- Scribing Compass & Jigsaw: For custom-fitting oversized end panels to uneven wall contours.
Essential Base Cabinet Installation Tools and Budget Breakdown
Having the right tools separates an amateur installation that sags over time from a professional setup that stays rigid for decades. Budgeting for specialized tools upfront costs significantly less than repairing damaged face frames or cracked stone tops later.
| Tool / Hardware | Primary Purpose | Where to Buy | Avg Cost |
|---|---|---|---|
| 360-Degree Green Laser Level | Projects level datum lines across all kitchen walls | Home Depot / Amazon | $149 – $299 |
| 48-Inch Box Beam Level | Checks alignment across consecutive cabinet boxes | Lowe’s / Home Depot | $45 – $85 |
| Composite Cabinet Shims (24-Pack) | Levels cabinet bases without crushing under stone loads | Home Depot / Amazon | $12 – $18 |
| #10 GRK Washer-Head Screws (100-Pack) | Fastens cabinet hanging rails securely into structural studs | Lowe’s / Amazon | $18 – $28 |
| Cabinet Face Frame Clamps (Pair) | Aligns face frames flush in two planes before fastening | Amazon / Rockler | $35 – $65 |
| Electronic Deep-Scan Stud Finder | Locates centerlines of wood and metal wall studs | Home Depot / Amazon | $25 – $55 |
| Precision Scribing Compass | Transfers wavy drywall contours onto finished filler panels | Amazon / Woodcraft | $14 – $24 |
| Countersink Drill Bit Set | Pre-drills pilot holes to prevent splitting face frames | Lowe’s / Home Depot | $15 – $30 |
Rule 1: Find the High Point of the Floor
You must locate the highest elevation point of your kitchen subfloor before placing or fastening a single cabinet box. Subfloors in both old and new homes dip in room centers and crown over foundation joists by 1/4 inch to 1/2 inch.
If you start installing at a low spot, your cabinets will climb uphill. Once you reach the high point, your cabinet box will sit higher than your reference line. Your only fix then is cutting down the bottom toe kicks of remaining boxes, which ruins factory proportions and weakens cabinet joinery.
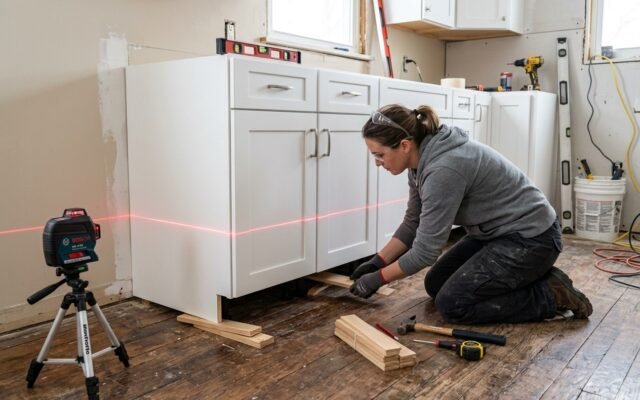
Mount your 360-degree laser level on a tripod in the center of the kitchen, casting a beam roughly two feet off the floor. Place your tape measure flat against the subfloor along the perimeter walls where cabinets will sit. Measure the distance from the subfloor up to the laser beam every two feet.
The location with the smallest measurement on your tape is the highest point of your floor because the floor is closest to the laser beam at that spot. Mark this exact location on the subfloor as your primary installation benchmark.
Rule 2: Snap Your Level Reference Line
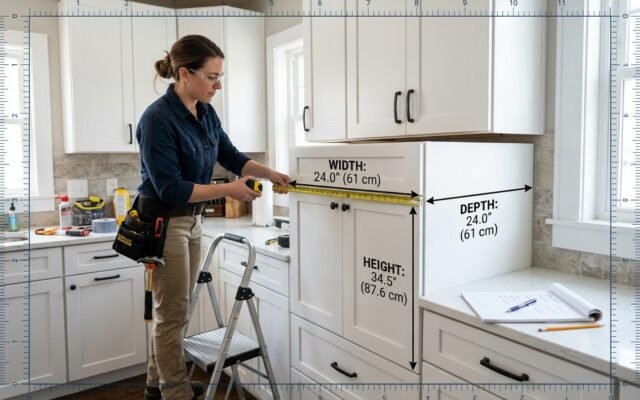
Snap a crisp chalk benchmark line on your drywall exactly 34-1/2 inches above the highest floor point across the entire perimeter. Standard factory base cabinets stand 34.5 inches tall without countertops. When your fabricator adds a standard 1.5-inch thick quartz or granite top, your counter reaches the standard 36-inch ergonomic height.
Go to your floor high point and measure up exactly 34-1/2 inches on the wall. Adjust your laser level tripod until the horizontal beam cuts directly through this mark, projecting a level datum line across every wall. Trace this line onto your drywall with a 48-inch level or chalk snap line.
Every cabinet in your kitchen will align its top edge with this line. In low spots where the floor drops, you will insert shims beneath the cabinets to raise their top rails up to meet the 34.5-inch mark. Review our breakdown of kitchen base cabinet sizes to confirm factory box dimensions before fastening.
Use an electronic stud finder to locate every wall stud between 6 inches and 36 inches off the floor. Draw vertical pencil lines along stud centers to prepare for solid wood fastening.
Rule 3: Start at the Corners
Always install your corner cabinet or blind corner base box first, because it fixes the 90-degree reference angle for both intersecting wall runs. Starting in the middle of a wall run creates alignment drift that leaves your corner cabinet pinched or racked out of square.
Drywall corners are rarely square. Mud buildup and framing shifts often create 88-degree or 92-degree angles. When you set a square corner box into a tight corner, the back corner hits the wall before the face frames align with your layout line.
Place your corner cabinet into position and align its top edge to your 34.5-inch reference line. If the corner is wider than 90 degrees, place shims behind the cabinet back to keep the face frame parallel to your layout line. If the corner is tighter than 90 degrees, pull the cabinet out slightly and install a corner filler strip so doors clear hardware on adjacent walls.
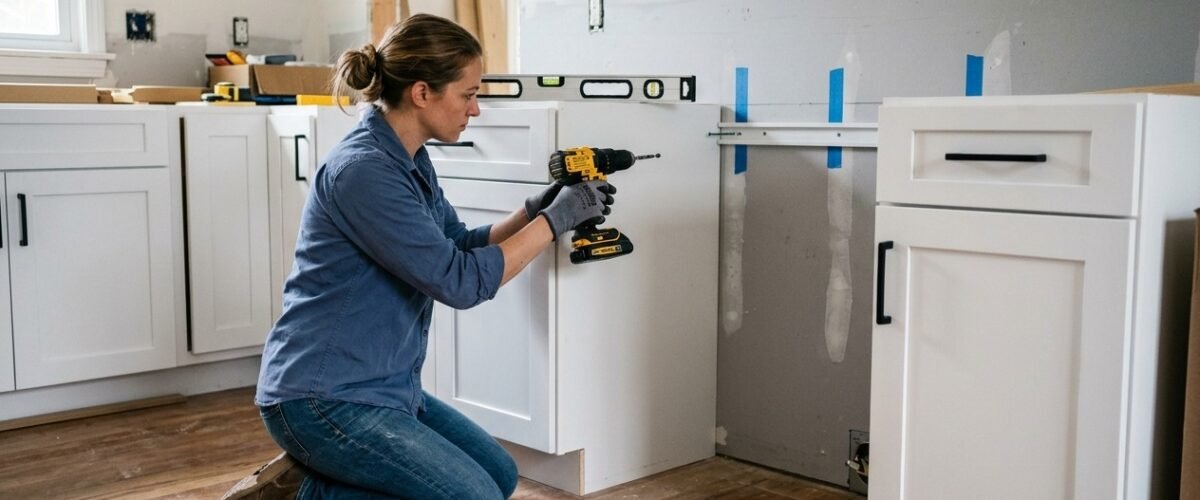
Level the corner unit in all directions using composite shims beneath the base platform. Drive two #10 washer-head screws through the upper hanging rail into the wall studs, leaving them slightly loose for final adjustments when joining adjacent boxes.
Rule 4: Always Level Side-to-Side and Front-to-Back
Every individual cabinet must sit dead level across the front face frame and along the side panels from front to back. A cabinet that is level across its face but tilted forward causes heavy drawers to roll open automatically and strains wall fasteners.
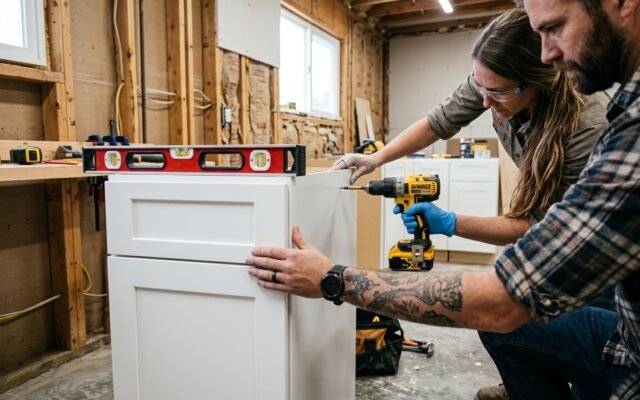
Place a 24-inch level on top of the cabinet face frame to check side-to-side alignment, then place it along the side gable to check front-to-back plumb. Insert composite shims under the cabinet base from both front and rear corners, placing shims directly beneath vertical load-bearing side panels.
Never use wood shims under base cabinets. Wood shims compress under stone countertops and absorb moisture from floor cleaning, causing joints to sag over time. Composite shims support up to 2,000 pounds without crushing and never rot. For advanced leveling techniques, read our guide on how to level kitchen base cabinets on an uneven floor.
Clamp adjacent face frames together with dedicated cabinet clamps until the faces and top edges are completely flush. Pre-drill 1/8-inch pilot holes through the face frame sides, countersink the holes, and drive 2-1/2 inch screws to join the cabinets into a rigid continuous bank.
Rule 5: Fasten to Studs, Not Drywall
Secure cabinet mounting rails directly into structural wall studs using heavy-duty 2-1/2 inch to 3-inch washer-head cabinet screws. A 36-inch base cabinet filled with cookware and topped with heavy stone exerts massive downward shear and outward rotational pull on wall fasteners.
Drywall anchors and toggle bolts pull through sheetrock under dynamic kitchen weight. Every cabinet box requires at least two screws through the upper hanging rail and two screws through the lower rail directly into solid wood framing, achieving at least 1-1/2 inches of stud penetration.
Avoid standard drywall screws. Drywall screws are made from brittle hardened steel that snaps under lateral shear loads when cabinets settle. Use dedicated #10 GRK cabinet screws with broad washer heads that clamp the back rail firmly against the wall without pulling through the back panel.
If a narrow cabinet falls between two studs where direct fastening is impossible, clamp its face frame tightly to neighboring cabinets on both sides. Drive four connecting screws through the face frames to suspend the unit securely between stud-mounted boxes.
Rule 6: Scribe Your End Panels
Scribe finished side panels and filler strips with a pencil compass to copy the exact profile of wavy walls before cutting. Taped drywall seams, corner beads, and warped studs create wall bows up to 3/8 inch along a cabinet run.
Pushing a factory-square end panel against an uneven wall leaves dark, unsightly gaps along the back edge. Professional installers use oversized finished panels scribed directly to the wall contour for a clean fit without caulk.
Clamp your decorative end panel to the side of the cabinet box, holding it plumb with a level. Measure the widest gap between the panel and the drywall, and set your scribing compass to that exact dimension.
Run the steel compass point down the drywall while the pencil marks the contour onto the panel face. Cut along the pencil line with a fine-tooth jigsaw tilted at a 5-degree back-bevel so the front edge of the panel seats tightly against the wall surface.
Rule 7: Leave Gaps for Appliances
Maintain exact manufacturer rough-in dimensions plus a 1/4-inch to 3/8-inch clearance margin for dishwashers, ranges, and refrigerators. Overlooking appliance clearances is one of the most costly DIY remodeling mistakes.
For standard 24-inch dishwashers, leave a 24-1/4 inch clear opening between finished cabinet gables, and ensure 34-1/2 inches of vertical clearance from the floor to the counter underside. Install a moisture-resistant finished side panel on exposed dishwasher sides to protect cabinet cores from steam.
For freestanding 30-inch ranges, provide 30-1/8 inches of space between face frames. This 1/8-inch buffer prevents range heat from blistering cabinet finishes and allows smooth sliding during cleaning. For refrigerators, check spec sheets for mandatory side and top airflow gaps, typically 1/2 inch on sides and 1 inch on top.
Ensure subfloors inside appliance openings sit level with finished flooring. If flooring is installed after setting cabinets, run flooring under appliance bays or install plywood buildup risers to match finished floor height.
4 Common Base Cabinet Installation Mistakes to Avoid
Steer clear of these four critical installation traps that can ruin your cabinet setup:
- Over-tightening screws into bowed walls: Driving screws tight against a recessed wall bows the cabinet box out of square. Always insert shims behind mounting rails at stud locations before tightening screws.
- Trimming cabinet bottoms to match uneven floors: Cutting box bottoms alters toe kick heights and compromises factory joinery. Always raise low cabinets with composite shims up to your high point benchmark line.
- Skipping face frame alignment clamps: Holding face frames flush by hand while driving screws allows boxes to slip, creating uneven seams that catch clothing. Use dedicated cabinet clamps every time.
- Forgetting utility cutouts before hanging: Measure and cut openings for sink plumbing lines, drain stub-outs, and electrical boxes while cabinets rest flat on your workbench, not after mounting them to the wall.
Frequently Asked Questions
How do you level kitchen base cabinets on an uneven floor?
Find the highest point of the subfloor using a 360-degree laser level and mark your reference line 34-1/2 inches above that point. Position your first cabinet over the high point, then insert heavy-duty composite shims beneath subsequent boxes to raise them up to meet the level benchmark line.
What size screws should you use to install base cabinets?
Use #10 by 2-1/2 inch or 3-inch cabinet installation screws with built-in washer heads. The broad washer head clamps the mounting rail securely against the wall without sinking through the back panel. Never use brittle drywall screws, which can snap under heavy stone countertop weight.
Do you install upper or lower cabinets first?
Installing upper wall cabinets first prevents you from leaning over or damaging installed base cabinets below while lifting heavy upper boxes. However, if you establish your high-point reference lines first, either order works smoothly as long as you protect finished surfaces with moving blankets.
Can you install base cabinets directly on top of finished hardwood flooring?
Yes, nail-down solid hardwood and glued engineered hardwood support base cabinets directly. However, floating click-lock vinyl or laminate floors must never have heavy cabinets installed on top of them because the extreme weight pins the floor in place, preventing thermal expansion and causing planks to buckle.