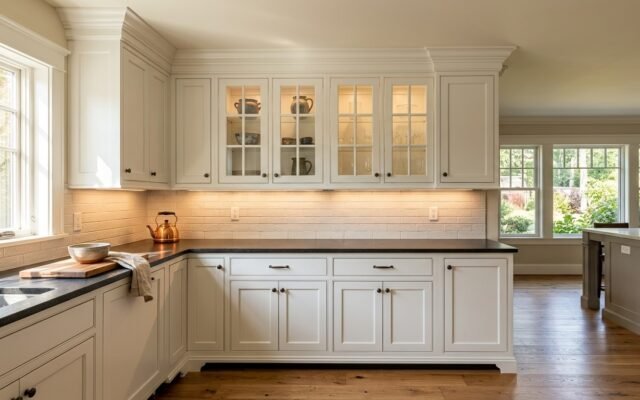
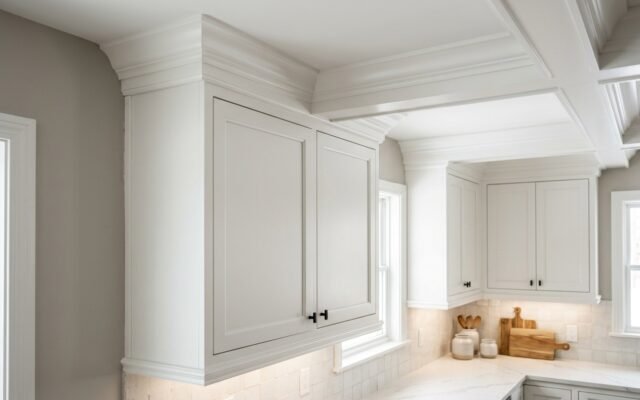
In addition, mastering the technique of installing base cabinets represents the defining skill of any quality kitchen remodel. Base cabinets bear immense weight from granite or quartz countertops. In addition, they anchor appliances and establish the plumb, level plane for wall cabinets above. Furthermore, when you set base cabinets accurately, countertops sit flat without epoxy shims. Furthermore, drawer slides glide effortlessly without racking or binding. Conversely, sloppy installation causes cracked stone countertops, sagging boxes. In addition, misaligned doors that refuse to close cleanly.
In addition, professional kitchen installers follow a systematic sequence on every job site. Specifically, they find the high floor spot, scribe cabinet boxes to wavy drywall. In addition, lock face frames together securely. In this comprehensive step-by-step masterclass, we break down tools, fastening standards, scribing methods. In addition, subfloor anchor techniques so your cabinet install lasts a lifetime.
For a focused look at this topic, see How to Install Kitchen Base Cabinets: Step-by-Step Guide and DIY Base Cabinet Installation: 7 Rules for Level & Solid Setup.
Tools, Fasteners, and Preparation Essentials
Before unboxing a single cabinet box, assembling the right commercial-grade tooling is essential. In addition, setting kitchen cabinets requires specialized tools designed to measure long straight lines and secure structural joinery. Cutting corners with improper tools produces frustrating alignment errors.
| Tool / Fastener | Specification / Model | Primary Function | Contractor Recommendation |
|---|---|---|---|
| Cross-Line Laser Level | Bosch GLL3-330CG or DeWalt DW089LG | Projects 360-degree level datum line | Essential for mapping high floor spots |
| Precision Box Level | Stabila 196 Series 48-inch & 96-inch | Verifies plumb across multiple boxes | Dead-straight aluminum frame |
| Cabinet Installation Screws | GRK Fasteners #8 x 2-1/2 or 3-inch W-Cut | Anchors cabinet hanging rail into studs | Never substitute drywall screws |
| Face Frame Clamps | Bessy or Jorgensen Cabinet Claws | Aligns and clamps stiles flush | Integrated pilot hole drill guide |
| Trim Head Screws | FastenMaster #7 x 2-1/4 trim screws | Joins face frames invisibly | Small head countersinks behind hinges |
| Composite Leveling Shims | Timber Wolf or Wobble Wedge composite | Levels cabinet feet on uneven floors | Will not rot, compress, or absorb water |
Spirit Levels, Cross-Line Lasers, and Straightedges
In addition, precision leveling tools form the backbone of cabinet installation. While a standard 24-inch torpedo level works for minor plumbing tasks, it is completely inadequate for aligning a 15-foot run of cabinetry. Instead, professional installers rely on continuous 48-inch and 96-inch precision box beam levels.
In addition, self-leveling cross-line laser levels have revolutionized modern cabinet positioning. In addition, mounting a green-beam laser level on an adjustable tripod projects a level reference line across all four kitchen walls simultaneously. This unbroken laser line provides an instant visual reference point for measuring floor slope and checking vertical wall plumb.
Why Drywall Screws Fail (Fastener Engineering Specs)
In addition, one of the most dangerous rookie mistakes in cabinet installation is using standard black drywall screws to secure cabinet boxes to wall studs. Drywall screws are manufactured from hardened, brittle steel designed solely to pull drywall paper tight against timber framing under minimal load. Consequently, drywall screws have virtually zero shear strength.
In addition, when heavy quartz countertops and loaded cast iron dishware bear down on cabinets, the downward shear force easily snaps brittle drywall screw heads right off. Instead, building codes require specialized cabinet installation screws. Quality cabinet screws feature heavy-gauge #8 or #10 hardened steel shafts, deep washer heads that prevent pull-through. In addition, specialized thread cuts that grip framing timber securely.
Composite Shims vs Wood Shims for Wet Kitchen Environments
In addition, shims bridge the gap between perfectly level cabinet boxes and crooked building floors. Historically, carpenters snapped tapered cedar or pine shims to level cabinet frames. However, wood shims suffer from severe long-term drawbacks in residential kitchens.
In addition, wood shims compress over time under heavy granite loads, causing subtle cabinet sagging. Furthermore, if an under-sink plumbing drip or dishwasher overflow occurs, wood shims absorb moisture, swell. In addition, develop organic mold rot. In contrast, modern composite plastic shims maintain exceptional compressive strength up to 8,000 PSI. Furthermore, they do not compress, rot, or absorb water, ensuring permanent stability.
Face Frame Clamps and Alignment Jigs
In addition, pulling adjacent cabinet face frames perfectly flush requires specialized mechanical clamping force. Standard bar clamps tend to twist face frames out of plane when tightened down. Furthermore, professional installers use dedicated cabinet claw clamps that apply pressure in two directions simultaneously.
Specifically, cabinet claw clamps squeeze the front face edges flush while pulling the side stiles together tightly. In addition, many commercial claw clamps incorporate a swinging pilot hole drill guide. This guide lets you pre-drill and drive fasteners through the stiles without removing the clamp, guaranteeing flawless joint alignment.
Finding the High Spot on Your Subfloor
In addition, no concrete slab or timber subfloor in existence is completely flat. Settling foundations, framing variations. In addition, warped subfloor joists create floor waves of 1/2 inch or more across a typical kitchen. Installing base cabinets without mapping these floor waves first guarantees disaster.
Mapping the Room Perimeter with a Cross-Line Laser
The very first physical step in base cabinet installation is finding the single highest point on the kitchen floor along the cabinet footprint. In addition, set up your cross-line laser in the center of the kitchen and lock it at approximately 36 inches above the floor. Take a tape measure and a pencil. In addition, walk the perimeter wall where cabinets will sit.
In addition, place the tape measure vertically against the wall with the base touching the subfloor. Note the exact measurement mark where the laser beam intersects the tape. Furthermore, take readings every 2 feet along the entire cabinet run. The location where the tape measure reading is smallest represents your highest floor point. Because the subfloor is closest to the laser beam.
Establishing the Benchmark Level Line at 34.5 Inches
In addition, once you identify the highest floor point, use a pencil to make a mark exactly 34.5 inches up from the subfloor at that exact spot. Standard manufactured base cabinets measure precisely 34.5 inches tall without countertops. Furthermore, this mark represents your benchmark level datum line.
Next, adjust your laser level tripod so the horizontal beam hits this 34.5-inch benchmark mark. In addition, use a 4-foot spirit level or a chalk line to snap a crisp reference line along all walls at this exact elevation. This line indicates the exact height where the top edge of every cabinet box must align. Furthermore, every cabinet in the room will be shimmed upward to meet this line, ensuring zero cabinets need cutting down.
Dealing with Severe Floor Runout and Uneven Tile
In addition, occasionally, an older home features a floor that slopes by 1 inch or more over a short 10-foot run. If you set the benchmark line at 34.5 inches above the high spot in this scenario, the cabinet at the low end will require a 1-inch thick stack of shims beneath its base. Furthermore, a 1-inch void looks unsightly and exposes gaps beneath standard toe kick moldings.
In addition, in severe situations, you have two professional options. You can pour self-leveling underlayment compound over the low subfloor area before installation. Alternatively, you can drop the benchmark line by 1/4 inch and trim a slight slice off the bottom toe kick stiles of the high-spot cabinet. Furthermore, this compromise minimizes the maximum shim height required at the opposite end of the room.
Scribing Cabinet Bases to Avoid Massive Shim Stacks
In addition, when high floor bumps occur in the middle of a cabinet run, shimming the outer ends leaves large voids. Experienced carpenters scribe the bottom edges of the cabinet base directly to the contour of the floor. Furthermore, setting the cabinet over the high spot and using a compass allows you to trace the floor wave onto the cabinet base.
After tracing the line, remove the cabinet and bevel-cut the bottom plywood edge using a jigsaw or power planer. In addition, cutting the cabinet base to match the floor hump drops the box down into position. This eliminates unsightly shims and ensures the entire cabinet base makes solid physical contact with the subfloor.
Locating and Marking Wall Studs
In addition, cabinet boxes carry substantial dead weight. However, loaded interior shelving and heavy stone countertops place massive tension on the upper wall anchors. Every cabinet must be fastened directly into solid wall studs with heavy-duty structural screws.
Magnetic and Deep-Scan Electronic Stud Locators
In addition, finding studs through 1/2-inch or 5/8-inch drywall requires reliable detection tools. Professional installers use two complementary tools: a rare-earth magnetic stud finder and a multi-sensor electronic deep-scan locator. Furthermore, magnetic finders locate the steel drywall screws holding the wallboard to the timber studs.
In addition, once you locate the drywall fasteners, use the electronic scanner to map the left edge, center. In addition, right edge of each 2×4 stud. Standard residential framing places studs at 16 inches on center, although 24-inch spacing occurs in some interior partition walls. Furthermore, draw clear vertical pencil lines extending from the floor up to 36 inches high along the centerline of each stud.
Plumb Stud Verification and Wall Bowing Checks
After marking stud locations, take an 8-foot level or straightedge and place it horizontally across the wall at 30 inches above the floor. In addition, kitchen walls are rarely flat. Studs often bow inward or outward. Furthermore, this creates hollows and high crowns in the drywall surface.
In addition, if you screw a flat cabinet box tightly against a bowed wall, the cabinet box will distort, twisting the face frame out of square. Mark the drywall high spots and hollow depressions on your wall layout. When mounting cabinets across hollow spots, you must slide shims behind the cabinet back panel before tightening screws. Furthermore, this prevents pulling the box out of square.
Adding Backer Blocking in Remodel Framing
In addition, if you are gutting a kitchen down to bare studs during a full renovation, seize the opportunity to install solid wood horizontal backing. Cut 2×6 framing lumber to fit between the wall studs, mounting the boards flat against the wall plane at 32 inches above the subfloor.
In addition, installing continuous 2×6 backer blocking eliminates the frustration of narrow cabinet boxes falling between stud bays. When you have continuous solid wood behind the drywall, you can drive heavy cabinet mounting screws at any point across the entire width of the cabinet back panel without hunting for studs.
Electrical and Plumbing Clearances Behind the Back Panel
Before driving 3-inch structural screws into wall framing, always verify what runs inside the wall cavity behind your layout. In addition, kitchen walls contain vertical water supply copper, PVC waste stacks. In addition, heavy 12-gauge electrical wiring runs powering countertop outlets.
In addition, standard building codes mandate that electrical wiring running through bored stud holes must sit at least 1.25 inches back from the stud face or be protected by steel nail plates. Driving a 3-inch screw straight into the center of a 3.5-inch deep 2×4 stud leaves only 1/2 inch of clearance. Furthermore, always maintain awareness of pipe and wire routes to prevent expensive plumbing leaks and electrical shorts.
Installing the First Cabinet (The Cornerstone Step)
In addition, the sequence in which you install cabinet boxes dictates the success of the entire kitchen run. You must always begin installation at a corner cabinet or from the highest point of the floor run.
Why Starting from the Corner or High Spot Is Mandatory
In addition, never start installing cabinets in the middle of a straight wall run. If your kitchen layout includes an L-shape or U-shape, the corner cabinet must always go in first. Corner cabinets establish the 90-degree square intersection for both adjoining walls.
In addition, if your layout is a straight galley run with no corners, begin at the cabinet sitting over the highest floor spot. Setting the high cabinet first establishes the benchmark height. Every subsequent cabinet will be shimmed upward to meet the high cabinet, ensuring smooth horizontal alignment across the entire run.
Shimming the Base to the Benchmark Line
Slide the first cabinet box into position against the wall. In addition, check the top edge of the cabinet against the benchmark line marked on the drywall. If the cabinet sits on the high spot, its top edge should align with the line. Furthermore, if it sits on a slight floor slope, slide composite shims beneath the bottom base rails.
In addition, place shims directly under the front and rear structural sidewalls of the cabinet. Use your 4-foot level to verify level across the front face, level along the side rails. In addition, vertical plumb on the face frame stiles. Furthermore, adjust the shim depth until the cabinet bubble rests centered in all three dimensions.
Fastening Through the Hanging Rail into Wall Studs
In addition, high-quality base cabinets feature a solid wood or plywood hanging stretcher rail measuring 3/4 inch thick running horizontally across the top inside rear of the box. Pre-drill 1/8-inch pilot holes through this rear hanging rail directly aligned with your marked wall stud centerlines.
In addition, drive 2-1/2 inch or 3-inch cabinet washer-head screws through the hanging rail and drywall into the wood studs. Do not tighten the screws fully on the first pass. Leave the screws slightly loose so you can make fine shimming adjustments as you tie in the adjacent cabinet boxes.
Checking Front-to-Back and Diagonal Plumb
Before locking the first cabinet firmly in place, double-check front-to-back level. A cabinet can sit level across its front face while leaning forward away from the wall. In addition, if a base cabinet leans forward, drawers will slide open by themselves under gravity.
In addition, place your 24-inch level along the top side edge of the cabinet box from front to back. If the cabinet tilts forward, slide shims behind the rear hanging rail until the bubble centers. Furthermore, once all four corners sit plumb, drive the mounting screws snug against the back panel without over-torquing.
Joining Adjacent Cabinet Boxes and Face Frames
In addition, once the cornerstone cabinet is secured, each subsequent cabinet box must be locked tightly to its neighbor. Seamless face frame joints make individual cabinet boxes look like a single piece of custom architectural furniture.
| Measurement Plane | Maximum Permissible Deviation | Verification Method | Correction Technique |
|---|---|---|---|
| Top Horizontal Run | 1/16-inch across 8 feet | 96-inch precision straightedge | Adjust base shims beneath side rails |
| Face Frame Front Plane | 1/32-inch flush alignment | Finger test across joint seam | Clamp with face frame claws before screwing |
| Vertical Stile Plumb | 1/16-inch over 34.5 inches | 48-inch spirit box level | Shim rear cabinet hanging rail |
| Box Squareness | 1/16-inch diagonal difference | Cross-corner tape measurement | Loosen wall screws and square box frame |
Clamping Face Frames Flush with Jorgensen or Bessey Claws
Slide the second cabinet box into position beside the first cabinet. Before fastening the second cabinet to the wall, focus on joining the two touching face frames together. In addition, align the top edges and front faces of the two vertical hardwood stiles.
In addition, attach two cabinet claw clamps across the joint, one near the top and one near the bottom of the face frame. Tighten the alignment screws on the clamps until the front surfaces of the two stiles feel smooth and flush when you drag your finger across the seam. Furthermore, the joint should be tight without visible gaps.
Pre-Drilling and Countersinking Trim Head Screws
In addition, hardwood face frame stiles are typically milled from solid maple, oak, or cherry. Driving a screw into hardwood stiles without pre-drilling will split the timber frame instantly, ruining the face frame. Furthermore, pre-drilling is completely mandatory.
In addition, use a 1/8-inch tapered drill bit with an integrated countersink collar to drill through the side of one stile into the center of the adjacent stile. Position the screw holes behind hinge mounting plates whenever possible to conceal fasteners. Furthermore, drive #7 x 2-1/4 inch trim-head screws snugly into the pilot holes until the screw heads countersink 1/16 inch below the wood surface.
Eliminating Gaps in Frameless European Cabinetry
In addition, in frameless European-style cabinetry (full overlay boxes), there are no hardwood face frames. Instead, the raw 3/4-inch plywood or particleboard sidewalls of adjacent cabinets butt directly against each other. Joining frameless boxes requires a different fastening method.
In addition, clamp the two box sidewalls together with spring clamps or flat jaw clamps. Drill clearance holes through the existing 5mm shelf pin holes using a brad-point drill bit. Furthermore, thread specialized two-piece nickel-plated architectural connecting bolts (sex bolts) through the shelf holes. Tighten the sleeve bolts with a screwdriver to clamp the sidewalls together seamlessly.
Aligning Box Floors for Seamless Shelf Pin Placement
In addition, when clamping adjacent cabinet boxes together, verify that the bottom interior floors sit flush with one another. If one cabinet floor sits 1/8 inch higher than its neighbor, internal pull-out wire baskets and kickboard trim will look crooked.
Check the bottom floor alignment with a small torpedo level before driving connector screws through the stiles. In addition, if one box sits low, tap composite shims under that specific cabinet foot until the interior floors align. Once the face frames and floors are locked together, secure the second cabinet to the wall studs.
Scribing End Panels and Fillers to Out-of-Plumb Walls
Drywall corners are notorious for bowing out of square, especially where taped seams accumulate thick drywall joint compound. In addition, when a cabinet run terminates against a side wall, you must scribe filler strips to achieve a tailored architectural finish.
Transferring Wall Contours with an AccuScribe Tool
In addition, filler strips are narrow strips of matching hardwood trim used to bridge the gap between the last cabinet stile and the drywall wall. Never attempt to force a cabinet box tight into an irregular drywall corner. Instead, leave a 1.5-inch to 3-inch gap for a custom scribed filler.
In addition, clamp the filler strip to the cabinet face frame so it overlaps the wall gap. Place a scribing tool or drafting compass with the metal point touching the drywall and the pencil lead touching the filler strip. Furthermore, drag the compass down the wall from ceiling to floor, allowing the pencil to record every bump and wave in the drywall onto the wood filler face.
Bevel-Cutting Filler Strips with a Jigsaw or Track Saw
In addition, once the scribe line is marked on the filler strip, remove the wood for cutting. If you cut the line at a 90-degree square angle, the back edge of the wood might strike a drywall high spot before the front face touches the wall.
In addition, to avoid this problem, set your jigsaw or track saw blade to a 5-degree to 7-degree back bevel. Cut along the pencil line so the rear edge of the filler is narrower than the front face. Furthermore, this back bevel ensures that only the sharp front face edge makes contact with the drywall. This creates a seamless joint without binding.
Sanding to the Scribe Line for Tight Architectural Fit
In addition, cutting freehand with a jigsaw often leaves subtle blade chatter marks along the timber edge. Use a belt sander or random orbital sander loaded with 80-grit ceramic sandpaper to smooth the cut edge right down to the pencil line.
In addition, test-fit the scribed filler strip against the wall. If any high spots hold the filler away from the drywall, mark them lightly and sand down the high areas. Furthermore, a properly scribed filler strip fits tight against the drywall without caulking.
Securing Fillers Flush with Cabinet Stile Faces
After achieving a tight fit against the drywall, anchor a solid wood cleat to the cabinet box sidewall 3/4 inch back from the face frame edge. In addition, slide the scribed filler strip into position, aligning its front face flush with the cabinet face frame.
In addition, clamp the filler to the cabinet stile and pre-drill pocket pilot holes through the rear support cleat into the back of the filler strip. Drive 1-1/4 inch screws from behind to secure the filler without creating visible screw holes on the front finished face.
Fastening Peninsula and Island Base Cabinets to the Subfloor
While perimeter base cabinets derive enormous structural support from wall studs, kitchen islands and peninsulas float freely in the center of the room. In addition, securing island cabinets firmly to the subfloor prevents tipping when heavy stone countertops are installed.
Building Internal 2×4 Subfloor Anchor Sleepers
In addition, island cabinets cannot simply be screwed to finished flooring. Doing so risks tearing the flooring material under lateral loads. Instead, professional contractors build internal wooden anchor cleats, often called 2×4 sleepers, directly on the subfloor.
In addition, measure the interior toe kick cavity beneath the island cabinet boxes. Cut 2×4 framing lumber to fit snugly inside the perimeter of the cabinet base recesses. Lay these 2×4 cleats onto the subfloor and trace their positions carefully before securing them permanently.
Concrete Slab Fastening with Tapcon Anchors
In addition, in homes built on concrete slab foundations, securing anchor sleepers requires specialized masonry fasteners. Position your cut 2×4 wood sleepers on the bare concrete slab and drill pilot holes through the wood into the slab using a hammer drill and masonry bit.
In addition, drive 1/4-inch diameter by 3-1/4 inch long Tapcon masonry screws or steel drop-in expansion wedge anchors through the timber cleats into the concrete. Verify that the sleepers sit solid without rocking. Furthermore, once the cleats are locked to the slab, lower the island cabinets over the cleats and drive screws through the cabinet base into the sleepers.
Wood Subfloor Lag Screws and Structural Strapping
In addition, on timber-framed subfloors, securing island sleepers is straightforward. Locate the underlying floor joists beneath the 3/4-inch plywood subfloor using a stud sensor or floor screw layout. Furthermore, whenever possible, align your anchor screws directly into floor joists.
In addition, drive 5/16-inch structural lag screws or heavy-duty construction screws through the 2×4 cleats into the floor joists. If an island cabinet sits entirely between joist bays, apply structural construction adhesive beneath the cleats and secure them with multiple structural screws driven into the subfloor at opposing 45-degree angles.
Electrical Conduit and Island Venting Pass-Throughs
In addition, kitchen islands almost always house electrical power outlets to satisfy electrical codes. In addition, many incorporate cooktops or prep sinks. Mark all plumbing pipe stubs and electrical conduit sleeves on the bottom floor of your island cabinets before setting the boxes in place.
In addition, use a hole saw to cut clean clearance openings through the bottom cabinet panel. Allow an extra 1/2 inch of diameter around plumbing pipes to allow fine positioning adjustments. Furthermore, slide the island cabinet down over the utility lines and verify that no wiring pinches against the subfloor sleepers.
Countertop Preparation and Final Quality Inspections
Before calling the stone fabricator to laser-template your countertops, you must perform a comprehensive quality control audit. In addition, countertop installers will refuse to install expensive stone if the cabinet plane is uneven or unlevel.
| Inspection Item | Quality Standard | Potential Consequence of Failure |
|---|---|---|
| Continuous Top Plane | Flat within 1/16 inch across 8 feet | Cracked quartz or uneven countertop seams |
| Shim Trimming | Cut flush behind toe kick line | Interferes with toe kick trim installation |
| Wall Anchor Security | Two #8 screws per stud per box | Cabinet pulls away from wall under load |
| Door Hinge Adjustment | Consistent 1/8-inch reveal gaps | Cabinet doors rub and scratch finish |
8-Foot Straightedge Plane Verification (Max 1/16-Inch Tolerance)
In addition, place an 8-foot precision straightedge or long box beam level across the top edges of your installed base cabinets. Slide the straightedge along the entire length of the kitchen run, looking for any hollows or high spots beneath the metal beam.
In addition, industry standards established by the Natural Stone Institute permit a maximum vertical deviation of only 1/16 inch across an 8-foot span. If a cabinet box sits high, loosen the wall screws and tap down the high point. Furthermore, if a low spot exists, slide shims beneath the cabinet base rails until the top plane sits flat.
Trimming Shims Flush and Installing Toe Kick Skins
In addition, once all cabinet boxes are secured and checked for level, trim off the protruding ends of your composite leveling shims. Score each shim along the cabinet base edge with a sharp utility knife and snap it off flush. Furthermore, alternatively, use an oscillating multi-tool fitted with a flush-cut wood blade to slice the shims flush with the toe kick frame.
After trimming shims, install the finished toe kick skins across the front base recesses. In addition, cut the thin veneer toe kick boards to length, apply dots of construction adhesive along the rear. In addition, fasten them into the cabinet base with an 18-gauge brad nailer using 1-inch nails.
Door and Drawer Front Re-Hanging and Micro-Adjustments
In addition, remove the protective cardboard and re-hang all cabinet doors and drawer boxes. Modern European concealed hinges feature three-way cam screw adjustments that allow you to fine-tune door alignment with a standard screwdriver.
In addition, turn the horizontal cam screws to align the vertical gaps between adjacent doors, maintaining a consistent 1/8-inch reveal. Turn the vertical cam screws to align the top edges of all doors flush with neighboring drawer fronts. Finally, adjust the depth screws to pull doors tight against the face frame bumpers for silent operation.
Wall Cabinets, Shelves, and Installation Tools
Base cabinets are only half the install. The wall cabinets above them, the shelves inside the boxes, and the tools you bring decide whether the kitchen goes up straight or fights you at every step.
How to Put Cabinets on the Wall
How to put cabinets on the wall starts with a ledger board: screw a straight 1×4 to the wall at the height of the bottom of the uppers, so the cabinets rest on it while you fasten them. Find the studs, mark them, and drive cabinet screws through the hanging rail into every stud the cabinet crosses. Hang the uppers before the bases, because the bases would block your ladder and your drill angle. For the heights, see our Kitchen Upper Cabinet Height guide, and for the full install sequence, see Installing Kitchen Cabinets.
Kitchen Cabinet Shelves: Adjustable, Half-Depth, and Fixed
Kitchen cabinet shelves are usually adjustable on shelf pins set in holes drilled every 32 mm, which lets you move a shelf to fit tall items. Half-depth shelves leave the back half of the cabinet open for tall items stored behind them, and fixed shelves are glued or dadoed in for strength in wide cabinets. Set the shelf pin holes before you install the box, because drilling them after the cabinet is on the wall is awkward and inaccurate.
Kitchen Cabinet Installation Tools Checklist
The kitchen cabinet installation tools you need are: a 4-foot spirit level and a cross-line laser for the benchmark line, a drill and driver with cabinet screws, face frame clamps to hold boxes flush, composite shims for leveling, a stud finder, a tape measure, and a jigsaw or track saw for scribing fillers. A second person helps for wall cabinets, because holding a 30-inch upper level while driving screws is a two-hand job even with a ledger board.
Frequently Asked Questions About Installing Base Cabinets
Do you install upper or lower cabinets first?
Most professional contractors install upper wall cabinets first. Installing upper cabinets first allows you to stand directly beneath the hanging work area without leaning awkwardly over lower base cabinets. However, in tight kitchens, installing base cabinets first allows you to rest support jacks on the base boxes.
What screws should I use to install base cabinets?
In addition, always use specialized #8 or #10 cabinet installation screws measuring 2-1/2 to 3 inches long with large washer heads. Never use standard drywall screws. Because they lack shear strength and will snap off under the heavy weight of stone countertops and stored dishes.
How far off level can base cabinets be for granite countertops?
In addition, base cabinets must be level and flat within 1/16 inch across an 8-foot run according to Natural Stone Institute guidelines. Excessive variations will stress stone slabs, potentially causing granite or quartz seams to crack during installation or daily use.
Should base cabinets be screwed to the floor?
In addition, perimeter base cabinets mounted against walls are anchored directly into wall studs and do not need floor screws. However, freestanding kitchen island and peninsula cabinets must be anchored securely to the subfloor using internal 2×4 wooden sleeper cleats.
Do you put flooring under base cabinets or install cabinets first?
Hardwood flooring and glued-down luxury vinyl tile should be installed before base cabinets so appliances slide in easily without height clearance issues. However, floating click-lock floors must be installed after cabinets to allow seasonal floor expansion beneath base molding.
Do you install wall cabinets before base cabinets?
Yes. Install wall cabinets first, because the base cabinets would block your ladder and your drill angle. Rest the uppers on a ledger board screwed to the wall at the bottom height of the cabinets, fasten through the hanging rail into the studs, then install the base cabinets below them.
What tools do you need to install kitchen cabinets?
You need a 4-foot level and a cross-line laser, a drill and driver, cabinet screws, face frame clamps, composite shims, a stud finder, a tape measure, and a saw for scribing fillers. A ledger board and a second person make hanging wall cabinets much easier.
Related Guides
Before you install, check Base Cabinet Height for the 34.5-inch standard, and Cabinet Filler Strips for scribing gaps to the wall. For the full kitchen install, see Installing Kitchen Cabinets.