Painted kitchen cabinets fail in two to three years when the prep is skipped. Do the work right and your finish will meet ANSI/KCMA A161.1 durability standards, surviving 10 years of daily steam, grease, and cleaning. You will need: TSP substitute degreaser, 150-grit and 220-grit sanding sheets, Zinsser BIN shellac primer, Benjamin Moore Advance alkyd paint or Sherwin-Williams Emerald Urethane, a fine-finish roller (4-inch), a Purdy 2.5-inch sash brush, painter’s tape, a tack cloth, and a good respirator.
What You Will Need
| Item | Spec / Product | Why It Matters |
|---|---|---|
| Degreaser | TSP substitute or Krud Kutter | Removes cooking oil that prevents adhesion |
| Sandpaper | 150-grit then 220-grit | Opens pores for primer, smooths raised grain |
| Shellac primer | Zinsser BIN (white shellac) | Seals tannins in oak, stain-blocks knots |
| Bonding primer alternative | Zinsser Bulls Eye 1-2-3 or Stix | Water-based option for MDF doors |
| Topcoat paint | Benjamin Moore Advance (alkyd) or Sherwin-Williams Emerald Urethane | Hard alkyd cure, self-levels, resists scuffs |
| Roller | 4-inch fine-finish foam or microfiber | Produces near-spray-smooth finish |
| Brush | Purdy Clearcut 2.5-inch sash | Cuts in recessed panel details cleanly |
| Tack cloth | Non-oil-based, low-residue | Picks up sanding dust without contaminating surface |
| Respirator | P100 half-mask | Required when spraying shellac or solvent finishes |
Step 1: Strip and Degrease
Remove every door, drawer front, and hinge before touching primer or paint. Label the inside of each door with a pencil number matching a numbered tape flag inside the corresponding cabinet opening. This saves you 30 minutes of guesswork on reinstall day.
Mix TSP substitute at the package ratio, usually 2 tablespoons per gallon of warm water. Wipe every surface with a lint-free cloth, then rinse with clean water and let the wood dry for at least 2 hours at 65 degrees Fahrenheit or warmer. Do not rush this step. Oil from cooking smoke bonds to bare wood and shellac will not stick over a greasy surface, no matter what the label says.
Check: Run a clean white cloth over the wiped surface. If the cloth picks up any yellow or brown residue, degrease again before moving on.
Step 2: Sand to 150-Grit then 220-Grit
Start with 150-grit on factory-finished cabinets. You are not stripping the finish; you are scuffing it so the primer has mechanical tooth. Sand with the wood grain using light, even pressure. On flat door panels, use a sanding block to keep the paper flat. On profile edges and raised details, fold the paper and use your fingertip.
After vacuuming the dust, follow with 220-grit on the flat faces only. The 220 removes the scratch marks left by 150 and gives you the smooth base that produces a glassy topcoat. Wipe with a tack cloth before priming. Do not use a dry microfiber here; tack cloth grabs finer particles.
Check: Sight down the door face with a work light held at a low angle. You should see a uniform dull sheen. Any shiny spots are areas you missed and will show fisheye or adhesion failure under paint.
Step 3: Prime with Shellac or Bonding Primer
Zinsser BIN shellac primer is the professional first choice on wood cabinets, especially oak, cherry, or any species with tannins. Shellac seals tannin bleed, knots, and dark stains in one coat. Apply a thin coat with a brush or small roller, keeping the wet-film thickness at 3 to 4 mils. Shellac flashes in 30 to 45 minutes at 70 degrees Fahrenheit, so you can sand and recoat the same morning.
If you are painting MDF vs plywood cabinet boxes and the doors are MDF, use a water-based bonding primer like Zinsser Bulls Eye 1-2-3 or Insl-x Stix instead. Shellac over MDF edges raises the surface fibers aggressively and takes more sanding to smooth out.
Apply one full primer coat to all surfaces. Let dry completely: 45 minutes for shellac, 2 hours for water-based bonding primer. Then sand lightly with 220-grit and tack off again before paint.
E-E-A-T inspection test: Press your thumbnail firmly into the primed surface. If the primer scratches off in a ribbon under your nail, adhesion is poor and the surface needs another scuff-sand and second prime coat. A properly adhered primer coat resists thumbnail pressure and leaves no mark.
Check: The primed surface should feel slightly chalky and uniform in sheen. Zero bare wood or shiny factory-finish spots should remain visible.
Step 4: Apply the First Coat
Benjamin Moore Advance and Sherwin-Williams Emerald Urethane are the two paints cabinet painters use on high-end residential work for good reason. Both are water-borne alkyd hybrids that self-level, cure hard, and meet the scuff and chemical-resistance benchmarks in ANSI/KCMA A161.1. Advance has a longer open time, around 30 minutes, which gives brush marks more time to flow out. Emerald Urethane cures harder and handles abrasion slightly better in testing.
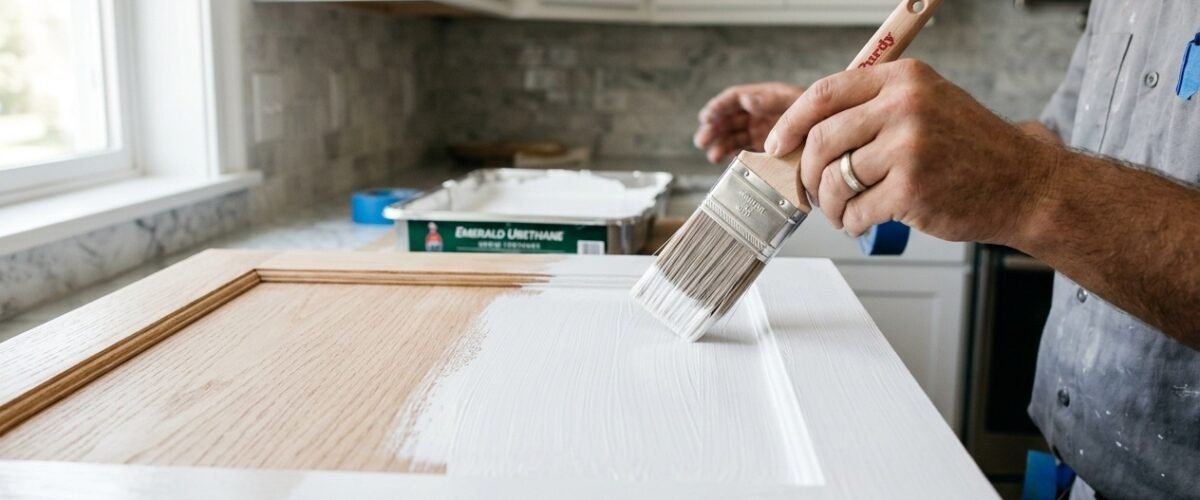
Load the brush and cut in every profile edge and recessed panel detail first. Then immediately roll the flat field with a 4-inch fine-finish roller while the brush cuts are still wet. This wet-into-wet technique prevents visible lap lines between brushed and rolled areas.
Apply at the manufacturer’s stated spread rate: Advance at 400 square feet per gallon, Emerald Urethane at 350 to 400 square feet per gallon. Thin coats prevent sags. A single door panel at roughly 2.5 square feet takes about 1 fluid ounce of paint per coat.
Check: Within 5 minutes of application, check the wet surface under a side light. If you see thick ridges, back-brush lightly to level them. If the paint is already starting to set, leave it alone and sand level after curing.
Step 5: Sand Between Coats
Let the first coat cure for the full time the manufacturer lists, not the dry-to-touch time. Advance requires 16 hours before sanding between coats. Emerald Urethane needs 4 hours minimum at 77 degrees Fahrenheit. Sanding too early pulls the film and creates pilling.
Sand with 220-grit using a sanding block on flat faces. Knock down any dust nibs, roller stipple, or brush marks. You are not removing the coat, just flattening the texture. Vacuum, then tack cloth. Do not skip the tack cloth step here; any dust particle left on the surface becomes a visible bump in coat two.
Check: Run the back of your hand across the sanded surface. It should feel as smooth as a sheet of copy paper. Rough texture means you need another light pass before coat two.
Step 6: Second Coat and Cure Time
Apply the second coat exactly as you did the first: brush details, roll flats, wet into wet. Two coats of Advance or Emerald Urethane deliver a dry-film thickness of about 3 mils total, which is enough for the ANSI/KCMA A161.1 finish durability standard.
If you want a professional spray-quality finish and have the equipment, both paints can be sprayed through an airless at 0.015 to 0.017-inch tip with 1,800 to 2,000 psi. Thin Advance 5 to 10 percent with Flotrol or water per the spec sheet. Do not thin Emerald Urethane more than 10 percent or you break the sheen uniformity.
Cure time matters more than dry time. Advance reaches full hardness in 30 days. Emerald Urethane hits usable hardness in 7 days. During cure, do not hang doors, do not stack painted surfaces, and do not clean with anything stronger than mild dish soap. A finish that feels dry at 24 hours will still dent or peel if you reinstall and slam it on day two.
For comparison, professional cabinet shops spray 2-part acid-catalyzed conversion varnish, which cures chemically in 24 to 48 hours and far exceeds the durability of air-dried lacquer or any water-borne paint. Conversion varnish is not a DIY product because it requires a spray booth, forced-air cure, and an acid catalyst that is hazardous without proper equipment. For a DIY project, Advance and Emerald Urethane are the closest-performing options available without a spray booth.
Check: At 7 days, press a folded piece of paper against the cabinet face and rub firmly 10 times. No color transfer and no surface mar means the cure is on track.
Common Mistakes That Ruin Painted Cabinets
- Skipping the degreaser. Cooking oil is invisible but completely blocks primer adhesion. Every cabinet surface needs a TSP-substitute wash before sanding, full stop.
- Using latex wall paint. Standard interior latex stays soft and peels off cabinet surfaces in 12 to 18 months. Use an alkyd-hybrid cabinet-specific paint like Advance or Emerald Urethane.
- Painting in one thick coat. One thick coat sags, stays soft longer, and traps solvent. Two thin coats always outperform one heavy coat.
- Skipping inter-coat sanding. Without 220-grit between coats, the second coat does not bond as well to the first and the surface stays rough.
- Reinstalling doors before cure. Screw a hinge into a freshly painted door and you will tear the finish around every screw hole. Wait at least 7 days before hardware installation.
- Painting over dark stain without shellac primer. Tannin bleed from oak and cherry will turn a white topcoat yellow within weeks. Shellac primer stops it completely.
- Ignoring humidity. Paint applied above 85 percent relative humidity traps moisture and blushes, turning the finish milky. Check the room with a hygrometer before you start.
Painted Cabinets vs Spray-Finished Cabinets: A Quick Comparison
| Finish Type | Application | Cure Time | Durability | DIY-Friendly |
|---|---|---|---|---|
| Benjamin Moore Advance (alkyd) | Brush and roll | 30 days full cure | Meets ANSI/KCMA A161.1 | Yes |
| Sherwin-Williams Emerald Urethane | Brush, roll, or spray | 7 days usable | Meets ANSI/KCMA A161.1 | Yes |
| Air-dried lacquer | Spray only | 24 hours | Moderate, chips at edges | Possible with HVLP |
| 2-part acid-catalyzed conversion varnish | Spray booth required | 24 to 48 hours chemical cure | Exceeds ANSI/KCMA A161.1 | No |
Frequently Asked Questions
How many coats of paint do kitchen cabinets need?
Two coats of a cabinet-grade alkyd paint over one coat of shellac primer is the minimum for lasting results. Three coats give you extra protection in high-traffic areas like around the dishwasher and sink. Do not exceed three coats without sanding between each; too many layers build up and crack along door edges.
Can you paint over stained cabinets without sanding?
You can use a liquid deglosser to chemically scuff the surface, but sanding with 150-grit still produces better mechanical adhesion. Liquid deglosser alone skips the scratch profile that primer needs to grip. Use deglosser only where sanding is impossible, like deep carved details.
What is the best paint for kitchen cabinets?
Benjamin Moore Advance and Sherwin-Williams Emerald Urethane consistently outperform standard latex in cabinet applications. Both are alkyd hybrids that self-level, cure hard, and resist household cleaners. If you can only pick one, Advance is slightly more forgiving with brush application; Emerald Urethane cures harder faster.
How long do painted kitchen cabinets last?
A properly prepped and primed cabinet painted with an alkyd-hybrid topcoat lasts 8 to 12 years before needing a full repaint. The areas around the dishwasher and stove will show wear first because of heat and steam. A light scuff-sand and single touch-up coat every 3 to 4 years keeps the finish looking fresh without a full redo.
Do I need to use a sprayer or can I brush and roll?
You can get a near-spray-quality result with a 4-inch fine-finish foam roller and a good sash brush. The key is thin coats and wet-into-wet technique: brush the details, roll the flats while the brush marks are still wet, and let the paint self-level. A sprayer is faster on large kitchens, but brush and roll is quieter, produces less overspray, and requires no masking of adjacent surfaces.
You Might Also Like
- MDF vs plywood cabinet boxes: which substrate holds up better under painted finishes.
- Frameless vs framed cabinets: how the box construction changes the painting and finishing process.
- How to install base cabinets: the full step-by-step once your painted doors are cured and ready to hang.
- Cabinet and countertop color combinations: color pairings that work when your painted cabinets are white, gray, or navy.