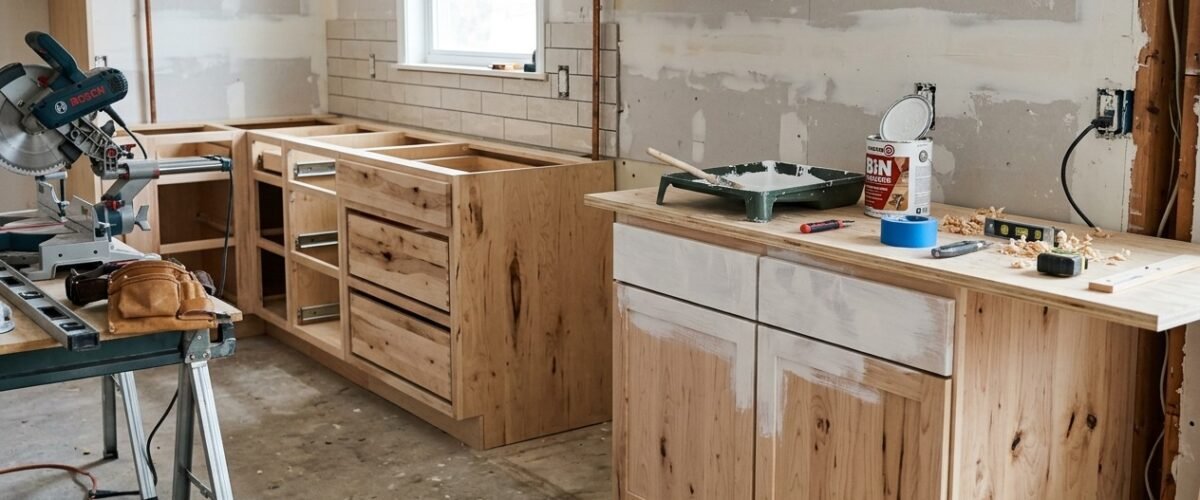
Here’s what the home improvement store won’t tell you when you’re standing in front of a stack of unfinished base cabinets: the money you save on the box itself you will absolutely spend on prep, primer, and paint — and if you skip any of those steps, you’ll be stripping and repainting inside three years. Unfinished cabinets can be a genuinely smart buy, especially for homeowners who want a specific paint color, a custom stain, or a high-end furniture look that pre-finished stock cabinets can’t deliver. But the gap between “I bought unfinished cabinets” and “I have a kitchen that looks as good as pre-finished” is about 20 hours of prep work that nobody warns you about. Here’s what that actually involves.
What “Unfinished” Actually Means Across Different Cabinet Lines
The word “unfinished” covers a pretty wide range. Depending on where you buy, you might get bare solid wood, raw MDF, sanded plywood boxes, or something in between. Here’s what you’ll typically find at each price tier:
| Source | Box Material | Door Material | Surface Condition | Price (30″ base) |
|---|---|---|---|---|
| Big box stores (Hampton Bay, HDC) | Particleboard | MDF or wood composite | Sanded, some mill marks | $180–$320 |
| RTA online retailers (Lily Ann, Cabinetsnow) | Plywood | Solid wood or MDF | Sanded, ready for primer | $240–$480 |
| Local cabinet shops | Plywood or solid wood | Solid wood | Sanded, sometimes pre-primed | $350–$800+ |
| IKEA (frame only, no finish) | Particleboard | Separate door order | White melamine interior | $99–$220 (frame only) |
The most important thing to know: “unfinished” usually applies to the exterior faces and doors. Cabinet interiors on most lines are finished with a white melamine or thermofoil liner — that’s already a sealed surface and doesn’t need painting unless you want a specific interior color. The raw wood surfaces that need your attention are the door faces, drawer fronts, cabinet sides (furniture ends), and face frames.
Wood Species Comparison: What Paints Well vs. What Takes Stain Best
The wood species your unfinished cabinet is made from affects everything: how much prep it needs, how many coats of paint to expect, whether it’ll show grain under paint, and how it accepts stain. Here’s the honest breakdown:
| Species | Paint Result | Stain Result | Grain Telegraphing | Extra Prep Needed |
|---|---|---|---|---|
| Maple | Excellent — tight grain, smooth finish | Poor — blotchy without conditioner | Minimal | Light sanding, one coat primer |
| Birch (plywood) | Very good — common for box material | Fair — better than maple | Minimal to moderate | Light sanding, one coat primer |
| Poplar | Excellent — fast-growing, tight grain | Poor — needs pre-conditioner | Minimal | Light sanding, one coat primer |
| Oak | Fair — open grain shows under paint | Excellent | Significant | Grain filler required for painted look |
| Pine | Fair — knots bleed through | Good — rustic look | Moderate to heavy | Knot sealer essential |
| MDF (composite) | Excellent — best painted surface | N/A (not real wood) | None | Edge sealing required |
If you’re painting, maple and MDF are your best options. If you’re staining for a natural wood look, oak and alder are the go-to choices. The worst combination: painting over oak without grain filler. The open pores in oak telegraphed through paint look like someone dragged a comb through your cabinet doors — and you see it in raking light every time the sun hits the kitchen at the right angle.
The Right Primer Makes or Breaks the Whole Project
Most painting disasters on unfinished cabinets come down to primer selection. There are three types worth knowing about:
- Oil-based primer (like Zinsser Cover Stain): The gold standard for raw wood. It penetrates the wood fibers, seals tannins that bleed through water-based products, and bonds strongly to both the wood and topcoat. Downside: slow dry time (4–8 hours between coats), strong fumes, needs mineral spirits to clean up. Cost: $35–$55/gallon. Use this on any raw wood cabinet that will be painted a light color.
- Shellac-based primer (Zinsser BIN): The best option for pine cabinets or any wood with knots — shellac seals resin pockets that would otherwise bleed brown spots through your topcoat for years. Dries in 45 minutes. Cost: $40–$60/gallon. The downside is that it’s alcohol-based and has significant fumes — use it with ventilation and a proper respirator.
- Water-based bonding primer: Fine for MDF and pre-sanded plywood, not great for raw solid wood. It raises the grain on open-pore woods and doesn’t seal tannins. The big pro: low VOC, easy cleanup, and same-day recoating. Cost: $25–$45/gallon. This is the right choice for MDF doors or pre-primed cabinet boxes.
How many coats? One coat of oil-based primer, lightly sanded (220-grit), then topcoat. On MDF, always two coats of primer because MDF edges absorb primer like a sponge — one coat isn’t enough and the edges will look chalky under your paint color.
Paint Selection: Not Every Paint Belongs on Cabinets
Wall paint is formulated to touch-dry quickly and be easy to roll on. Cabinet paint is formulated to cure hard enough to withstand daily opening, closing, wiping, and moisture exposure. Those are completely different performance specs.
The top choices for unfinished kitchen base cabinets:
- Benjamin Moore Advance (waterborne alkyd): The most recommended cabinet paint by professional painters. It levels out brush and roller marks as it dries, cures to a hard enamel finish, and cleans up with water. Full cure: 30 days. Cost: $75–$90/gallon. Available in any Benjamin Moore color.
- Sherwin-Williams Emerald Urethane Trim Enamel: Direct competitor to Advance. Very similar performance, slightly harder cure. Cost: $85–$100/gallon. If you’re in a Sherwin-Williams store, this is the one to ask for.
- Rust-Oleum Cabinet Transformations or Cabinet Paint Kit: A budget option ($80–$120 for a kit) that works reasonably well for light-duty kitchens. Not as hard-wearing as professional cabinet enamel. Better for a rental or a cabinet run that doesn’t get heavy daily use.
- Oil-based alkyd enamel (traditional): The hardest finish available, but yellows over time — especially on whites and light grays. Best for darker colors where yellowing doesn’t show.
Sheen level: Semi-gloss or satin. Flat and eggshell are too porous and won’t wipe clean. High-gloss shows every brush mark and every dent. Semi-gloss is the industry standard for cabinet faces; satin is fine for interiors if you’re painting them.
What to Avoid: The Shortcuts That Ruin Unfinished Cabinets
These are the mistakes I see most often when homeowners tackle unfinished cabinets without the full picture:
- Skipping sanding between coats: After the primer dries, raised grain and dust nibs create a rough surface. Sand with 220-grit before every topcoat — it takes 20 minutes per cabinet run and the difference in the final surface is not subtle.
- Painting cabinet boxes while installed: Always remove doors and drawer fronts. Paint them horizontally in a garage or basement. Painting vertical surfaces produces drips; painting doors while they’re on the cabinet means you can’t coat the edges properly and the hinges get paint in them.
- Using latex wall paint as a topcoat: It won’t cure hard enough. In 6 months you’ll have paint sticking to itself where cabinet doors contact the face frame — called “blocking.” Then you yank the door open and pull off a chunk of finish.
- Not sealing MDF edges: Raw MDF edges are extremely porous. Without two coats of primer specifically on the edges, they’ll absorb moisture over time and swell — especially on sink base cabinet doors where steam and splashing are constant.
- Painting in a cold garage in winter: Most latex and waterborne alkyd paints won’t cure properly below 50°F. The paint stays soft and tacky for weeks, collects dust, and never develops full hardness. If your garage drops below 50°F, paint indoors or wait for warmer weather.
Cost Comparison: Unfinished vs. Pre-Finished Cabinets
Let’s look at the real math for a typical 10-foot kitchen wall run (about 8 base cabinet boxes):
| Cost Item | Unfinished (DIY Paint) | Pre-Finished Stock | Pre-Finished Semi-Custom |
|---|---|---|---|
| Cabinet boxes (8 bases) | $1,200–$2,400 | $1,800–$3,600 | $3,200–$7,000 |
| Primer (2 gal) | $70–$110 | — | — |
| Paint (2 gal) | $150–$200 | — | — |
| Sandpaper, supplies | $30–$60 | — | — |
| Labor (DIY time, ~20 hrs) | Your time | — | — |
| Professional painter (if hired) | $600–$1,200 | — | — |
| Total (DIY paint) | $1,450–$2,770 | $1,800–$3,600 | $3,200–$7,000 |
The DIY savings are real — typically $500 to $1,500 over pre-finished stock — but only if you do the finishing work yourself and do it right. If you hire a painter, the savings narrow significantly. The strongest case for unfinished cabinets is when you want a custom color that isn’t available in pre-finished lines, or when you want a specific stain tone that matches existing furniture.
Installation Order: Do You Paint Before or After Installing?
This is genuinely debated among cabinet painters and installers. Here’s what actually works:
Paint doors, drawer fronts, and furniture end panels before installing. These are easiest to finish flat, off the cabinet, and you avoid masking off hardware and countertops. Hang them after the kitchen is done.
Paint cabinet boxes after rough installation but before countertops. Get the boxes level and screwed to the wall first so you know where the seams fall. Then paint the face frames and visible sides in place. This way any touch-up work on seams or scribe fillers is done before the countertop goes on.
After countertops are set: Hang doors, attach drawer fronts, install hardware. Do any final touch-up painting with a small artist’s brush — not a full roller pass or you’ll get paint on your new stone.
Unfinished cabinets are a legitimate path to a better-looking kitchen at lower cost, but only if you go in knowing the finishing process is as involved as the installation itself. For your next decision point, check out our guide on how to level kitchen base cabinets — because even the most beautifully painted cabinet run looks wrong if the boxes aren’t plumb, level, and square before you hang a single door.
Related Guides
- Best Wood Species for Kitchen Cabinets: Durability & Cost Compared
- Shaker vs Flat-Front Slab Cabinets: 2026 Design Showdown
- Top 10 Kitchen Cabinet Color Trends Dominating 2026
Frequently Asked Questions
Is it cheaper to buy unfinished cabinets and paint them yourself?
Yes. Buying unfinished base cabinets and DIY painting saves $500 to $1,500 on an average 10-foot run compared to pre-finished stock cabinets. However, it requires approximately 20 hours of sanding, priming, and painting.
What is the best primer for raw wood cabinets?
Oil-based primer (such as Zinsser Cover Stain) is best for raw hardwood, sealing tannins and preventing grain raise. For pine cabinets with knots, shellac-based primer (Zinsser BIN) prevents resin bleed-through.
Do you paint cabinets before or after installation?
Paint doors, drawer fronts, and end panels flat before installation. Install cabinet boxes, level and fasten them to the wall, then paint face frames in place before countertops are measured and installed.