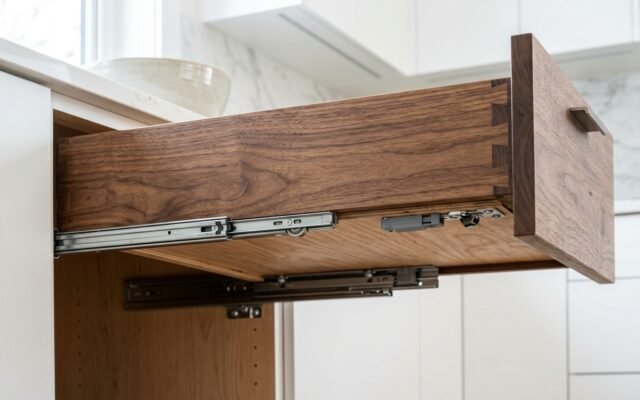
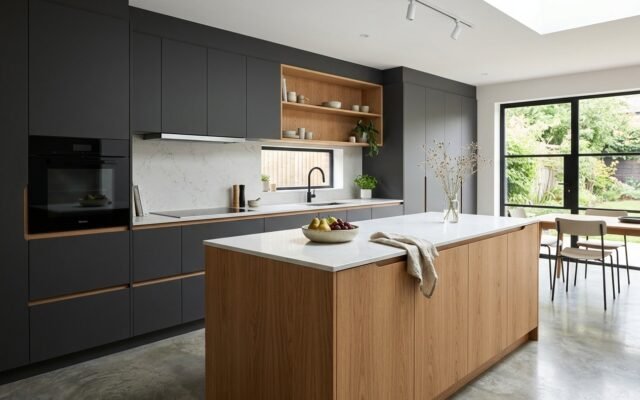
An undermount sink base cabinet requires at least three inches of total box clearance beyond the outer rim of your sink basin. Thus, a standard 33-inch sink needs a 36-inch base cabinet. In fact, an undermount sink base cabinet must support up to one hundred and fifty pounds of water and cast iron without pulling away from your stone counter.
Also, installing an undermount sink base cabinet means managing tight clearances around drain pipes, supply lines. Also, garbage disposals. Getting the measurements right before ordering your cabinet prevents costly job-site modifications. In this guide, we break down sizing rules, sturdy support cradles, plumbing layouts. Also, common install mistakes.

Sizing Rules and size Clearances
The Three-Inch Cabinet Width Rule
First, pro kitchen builders always follow the three-inch width rule for undermount sinks. Measure the total outer width of your sink from rim to rim. Then, add three inches to determine the absolute minimum cabinet width required. For example, a 30-inch undermount basin requires a 33-inch or 36-inch base box.
Yet, trying to squeeze a sink into an exact-width cabinet leaves zero room for undermount mounting clips or support brackets. The sink rim collides with the cabinet side walls. As a result, builders must notch or router into the cabinet sturdy sides. In fact, this weakens the box and voids the cabinet warranty.
Thus, always check the maker sink cutout template before ordering your cabinets. Give your sink basin an extra inch or two of breathing room. That way, plumbing hookups and future repairs are easy.
Front and Rear counter Overhang Setbacks
Next, front-to-back clearances are just as critical as side-to-side measurements. Standard kitchen base cabinets have an outer depth of 24 inches. With a standard one-and-a-half-inch counter overhang, your total counter depth measures 25 and a half inches.
Yet, your sink basin cannot sit flush against the front cabinet rail. You must maintain at least a three-inch to three-and-a-half-inch setback from the front edge of the counter to the inner sink bowl. This setback provides sturdy stone strength in front of the sink cutout and prevents counter fractures.
Also, you need at least two and a half to three inches of clear stone behind the sink basin. This rear space fits faucet drilling holes, soap dispensers. Also, air gaps. Always verify that your faucet base plate clears the kitchen backsplash tile with ease.
Depth Clearances for Garbage disposals
In fact, consider upright depth clearances inside your undermount sink base cabinet. Undermount sinks hang beneath the bottom surface of the counter, typically adding one and a quarter inches of depth compared to drop-in models. A 10-inch-deep undermount sink bowl hangs 11 and a quarter inches below the counter surface.
When you hang a heavy three-quarter-horsepower garbage disposal beneath that 10-inch basin, the disposal motor extends another 12 to 14 inches downward. As a result, you have only ten to 12 inches of clearance remaining above the cabinet floor.
Also, this upright drop lowers the drain waste arm height greatly. If your wall drain pipe is plumbed too high, waste water cannot drain. As a result, gravity drainage will fail. Plan rough plumbing heights carefully to ensure proper drainage slope.
Standard Base Cabinet Sizes from 24 to 42 Inches
Also, standard factory sink base cabinets are built in three-inch width increments. Knowing what sink fits into each standard cabinet size simplifies your kitchen planning process.
A 24-inch sink base (SB24) is designed for single-bowl bar sinks or prep basins up to twenty-one inches wide. A 30-inch sink base (SB30) fits compact single-bowl sinks up to twenty-seven inches wide, making it ideal for galley kitchens or small apartments.
In fact, a 36-inch sink base (SB36) is the industry standard for full-size home kitchens. It quick fits large single-basin sinks or double-bowl basins up to thirty-three inches wide. For grand luxury kitchens, a 42-inch sink base (SB42) fits expansive 40-inch workstations with integrated cutting boards.
Sink Support Systems and Weight spread
Undermount Sink Clips vs sturdy Cradles
First, never rely solely on epoxy and light clips. They cannot support a full undermount basin. Metal clips attached to the underside of quartz or granite counters are only designed to hold the sink snug against the stone. They cannot carry the full load of a heavy basin filled with twenty gallons of water.
In fact, a large single-bowl fireclay or cast-iron sink weighs seventy to one hundred and twenty pounds empty. When filled with water and wet pots, total weight can exceed two hundred and twenty pounds. Relying only on glued-on clips leads to severe seal failure and dropped basins over time.
Instead, pro builders install set sturdy support systems beneath the sink rim. A proper support system transfers the downward weight right into the wooden cabinet box walls rather than pulling on the fragile stone counter.
Solid Wood Support Cleats and 2×4 Framing
Next, building a site-built sturdy cradle out of solid wood cleats is the most reliable method for heavy sinks. builders screw two-by-four or 3/4-inch hardwood cleats flat into the inner sides of the cabinet box. Use heavy-duty sturdy wood screws driven through pre-drilled holes.
Then, cut two cross-braces that span from the front cleat to the rear cleat right beneath the sink rim flange. The sink sits firmly on top of this wooden ladder frame. Use wood shims to dial in the exact basin height until the rim meets the underside of the counter with zero gap.
Also, seal all exposed cut wood edges with water-resistant outer wood glue or clear sealer. This protects your wooden cradle from accidental plumbing leaks and moisture damage.
Adjustable Steel Undermount Support Bars
In fact, adjustable steel sink straps and rigid steel support bars offer a clean, fast alternative to wood framing. Products like the Sink Setter or Hercules Universal Sink Harness use heavy-gauge steel brackets that mount right to the cabinet side walls.
These steel systems feature threaded leveling bolts along the crossbars. builders can turn the bolts with a wrench from beneath the sink to lift the basin tightly against the counter stone. This mechanical lifting action creates an airtight silicone seal without needing messy wood shims.
Also, steel support systems take up minimal inner cabinet space. They leave plenty of open room below the basin for garbage disposals, water filtration tanks. Also, pull-out storage bins.
Preventing counter Separation and Seal Failures
Also, a failing silicone seal between the sink rim and counter is one of the most frustrating kitchen repairs. When a sink sags even slightly, the silicone bead tears. As a result, water seeps into the joint. Water seeps into the gap, causing black mold growth and rotting the top front cabinet rail.
To ensure a permanent watertight bond, clean both the sink rim and the underside of the stone with denatured alcohol before install. Apply a steady, generous bead of one hundred percent neutral-cure silicone sealant around the entire rim outer edge.
Tighten your support cradle until silicone squeezes out. Make sure it beads evenly on all four sides. Wipe away excess silicone with a damp cloth. Let it cure fully for 24 hours. Allow the silicone to cure fully for 24 hours before running water or installing heavy plumbing fixtures.
Plumbing Rough-In and inner Cabinet Layout
Drain Outlet Heights and P-Trap Clearance
First, rough plumbing drain height is the single most common pitfall when switching to an undermount sink. With classic drop-in sinks, wall drain outlets were commonly plumbed at 16 to 18 inches above the finished floor. Yet, an undermount sink drops the basin bottom much lower.
For an undermount sink with a garbage disposal, the center line of the rough drain pipe in the wall must be 12 to 14 inches above the finished floor. If the wall outlet sits at 16 inches, the disposal drain outlet sits below the wall pipe. Water cannot flow uphill, causing your disposal to hold stagnant water and smell.
Thus, always measure your rough drain height before ordering your new undermount sink base cabinet. Lowering a PVC drain pipe inside the wall cavity takes a plumber one to two hours. Yet, doing it before cabinet install saves huge headaches.
Water Supply Shutoff Valve placing
Next, plan water supply shutoff valve locations to avoid clashing with pull-out drawers or storage racks. Plumbers typically rough in hot and cold supply lines 16 to 18 inches above the finished floor, spaced six to eight inches apart.
Install quarter-turn brass ball valves. Avoid cheap multi-turn plastic valves. Quarter-turn brass ball valves provide leak-free shutoff. In fact, they work smoothly even after years of disuse. Also, install braided steel supply hoses. These link valves cleanly to your kitchen faucet.
Also, if you plan to install an under-sink reverse osmosis water filter or instant hot water dispenser, add set tee valves during rough plumbing. Having set shutoffs prevents messy pipe splicing down the road.
fitting Large Garbage disposals
In fact, modern high-end garbage disposals require large flat and upright clearance. Compact one-third-horsepower units measure six to seven inches in diameter. Yet, premium three-quarter or one-horsepower sound-insulated models measure nine to 11 inches in diameter.
In an offset double-bowl sink, placing the disposal under the smaller secondary bowl keeps the main basin open for washing large pots. But in a large single-bowl workstation sink, the center or rear-corner drain location dictates disposal placement.
Also, ensure there is at least four inches of clear space between the side of the disposal motor and the cabinet sidewall. This clearance allows easy access to the reset button and hex wrench socket on the bottom of the unit.
Pull-Out racks Around Waste Lines
Also, standard pull-out cabinet shelves rarely fit inside an undermount sink base cabinet. This is because of upright plumbing pipes. Standard full-depth shelves hit the P-trap and disposal body.
Instead, choose specialized U-shaped pull-out racks designed specifically for sink bases. Brands like Rev-A-Shelf make U-shaped sliding baskets. They wrap around drain pipes to maximize storage. These chrome or birch pull-outs keep sponges, dish soap. Also, cleaning supplies organized and accessible.
Also, consider installing a roll-out trash can or door-mounted recycling bin if your cabinet is thirty-six inches or wider. Proper inner planning turns an otherwise cluttered plumbing box into efficient, practical kitchen storage.
Step-by-Step install of an Undermount Sink Cabinet
Step 1: Modifying the Top Corner Gussets
First, unpack your new undermount sink base cabinet and check the top sturdy corners. Factory cabinets ship with plastic corner gussets or wooden rails. These sit across the top front and rear corners. In many cases, these gussets clash with the wide outer flange of your undermount sink.
If sink flanges hit plastic gussets, remove the plastic blocks. Use a screwdriver to back them out. Replace their sturdy holding power by screwing solid hardwood blocks lower down the inner box corners. Never remove sturdy bracing without adding replacement bracing lower in the carcase.
Also, check whether the front top cabinet rail needs notching. If your sink basin is very deep from front to back, you may need to router a shallow relief groove along the inside edge of the front rail.
Step 2: Scribing the Back Panel for Plumbing Stubs
Next, measure the exact locations of the rough-in drain pipe and hot and cold water supply stubs on your kitchen wall. Transfer these sizes accurately to the outer back panel of your sink base cabinet.
Use a sharp hole saw mounted on your drill. Cut clean circular openings for each pipe. Drill the holes half inch larger than the pipe outside diameter to allow for minor leveling adjustments. Do not cut jagged holes with a saw. In fact, oversized openings weaken the back panel.
Also, slide the cabinet into place against the wall studs to verify pipe alignment. Ensure all three pipes penetrate cleanly through the cutouts without binding against the wood.
Step 3: Fastening sturdy Support Cleats
In fact, attach your sturdy sink support cleats before leveling the cabinet in its final place. Working inside an empty, unattached box gives you plenty of elbow room to drive screws and align support brackets.
Measure down from the top cabinet edge. Match the exact thickness of your sink rim flange. Screw solid 3/4-inch hardwood cleats flat into both cabinet side panels using two-inch cabinet screws. Use PVA wood glue along the cleat back for maximum shear strength.
Then, test-fit your sink basin inside the box on top of the cleats. Ensure the top surface of the sink rim sits fully flush with the top edge of the cabinet carcase sides.
Step 4: Leveling and Anchoring the Base Cabinet
Also, proper leveling is vital for an undermount sink base cabinet. An unlevel cabinet causes standing water to pool inside the sink corners rather than draining toward the waste outlet. Check our detailed tutorial on how to install kitchen base cabinets for complete leveling techniques.
Place a four-foot spirit level across the front rail, rear rail. Also, diagonally across both corners. Drive composite shims under the cabinet base frame. Ensure the box is dead level in all directions. Composite shims will not rot or compress under water exposure like cheap pine shims.
Once level, anchor the cabinet tightly to wall studs using two-and-a-half-inch washer-head cabinet screws driven through the rear hanging rail. Also, clamp and screw the face frame to adjoining cabinets using counter-sunk trim screws.
Step 5: placing the Basin and Applying Silicone
Finally, prepare for stone counter install. When the stone fabricators arrive, they will place the stone cutout right over your sink base cabinet. Clean all contact surfaces thoroughly with denatured alcohol to remove dust and oil residue.
Apply a steady bead of one hundred percent silicone sealant along the entire top rim of the sink basin. Raise the sink using your support cradle or steel harness. Press the rim firmly against the stone underside.
Wipe away excess silicone right away. Use mineral spirits and a clean cloth. Allow the silicone bond to cure for a full 24 hours before connecting the drain build, P-trap. Also, garbage disposal.

Sink Base Cabinet wood and spec Table
Plywood vs Moisture-Resistant MDF Sink Boxes
First, choosing the right box wood for a sink base is far more critical than for standard dry pantry cabinets. Sink cabinets face constant exposure to plumbing condensation, minor drain drips. Also, damp sponges stored under the bowl.
Standard particle board swells and delaminates rapidly when exposed to standing water. Once particle board edges absorb moisture, the wood fibers blow apart firmly, causing shelf sag and hinge screw failure. Yet, 3/4-inch birch or maple plywood offers superior water resistance and screw-holding power.
The following comparison table breaks down the essential specs for sink base cabinet build across different grade tiers:
| Cabinet Grade Tier | Box Core wood | Max Load space | Water Resistance Rating | Typical Unit Price (36-inch) |
|---|---|---|---|---|
| Stock Builder Grade | 1/2-inch particle board | 75 lbs (clips only) | Poor (swells with drips) | $180 to $280 |
| Semi-Custom RTA | 1/2-inch Hardwood Plywood | 150 lbs (with cradle) | Good (resists light leaks) | $320 to $520 |
| Premium Custom Box | 3/4-inch Marine-Grade Plywood | 300+ lbs (reinforced) | Excellent (waterproof glues) | $600 to $950 |
Also, check our comprehensive comparison of kitchen base cabinet sizes for standard width, height. Also, depth guidelines across all kitchen zones. Matching cabinet sizing to unit specs ensures a harmonious, cohesive kitchen layout.
Physical Showroom check Tests for Sink Bases
Next, check sink base display units in person before making your purchase. Conduct these three practical showroom tests to verify build grade:
First, perform the Floor Panel Deflection Test. Place your hands on the inner bottom floor panel of the sink cabinet and push down firmly with twenty to thirty pounds of force. If the floor flexes or creaks, it is thin three-eighths-inch particle board. A grade sink base features a sturdy half-inch or 3/4-inch plywood floor supported by solid base runners.
Second, conduct the Top Stretcher Rail check. Look at the top front rail running between the two cabinet face frame stiles. In low-cost cabinets, this rail is made of lightweight MDF or thin particle board that sags over time. A reliable sink base uses solid hardwood or multi-ply plywood for this critical top member.
Third, verify the screw and Joint Check. Look at the inner box corner joints. Reliable cabinet boxes feature full-depth routed dado joints glued and fastened with pocket screws. Avoid boxes assembled solely with plastic dowels and metal cam locks, as water exposure loosens these mechanical screws quickly.
Common Undermount Sink Base Cabinet Mistakes to Avoid
Buying a Sink Too Wide for the inner Box
First, the most frequent buyer mistake is ordering a sink based on outer cabinet sizes rather than inner clearances. A 36-inch base cabinet built with 3/4-inch plywood walls has an inner width of only thirty-four and a half inches. In framed cabinets, the front face frame opening is narrower still.
If you purchase a thirty-four-inch sink basin, it will not fit between the inner box walls once mounting brackets are attached. builders must carve deep notches into the cabinet sides, severely weakening sturdy integrity.
Always subtract at least three inches from your outer cabinet width to determine your maximum allowable sink width. If you desire a massive 33-inch basin, order a 36-inch or thirty-nine-inch sink base cabinet.
Relying Only on counter Glue Clips
Next, relying solely on under-counter glue clips without a lower mechanical cradle is a recipe for disaster. Budget stone installers glue small metal brackets to the stone. They use two-part polyester glue. Over time, hot dishwater heat and disposal vibrations break the glue. The basin can drop.
When glue fails, the heavy sink drops loose. It tears plumbing lines and dumps water onto the floor. Always insist on solid wood cleats or steel support bars. They anchor the basin mechanically.
A mechanical cradle guarantees that your sink remains immovable, even when filled to the brim with heavy Thanksgiving cookware.
Forgetting Faucet Hole Setback Clearances
Also, forgetting to account for faucet base setbacks behind the sink rim causes serious install roadblocks. Commercial gooseneck faucets have wide mounting collars. They measure 2 to 2.5 inches across.
If the rear sink rim sits too close to the rear rail, you cannot drill the faucet hole. Even worse, the faucet mounting nut underneath cannot clear the wooden cabinet back rail.
Specifically, maintain at least 2.5 inches of clear counter space between the rear sink flange and the wall backsplash. Also, verify that your faucet handle can rotate fully backward without hitting the backsplash tile.
Not Sealing Raw Wood Edge Cutouts
In fact, forgetting to seal wood cutouts made for plumbing pipes and support cleats invites water damage. Cutting holes through plywood exposes raw end grain. End grain pulls in moisture like a sponge. End grain acts like a bundle of drinking straws, drawing moisture deep into the panel during leaks.
Before completing cabinet install, brush two coats of outer clear sealer, water-resistant PVA glue, or silicone sealant over all freshly cut wood edges. This five-minute step creates an tight moisture barrier that protects your cabinet carcase for decades.
Also, consider installing an rubber silicone drip mat across the entire cabinet floor. A waterproof tray with raised lips catches up to two gallons of water. It protects your subfloor from leaks.
Frequently Asked Questions
What size undermount sink fits in a 36-inch base cabinet?
A 36-inch undermount sink base cabinet with ease fits sinks with an outer width up to thirty-three inches. This sizing leaves an inch and a half of clearance on each side for mounting clips, support cleats. Also, plumbing connections.
Can you retrofit an undermount sink into an existing cabinet?
In addition, retrofitting an undermount sink into an existing cabinet is possible if you are replacing the counter. The cabinet box must be modified with sturdy wood cleats or adjustable steel support straps before the new stone counter is set in place.
How much weight can an undermount sink base support?
In fact, when properly reinforced with solid wood cleats or steel support bars, an undermount sink base cabinet can quickly support two hundred and fifty to three hundred pounds. This space safely carries cast iron basins filled with water and heavy cookware.
Do you need a cradle for a stainless steel undermount sink?
While stainless steel sinks are lighter than cast iron or fireclay, a mechanical cradle or support harness is still strongly recommended. Water weight and disposal vibration loosen glue clips over time, making mechanical cradles the safest choice.
How far back should a sink sit from the front counter edge?
Specifically, a sink should sit 3 to 3.5 inches back from the front finished edge of the counter. This distance ensures enough sturdy stone strength in front of the sink cutout while keeping dishwashing easy without excessive leaning.

Related Sink Base Guides
For standard sizes and plumbing clearances, see our Sink and Base Cabinet Sizing guide. For other sink styles, see the Farmhouse Sink Base Cabinet and Corner Sink Cabinet guides.
Editorial Note: This guide was researched and written by David Miller, founder of Kitchen Base Cabinets, and reviewed by Editorial Lead Marcus Vance. Prices are typical national ranges, not quotes — confirm locally before you buy.