Accurate cabinet measuring is the difference between a clean, square installation and thousands of dollars in freight return fees, filler panel scrambles, and misaligned countertop overhangs. Professional cabinet installers do not simply pull a tape measure across the baseboard; they map walls in three dimensions, locate the highest floor point, and account for plumb variations before placing a single cabinet order. A variance of just 1/2 inch across a 10-foot wall run can prevent your slide-in range or refrigerator from fitting into its designated opening.
Drywall is rarely flat, corners are rarely square, and subfloors are rarely level. Here is the exact field-measuring protocol contractors use to record precise wall runs, plumbing centerlines, and appliance clearances so your cabinet order fits the first time.
What You Will Need: Professional Measuring Tools
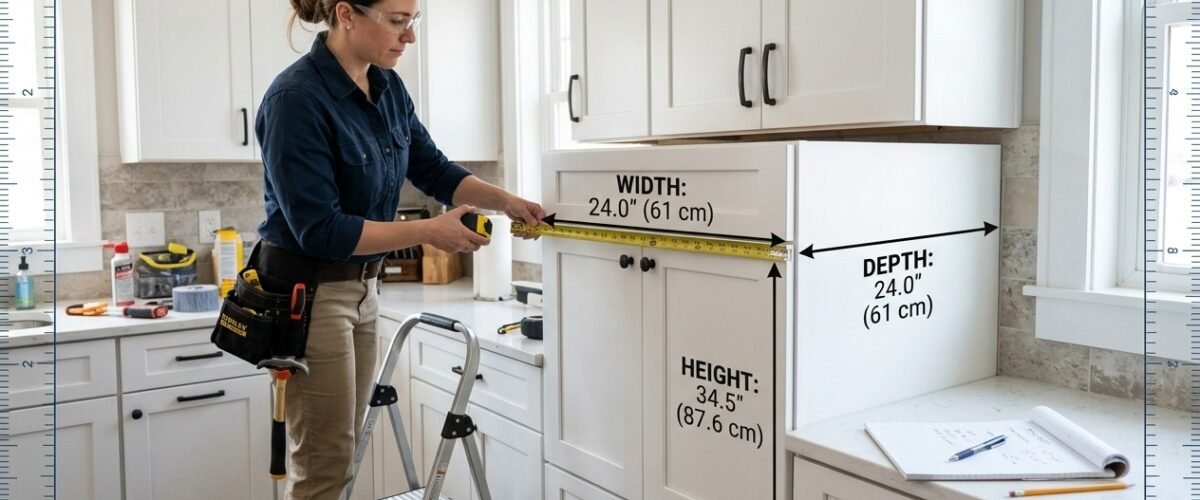
Gathering the correct measuring tools before you start ensures consistent readings and eliminates cumulative layout errors across multiple walls.
- 25-Foot Heavy-Duty Tape Measure: Choose a tape with a 1-1/8 inch wide blade that offers at least 11 feet of rigid standout without bending.
- Self-Leveling Cross-Line Laser Level: Projects true horizontal and vertical reference benchmarks across all walls simultaneously.
- 4-Foot and 6-Foot Precision Box Levels: Used to check wall plumb, detect local framing humps, and verify laser benchmark lines.
- Electronic Stud Finder: Detects wall studs, plumbing pipes, and live electrical wiring behind drywall surfaces.
- 12-Inch Combination Square or Framing Square: For checking 90-degree corner squareness and marking appliance centerline offsets.
- 1/4-Inch Grid Graph Paper and Mechanical Pencil: For drawing accurate overhead floor plans and separate wall elevation diagrams.
- Blue Painter Tape: For making temporary benchmark pencil marks directly on walls without damaging paint surfaces.
Step 1: Draw an Overhead Floor Plan and Elevation Grid
Before pulling your tape measure, sketch a rough bird-eye-view floor plan of your entire kitchen space on graph paper. Label each wall clockwise starting from the entry doorway as Wall A, Wall B, Wall C, and Wall D.
Mark the rough location of every architectural feature on your overhead sketch, including entry doors, windows, structural posts, HVAC supply registers, and electrical breaker panels. Draw separate rectangular elevation grids for each wall on additional sheets of paper. Having dedicated elevation sketches allows you to record vertical heights for window sills, electrical outlets, range hoods, and ceiling soffits without cluttering your main overhead perimeter dimensions.
Label all measurements in inches down to the nearest 1/16 inch. Never round your field measurements up or down to the nearest whole inch; small rounding errors multiply across several adjacent cabinet boxes and cause layout binding during installation.
Step 2: Find the Highest Point of the Kitchen Floor
Subfloors in both old and new homes consistently slope and dip. Before determining cabinet heights, you must identify the highest spot of the floor along your cabinet walls and establish your level benchmark line.
Set up your self-leveling cross-line laser level on an adjustable tripod in the center of the room. Project a 360-degree horizontal laser line across all perimeter walls at roughly 48 inches above the subfloor. Using your tape measure, measure straight down from the laser line to the finished subfloor every 24 inches along all walls where base cabinets will sit.
Compare your recorded vertical measurements. The spot with the smallest measurement from the laser line down to the floor is the highest point in the room. For example, if most points measure 48 inches down from the laser line, but one corner measures 47-1/4 inches down, that corner is 3/4 inch higher than the rest of the floor.
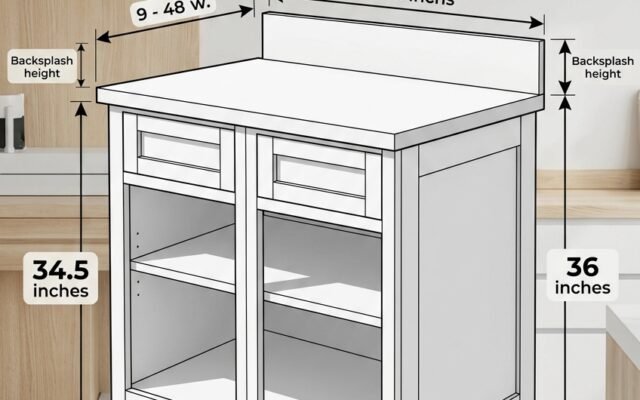
Mark exactly 34-1/2 inches above this high floor point on your wall using blue painter tape. Snap a level chalk line or align your laser line across all perimeter walls at this 34-1/2 inch height. This line marks the exact finished top edge of all your base cabinet boxes before countertops are installed.
Step 3: Measure Wall Lengths at Three Critical Elevations
Studs warp and drywall tapers, meaning a wall rarely measures the exact same length at the floor as it does near the ceiling. To prevent ordering a cabinet run that jams between drywall surfaces, measure every wall horizontally at three distinct heights.
Record your horizontal wall dimensions at these elevations:
- Toe Kick Level: 6 inches above the subfloor (where the bottom bases contact the wall).
- Countertop Level: 36 inches above the subfloor (where the cabinet top rails and countertop meet).
- Upper Cabinet Level: 84 inches to 96 inches above the subfloor (where wall cabinet hanging rails attach).
The Golden Ordering Rule: Always use the smallest of the three measurements when calculating the total width of your cabinet run. If a wall measures 120-1/2 inches at the floor, 120 inches at counter height, and 120-1/4 inches near the ceiling, treat the wall as 120 inches wide. Plan a total cabinet width of 117 to 118 inches, leaving 2 to 3 inches for scribed filler panels at the ends. Check our detailed guide on standard kitchen base cabinet sizes to match your available wall dimensions to standard box widths.
Step 4: Map Window and Door Openings from Outside Casing Edges
When measuring windows and doorways, always measure to the outside edges of the decorative casing trim, not to the drywall rough opening. Cabinets must clear the window molding, not just the window glass.
Follow this exact four-point sequence for every window along a cabinet wall:
- Corner to Casing: Measure horizontally from the nearest reference corner wall to the outside edge of the left window casing.
- Overall Casing Width: Measure horizontally from the outside edge of the left window casing to the outside edge of the right window casing.
- Casing to Opposite Corner: Measure horizontally from the outside edge of the right window casing to the far corner wall.
- Vertical Sill Height: Measure vertically from the floor high point up to the bottom edge of the window stool or casing apron.
Add the three horizontal window measurements together (Corner to Casing + Casing Width + Casing to Opposite Corner). This sum must exactly equal your total wall length recorded in Step 3. If the numbers do not match, re-measure before proceeding. Verify that your window sill height sits at least 37 inches above the floor high point to allow standard 36-inch finished countertops to clear the window trim without interference.
Step 5: Locate Plumbing Centerlines, Gas Valves, and Electrical Outlets
Cabinet boxes must align with rough plumbing stub-outs and electrical feeds to prevent expensive pipe relocation work during installation.
To measure plumbing centerlines accurately:
- Measure horizontally from the nearest corner wall to the exact center of the 1-1/2 inch or 2-inch PVC sink drain pipe.
- Measure horizontally from the corner to the hot and cold water supply lines.
- Measure vertically from the subfloor up to the center of the drain stub-out (typically 12 to 15 inches above the floor) and water valves (typically 18 to 21 inches above the floor).
The drain pipe centerline determines the required width and position of your sink base cabinet. If your drain pipe centerline sits 54 inches from the left corner and you want a centered sink base under your window, a 36-inch sink base cabinet placed between 36 and 72 inches along the wall will center the sink over the plumbing cleanly. Repeat this process for 240V range outlets, 120V microwave circuits, dishwasher water supply lines, and gas shut-off valves.
Step 6: Account for Appliance Clearances and Manufacturer Specs
Never measure an existing older appliance and assume a new replacement model will have identical rough-in dimensions. Always obtain the official installation specification sheet for every new appliance before finalizing cabinet widths.
Follow these standard rough-in clearance guidelines:
- Built-In Dishwashers: Require an exact 24-inch clear opening between finished cabinet face frames. The subfloor under the dishwasher must be level with the finished kitchen floor to allow the unit to slide in without binding.
- Freestanding 30-Inch Ranges: Require a 30-1/8 inch to 30-1/4 inch clear opening between adjacent base cabinets. Leaving an extra 1/8 to 1/4 inch prevents the metal range chassis from scratching cabinet finishes during slide-in.
- Standard 36-Inch Refrigerators: Require a 36-inch to 37-inch wide cabinet opening, plus 1 inch of overhead clearance and at least 2 inches of side clearance if positioned adjacent to a full-height wall to allow refrigerator doors to swing open past 90 degrees.
- Over-the-Range Microwaves: Require a 30-inch clear width between upper wall cabinets and a minimum 30-inch vertical clearance from the cooking surface to the upper cabinet bottom shelf.
Review our step-by-step tutorial on DIY base cabinet installation to understand how appliance spacing affects face frame alignment and countertop overhangs.
Step 7: Check Corner Squareness and Calculate Scribe Fillers
Walls that meet at an angle greater than 90 degrees (obtuse) or less than 90 degrees (acute) force square cabinet boxes away from the drywall. Checking corner squareness allows you to budget appropriate filler strip widths to compensate for crooked walls.
Use the classic 3-4-5 carpenter triangle method to verify corner squareness:
- Measure exactly 3 feet (36 inches) from the corner along Wall A and make a sharp pencil mark on blue tape.
- Measure exactly 4 feet (48 inches) from the corner along Wall B and make a sharp pencil mark.
- Measure the straight diagonal distance between your two pencil marks across the room.
If your diagonal measurement is exactly 5 feet (60 inches), your corner is an exact 90-degree right angle. If the diagonal measures less than 60 inches, your corner is acute (tight); if it measures more than 60 inches, your corner is obtuse (open). For corners out of square by more than 1/4 inch over 5 feet, add a 2-inch to 3-inch scribe filler panel to the ends of your cabinet runs so you can scribe and plane the filler strip to match the crooked drywall angle cleanly.
Professional Measuring Tolerances and Common Mistakes
Understanding allowable measuring tolerances keeps your installation moving forward smoothly while preventing layout mistakes.
| Measurement Type | Recommended Tool | Allowable Tolerance | Common Mistake to Avoid |
|---|---|---|---|
| Overall Wall Length | 25-Ft Tape Measure | +/- 1/16 inch | Measuring at only one elevation and missing drywall bow |
| Floor Benchmark Line | Cross-Line Laser Level | +/- 1/32 inch | Starting benchmark from the low floor point instead of the high point |
| Plumbing Centerlines | Tape & Framing Square | +/- 1/8 inch | Measuring to the pipe edge instead of the center axis |
| Appliance Openings | Tape & Spec Sheet | + 1/8 to 1/4 inch | Designing exact tight dimensions with zero slide-in clearance |
| Corner Squareness | 3-4-5 Rule or Angle Gauge | +/- 0.5 degrees | Omitting end filler panels on out-of-square corner walls |
Related Guides
- Kitchen Base Cabinet Sizes: The Complete Measurement Chart Every Homeowner Needs
- DIY Base Cabinet Installation: 7 Rules for Level & Solid Setup
- How to Level Kitchen Base Cabinets on an Uneven Floor (The Laser Method)
Frequently Asked Questions About Measuring Kitchen Cabinets
What is the single most important measurement when measuring kitchen cabinets?
Finding the highest point of the floor along the cabinet run walls is the most critical measurement. Setting your level benchmark 34-1/2 inches above this high spot ensures that all base cabinets install level without exceeding standard countertop height limits.
Should you measure kitchen walls before or after drywall is installed?
Always take final ordering measurements after drywall is hung, taped, and finished. Drywall and corner bead add 1/2 inch to 5/8 inch of thickness to each wall surface, which can reduce your overall room dimensions by over an inch across opposing walls.
How much clearance do you leave between cabinets and a slide-in range?
Leave an extra 1/8 inch to 1/4 inch of total width beyond the nominal range size. For a standard 30-inch range, frame your cabinet opening at 30-1/8 to 30-1/4 inches wide to ensure the range slides in smoothly without binding.
Why are filler strips necessary when measuring cabinet runs?
Filler strips absorb wall bow variations, compensate for out-of-square corners, and provide door clearance next to walls so cabinet doors and drawers can open fully without colliding with door trim or hardware.