Meta description (153 chars): Build a DIY kitchen island from stock base cabinets for $755 to $4,809. Cabinet sizes, clearances, seating overhang, top costs, tools, and 4 mistakes.
Slug suggestion: diy-kitchen-island
Author: David Miller
Category: DIY and How-To
Format: 2 How-To / Build
Two stock base cabinets, a slab of butcher block, and a weekend turn into a
kitchen island that works like one built to order. A 4-foot island costs
$755 to $1,235 in materials. A 6-foot island with seating costs $1,815 to
$3,479. An 8-foot island with seating for 3 costs $2,567 to $4,809. A custom island of the same size starts at $400 per linear foot for
the cabinets alone, before the countertop. The build below uses the same
boxes that sit under your counters already, so the sizes, the heights, and
the hardware all match the rest of the kitchen. If you can run a drill, read
a level, and follow a cut list, you can build the cabinet part yourself.
Stone tops, outlets, sinks, and cooktops are the line where you bring in a
pro, and this guide marks that line clearly.
| Island build | Cabinets | Top | Total materials |
|---|---|---|---|
| 4-ft single row, no seating | 2 x 24-in unfinished bases, $380-$430 | Butcher block 8.5 sq ft, $255-$595 | $755-$1,235 |
| 6-ft back-to-back, seating for 2 | 4 x 36-in bases, $756-$1,088 | Butcher block 30.8 sq ft, $924-$2,156 | $1,815-$3,479 |
| 8-ft back-to-back, seating for 3 | 3 x 36-in + 3 x 24-in bases, $1,134-$1,632 | Butcher block 41.1 sq ft, $1,233-$2,877 | $2,567-$4,809 |
The table is the whole project in one view. The 4-foot island is two
cabinets and a top. The 6-foot island is four cabinets set back to back with
a 12-inch overhang for stools. The 8-foot island is six cabinets in two rows
of three. Every total includes panels, trim, and fasteners. The countertop
is the swing factor in every row: butcher block runs $30 to $70 per square
foot installed, so the top costs more than the cabinets on the bigger
islands. Read the custom kitchen cabinets cost
guide if you want the full custom quote to compare against, and the
how to build kitchen cabinets guide if
you want to build the boxes from plywood instead of buying stock.
What You Will Need: 9 Tools and 7 Materials
Buy the cabinets first and the top last. The cabinets set every other
measurement, and the top is cut to fit the finished base, not the other way
around.
Tools: cordless drill/driver ($60-$120), 4-foot level ($25-$40),
circular saw ($60-$100), 2 bar clamps ($15-$25 each), tape measure ($10-$20),
stud finder ($20-$30), speed square ($10-$15), caulk gun ($5-$10), and a
pencil and shim pack ($5-$10). Total tool cost if you own nothing: $210-$370.
Borrow the circular saw and the level and the total drops under $100.
Materials for the 6-foot island: 4 stock base cabinets, 36 inches wide,
24 inches deep, 34.5 inches tall ($189-$272 each unfinished or assembled
stock, $756-$1,088 for four); 1 butcher block top, 50 by 74 inches
(30.8 square feet at $30-$70 per square foot, $924-$2,156); 2 end panels
($30-$60 each); 1 toe-kick board and trim ($20-$40); 2×4 lumber for floor
cleats ($10-$15); 2-1/2-inch wood screws, cabinet screws, wood glue, and
shims ($25-$40). The cabinet prices are Home Depot stock pricing checked
this session: an unfinished 36-inch sink base at $189, an unfinished 24-inch
drawer base at $215, and an assembled 30-inch base at $272. Stock cabinets
run $100 to $300 per linear foot installed, and ready-to-assemble cabinets
run 20 to 30 percent less than pre-assembled units of the same size.
Plan the Island in 4 Measurements Before You Order
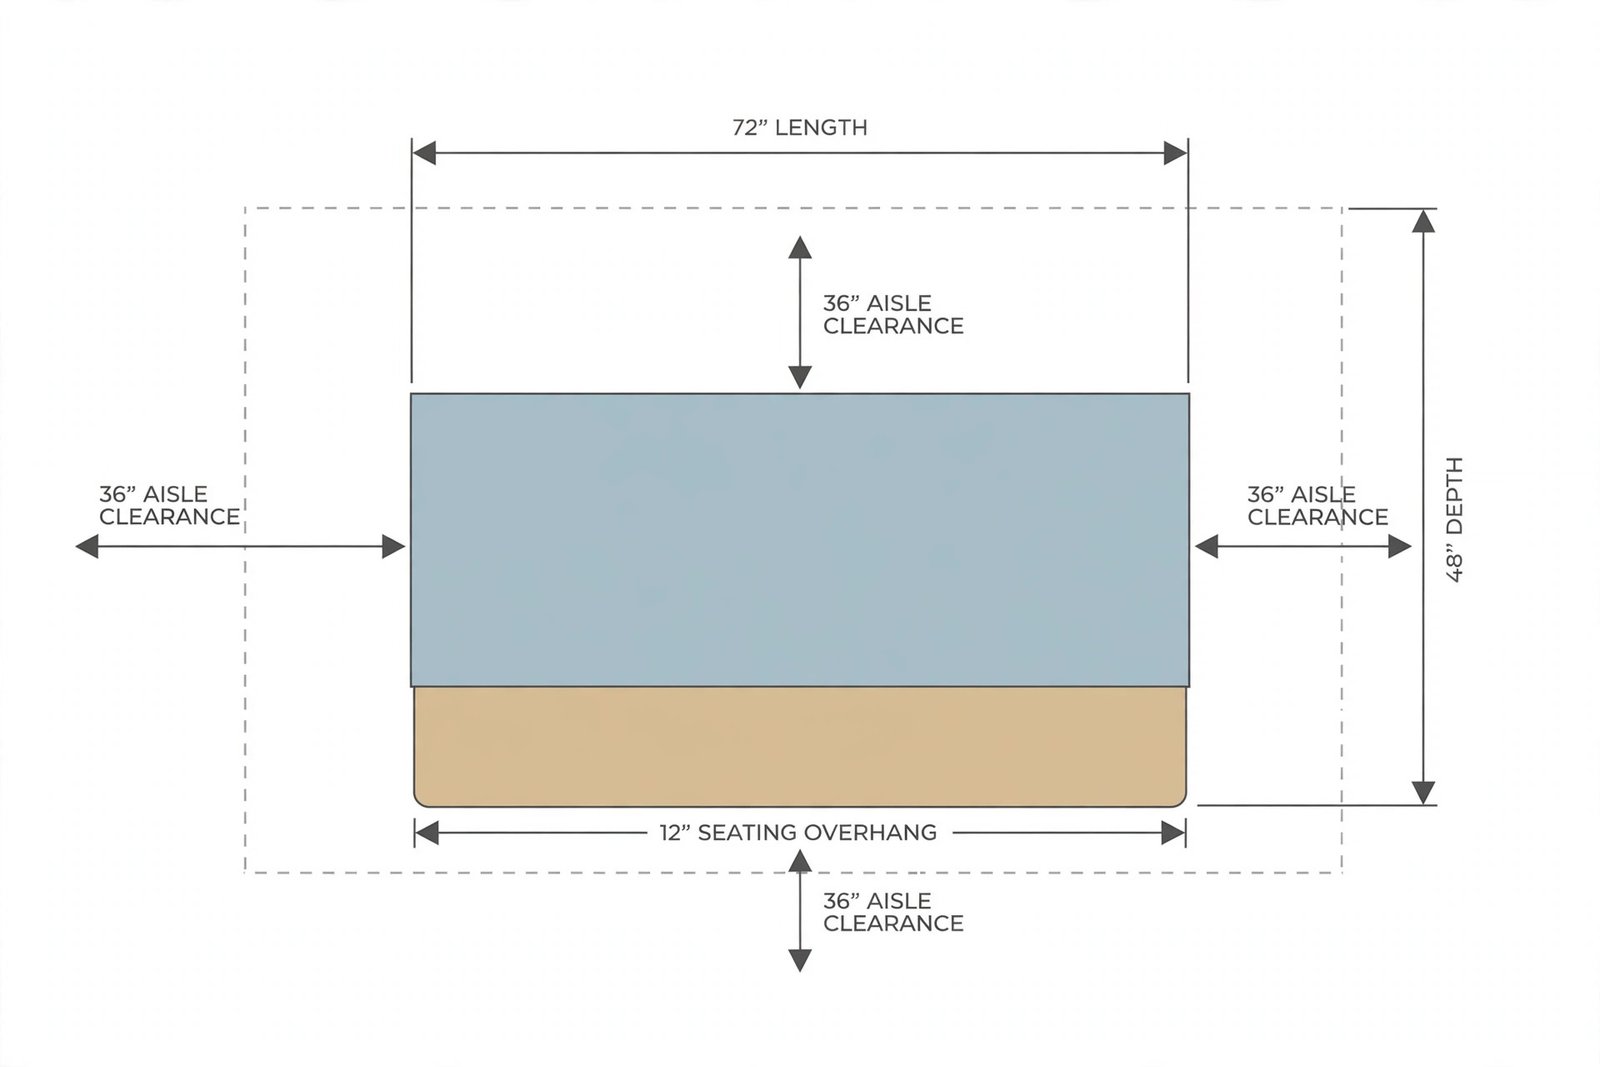
Four numbers decide the whole build. Get them right on paper and the build
goes fast. Get one wrong and you move a finished island.
- Length. Add up the cabinet widths. Two 24-inch cabinets make a
4-foot island. Two 36-inch cabinets make 6 feet. A 36-inch plus a 24-inch
plus a 36-inch makes 8 feet. Stock base cabinets come in 12, 18, 24, 30,
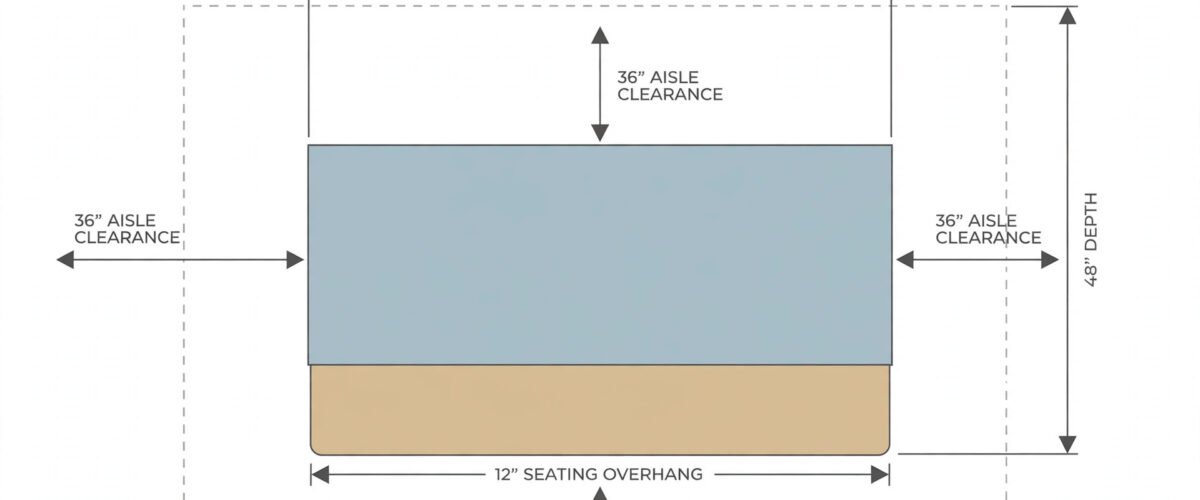
and 36-inch widths, so any length in 6-inch steps is possible. - Depth. One row of base cabinets is 24 inches deep. Two rows set back
to back is 48 inches deep. Add a 12-inch overhang on the seating side and
the top is 60 inches deep. A single row cannot carry a seating overhang
safely, because the top would hang 12 inches past cabinets that are only
24 inches deep. - Aisle clearance. Measure from the edge of the island countertop to
the nearest cabinet, wall, or appliance on every side. The minimum is 36
inches for a walkway. One cook working needs 42 inches. Two cooks need 48
inches. These are the kitchen planning clearances, and they are measured
from the countertop edge, not the cabinet face, because the top overhangs
the base by 1 to 1.5 inches on each side. - Height. A stock base cabinet is 34.5 inches tall. Add a 1.5-inch
countertop and the finished island is 36 inches high, the same as your
counters. If the top is thicker or thinner, the island height moves with
it, so check the top thickness before you order the cabinets.
Step 1: Mark the Footprint and Check the Floor
Tape the island footprint on the floor with painter’s tape, full size, and
live with it for a day. Walk around it. Open the dishwasher and the oven.
Pull out a drawer on the nearest run. If a door hits the tape, the island is
too close. Move the tape, not the island.
Check the floor for level across the footprint with the 4-foot level. Most
floors slope 1/4 to 1/2 inch across 6 feet. Note the high spot: that is
where you start leveling, and every other cabinet gets shimmed up to it.
Check for pipes and wiring before you drill into the floor. A floor cleat
screw that hits a water line turns a weekend project into a plumber visit.
If the floor is tile or concrete, use a masonry bit and concrete screws, and
drill only where you have checked what sits below. Time: 1 hour.
Step 2: Build the Floor Cleats and Set the First Row
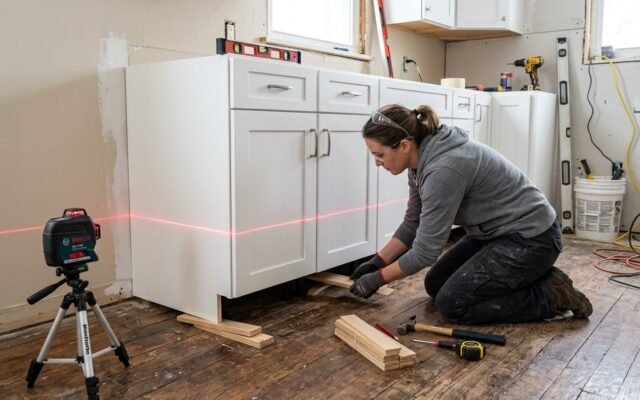
Cut two 2×4 cleats to fit inside the base of the first row of cabinets.
Screw the cleats to the floor inside the taped footprint, level across the
top, and shim under the low end until the level reads true. The cleats do
two jobs: they anchor the island so it cannot shift, and they give you a
level platform to set the cabinets on.
Set the first cabinet on the cleats. Level it front to back and side to
side, shimming under the low corners. Screw through the cabinet base into
the cleat. Set the second cabinet next to it, clamp the face frames
together with the bar clamps so the doors line up, and drive screws through
the pre-drilled holes in the face frames. Check the level again after every
cabinet: a cabinet that is 1/8 inch out at the first joint is 1/2 inch out
by the fourth. Time: 2 hours for a 4-foot island, 3 hours for a 6-foot
island.
Step 3: Join the Second Row Back to Back
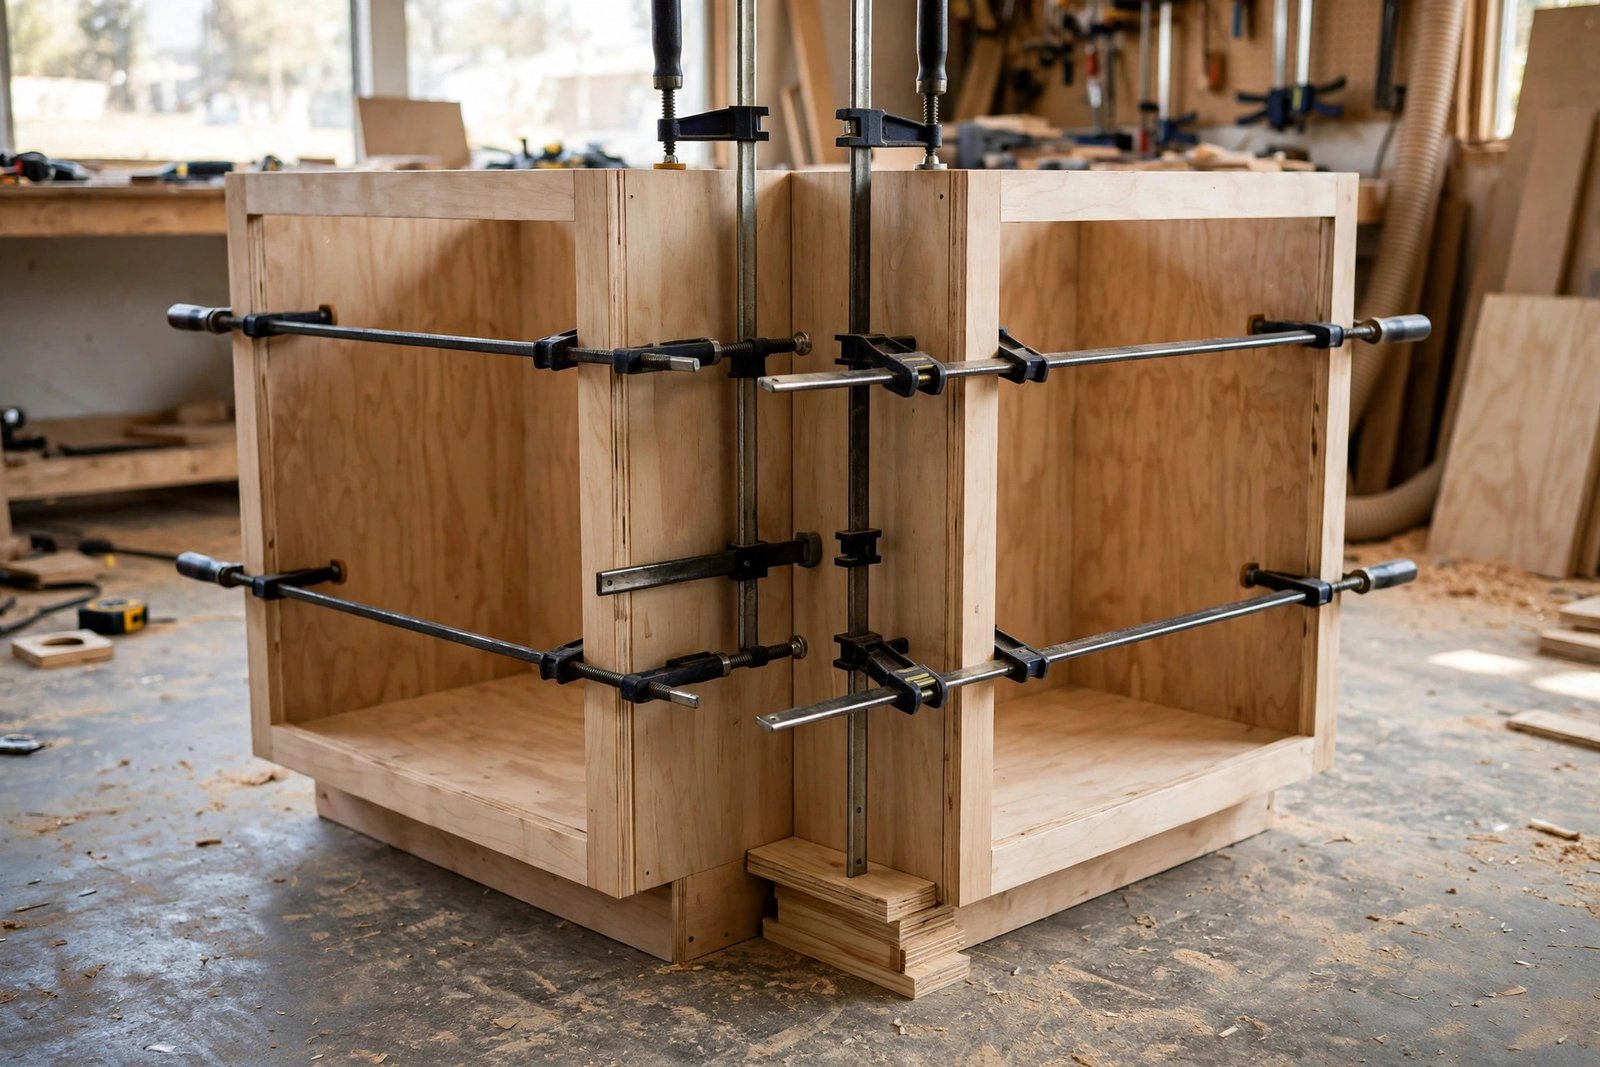
For a seating island, set the second row back to back against the first.
Clamp the two rows together at the top and the bottom, then screw through
the backs of the cabinets into each other. The two rows now act as one
48-inch deep base. Check the level across the full 48-inch depth: the two
rows must sit flat together, or the countertop will rock.
If the island has no seating, skip this step. A single row of cabinets is
the whole base, and the top overhangs the cabinet by 1 to 1.5 inches on
each side. Time: 1 hour.
Step 4: Fit the End Panels and Toe-Kick
The backs and ends of stock cabinets are unfinished, so they need panels.
Cut an end panel to cover each exposed end, and a back panel or shiplap for
any exposed back. Screw the panels from inside the cabinet so no fastener
shows on the outside face. Fit the toe-kick board around the base after
leveling, because the toe-kick hides the shims and the cleats.
This is the step that decides whether the island looks built to order or
looks like cabinets pushed together. Take the time to scribe the panels to
the floor if the floor slopes: a 1/4-inch gap under a panel reads as a
mistake from across the room. Time: 2 hours.
Step 5: Set the Countertop
Measure the finished base before you order or cut the top. The top
overhangs the cabinet by 1 to 1.5 inches on the sides and the front, and 12
inches on the seating side. For a 6-foot back-to-back island, the top is 74
inches long and 60 inches deep: 72 inches of cabinets plus 1 inch of
overhang on each end, and 48 inches of cabinets plus 12 inches of seating
overhang.
Butcher block is the DIY-friendly top because you cut it with a circular
saw, sand the edge, and oil it. One catch: butcher block slabs are commonly
sold up to 36 inches wide. A 48-inch or 60-inch deep top needs two slabs
edge-joined with biscuits and glue, or a custom-width glue-up ordered to
size. Join the slabs before you cut the top to length, and let the glue
cure overnight.
Screw the top down from inside the cabinets, through the cabinet top rails,
with screws short enough that they stop 1/4 inch below the top surface.
Never screw up through the top from below with a screw that can poke
through. For a stone top, do not set it yourself: stone needs a pro
fabricator to template, cut, and set it, and any overhang past 10 inches
needs corbels or steel brackets under it. Time: 1 hour for butcher block,
half a day booked with a fabricator for stone.
Step 6: Trim, Caulk, and Finish
Fill the screw holes on the panels, sand the filler flush, and paint or
stain the panels to match the cabinets. Caulk the joint where the top meets
the wall or the panels with paintable caulk. Oil a butcher block top with
food-safe mineral oil, two coats, letting each coat soak in for 4 hours.
Install the knobs and pulls last, after the paint is dry, so you do not
smudge a fresh finish reaching past them. Read the kitchen cabinet
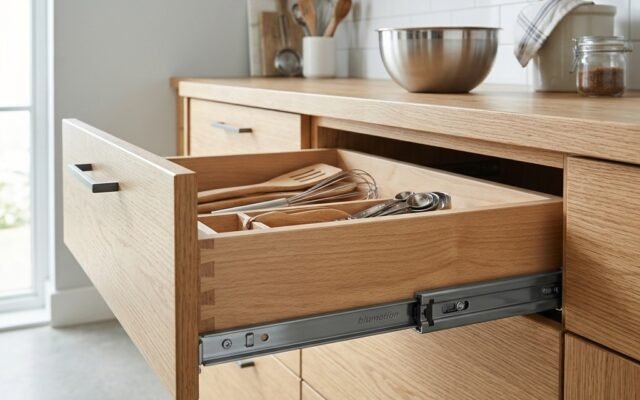
drawers guide if the island includes a drawer
base, and the kitchen cabinet end panels
guide for panel fitting detail. Time: 2 hours plus drying time.
A 6-Foot Island With Seating, Priced Line by Line
Here is the full 6-foot island from the table, priced line by line. Four
36-inch base cabinets set back to back: two drawer bases facing the kitchen
and two door bases facing the stools. The cabinets are unfinished stock at
$189 to $272 each, for $756 to $1,088. The butcher block top is 50 by 74
inches, which is 30.8 square feet, at $30 to $70 per square foot, for $924
to $2,156. Two end panels at $30 to $60 each add $60 to $120. Toe-kick,
trim, cleats, screws, glue, and shims add $75 to $115. Total: $1,815 to
$3,479, which matches the table above. The same 6-foot island built to order
starts at $400 per linear foot for the cabinets alone, which is $2,400
before the top, the panels, or the install, so a finished custom island of
this size runs about $3,500 to $5,500. The DIY island saves $1,000 to
$2,000 on a 6-foot build, and the saving grows with length. One way to cut
the top cost further: buy material-only butcher block slabs at about $300
to $450 per 25-by-96-inch slab and cut the top yourself instead of paying
installed prices.
Which Island Should You Build? 5 Questions Decide
Five questions pick the island. Answer them in order.
- Will anyone sit at it? No: build a single row, 24 inches deep, no
overhang past 1.5 inches. Yes: build two rows back to back, 48 inches deep,
with a 12-inch overhang on the seating side. - How much aisle do you have? Under 42 inches on the working side, keep
the island to a single row. Over 48 inches, a back-to-back island fits with
room for two cooks. - What top? Butcher block if you want to cut and set it yourself. Laminate
if the budget is tight: $15 to $40 per square foot installed. Quartz or
granite if you want stone: $50 to $120 per square foot installed, set by a
fabricator, with support brackets under any overhang past 10 inches. - What goes inside? Drawers facing the kitchen for pots and tools, doors
facing the stools for bulk storage. A drawer base costs more than a door
base of the same width, so put drawers where you reach every day and doors
where you reach once a week. - Sink, cooktop, or outlets? Any of the three moves the job past DIY.
A sink needs a plumber and a drain line under the floor. A cooktop needs a
gas or 240-volt line and a vent. Outlets in an island need an electrician
and a code-compliant circuit. Budget a pro for each one and build the
cabinet base first, then let the trades cut into it.
4 Island Failures and What Each Costs to Fix
Four failures cause most island problems. All four are avoidable if you
measure twice and anchor before you set the top.
- Island shifts on the floor. The island was never anchored, so it
creeps a few inches a year and the top overhangs unevenly. Cause: no floor
cleats, or screws into a floating floor that moves. Fix: lift the top,
screw cleats to the subfloor, and re-anchor. Cost: $15 to $30 in cleats
and screws plus 2 hours, or $200 to $400 if the top has to come off and
go back on. - Stone top cracks at the overhang. A 12-inch stone overhang with no
support cracks under its own weight or under a leaning cook. Cause: the
overhang passed 10 inches with no corbels or brackets. Fix: steel brackets
or corbels under the overhang, $25 to $60 each, plus a fabricator visit if
the stone already cracked. A cracked slab costs $500 to $2,000 to replace. - Cabinets out of level, doors bind. The doors rub and the top rocks
on the high corner. Cause: the floor slope was never shimmed, or the
shims slipped before the screws went in. Fix: loosen the anchor screws,
re-shim to level, and re-tighten. Cost: $0 in parts and 1 hour, if caught
before the top is set. After the top is set, add 1 hour to lift and reset
it. - Aisle too tight to work in. The island went in at 30 inches from the
nearest run, and the dishwasher door hits it. Cause: clearance was measured
from the cabinet face instead of the countertop edge, or never measured at
all. Fix: move the island before anchoring, $0. After anchoring and setting
the top, moving it costs $200 to $500 in labor and a new top if the old one
was cut to fit the spot.
Time and Cost Budget: DIY vs Pro in 10 to 14 Hours
A first-timer builds the 6-foot island in 10 to 14 hours over 2 days: 1
hour to mark and check the floor, 3 hours to set and join the cabinets, 1
hour for the second row, 2 hours for panels and toe-kick, 1 hour to set a
butcher block top, and 2 hours to trim and finish, plus glue curing and oil
drying time overnight. A pro crew builds the same cabinet base in 4 to 6
hours, and the stone top arrives templated and set in a separate visit.
Pro install for stock cabinets runs $75 to $150 per linear foot, so 6 feet
of island base costs $450 to $900 in labor. Doing it yourself saves that
amount and costs a weekend. Hire the pro if the floor is badly out of level,
the island needs plumbing or electrical, or the top is stone. Do the
cabinet base yourself if the floor is flat, the top is butcher block, and
you own a drill and a level.
Pre-Build Checklist: 12 Boxes to Tick
Fill in every blank before you order. A blank you skip is a cabinet that
arrives the wrong size.
- Island length (sum of cabinet widths): ______ in
- Island depth (24 in single row / 48 in back-to-back): ______ in
- Seating overhang: ______ in
- Aisle on the working side (36 in min, 42 in for one cook): ______ in
- Aisle on the far side: ______ in
- Cabinet widths, left to right: ______ in
- Cabinet type per slot (drawer / door / sink): ______
- Countertop material: ______
- Countertop size (length x depth): ______ in x ______ in
- Countertop thickness: ______ in
- Floor type under the island (wood / tile / concrete): ______
- Pipes or wiring under the footprint (checked): yes / no
Check the aisle numbers twice. The tape on the floor is the cheapest
mistake you will ever make.
DIY Kitchen Island Questions: 7 Answers
Can you build a kitchen island out of base cabinets?
Yes. Most islands, custom ones included, are base cabinets joined together,
fixed to the floor, finished on the back and ends with panels, and topped
with a countertop. Standard base cabinets are 24 inches deep and 34.5
inches tall, so one row makes an island 24 inches deep and about 36 inches
high with the top on.
How much does a DIY kitchen island cost?
A 4-foot island costs $755 to $1,235 in materials. A 6-foot island with
seating costs $1,815 to $3,479. A custom island of the same size starts at
$400 per linear foot for the cabinets alone, before the countertop. The
countertop is the biggest cost in every build: butcher block runs $30 to
$70 per square foot installed.
How deep should the seating overhang be?
12 inches. That gives knees room under a 36-inch high top. A stone top
with an overhang past 10 inches needs corbels or steel brackets under it,
because stone cracks under its own weight past that point.
How do you anchor an island to the floor?
Screw 2×4 cleats to the subfloor inside the footprint, level them, set the
cabinets on the cleats, and screw through the cabinet bases into the cleats.
On tile or concrete, use a masonry bit and concrete screws. Check for pipes
and wiring before you drill.
Can I put a sink in a DIY kitchen island?
You can build the cabinet base yourself, but the sink needs a plumber. A
drain line has to run under the floor to the island, and a vent has to run
up through it. Build the base first, then let the plumber cut into it.
What is the best countertop for a DIY island?
Butcher block, because you cut it with a circular saw and set it yourself.
Laminate is cheaper at $15 to $40 per square foot installed but harder to
cut cleanly. Quartz and granite look better and need no sealing, but they
need a pro fabricator at $50 to $120 per square foot installed.
Do I need a permit to build a kitchen island?
A freestanding island with no plumbing, gas, or electrical usually needs no
permit. Add a sink, a cooktop, or outlets and the permit rules apply, so
check with your local building department before you cut into the floor.